
Let your users connect Gemini CLI to your app
Get your app's MCP server ready for Gemini CLI, which finds your sign-in from the 401 challenge, and give your users the command to add it.
This page is part of Agent-ready apps: it covers what you do so that your own users can connect Gemini CLI to the app you built with BuildBase. Your app serves MCP with @buildbase/sdk, and each user signs in on your hosted sign-in page and approves Gemini CLI as themselves.
Note
Want to manage BuildBase itself from your AI? See Use BuildBase in Gemini CLI, in BuildBase in your AI tools.
The examples use https://app.example.com/api/mcp, the default path createAgentStack serves, and the name acme.
Before you share the URL
-
Answer the 401 challenge correctly. Gemini CLI starts its sign-in from your server's 401 and its
WWW-Authenticateheader, whichcreateAgentStackserves for you. Gemini CLI runs on your user's machine, so a server it can reach over the network is enough, but a public HTTPS URL is what most clients need. -
Let agents register themselves with a base client in Set up agent access. Gemini CLI has no client you create in advance.
-
Check it the way a client does:
npx buildbase agent doctor --url https://app.example.com/api/mcp
What your users do
Put these steps on your own help page, with your URL:
gemini mcp add --transport http acme https://app.example.com/api/mcpOr in settings.json, with httpUrl:
{
  "mcpServers": {
    "acme": { "httpUrl": "https://app.example.com/api/mcp" }
  }
}
Gemini CLI then opens your sign-in page in the browser. /mcp auth acme signs in again.
Google's docs say Gemini CLI was replaced by Antigravity CLI for unpaid and Google One users on 18 June 2026, so some of your users may no longer have it.
What your users see
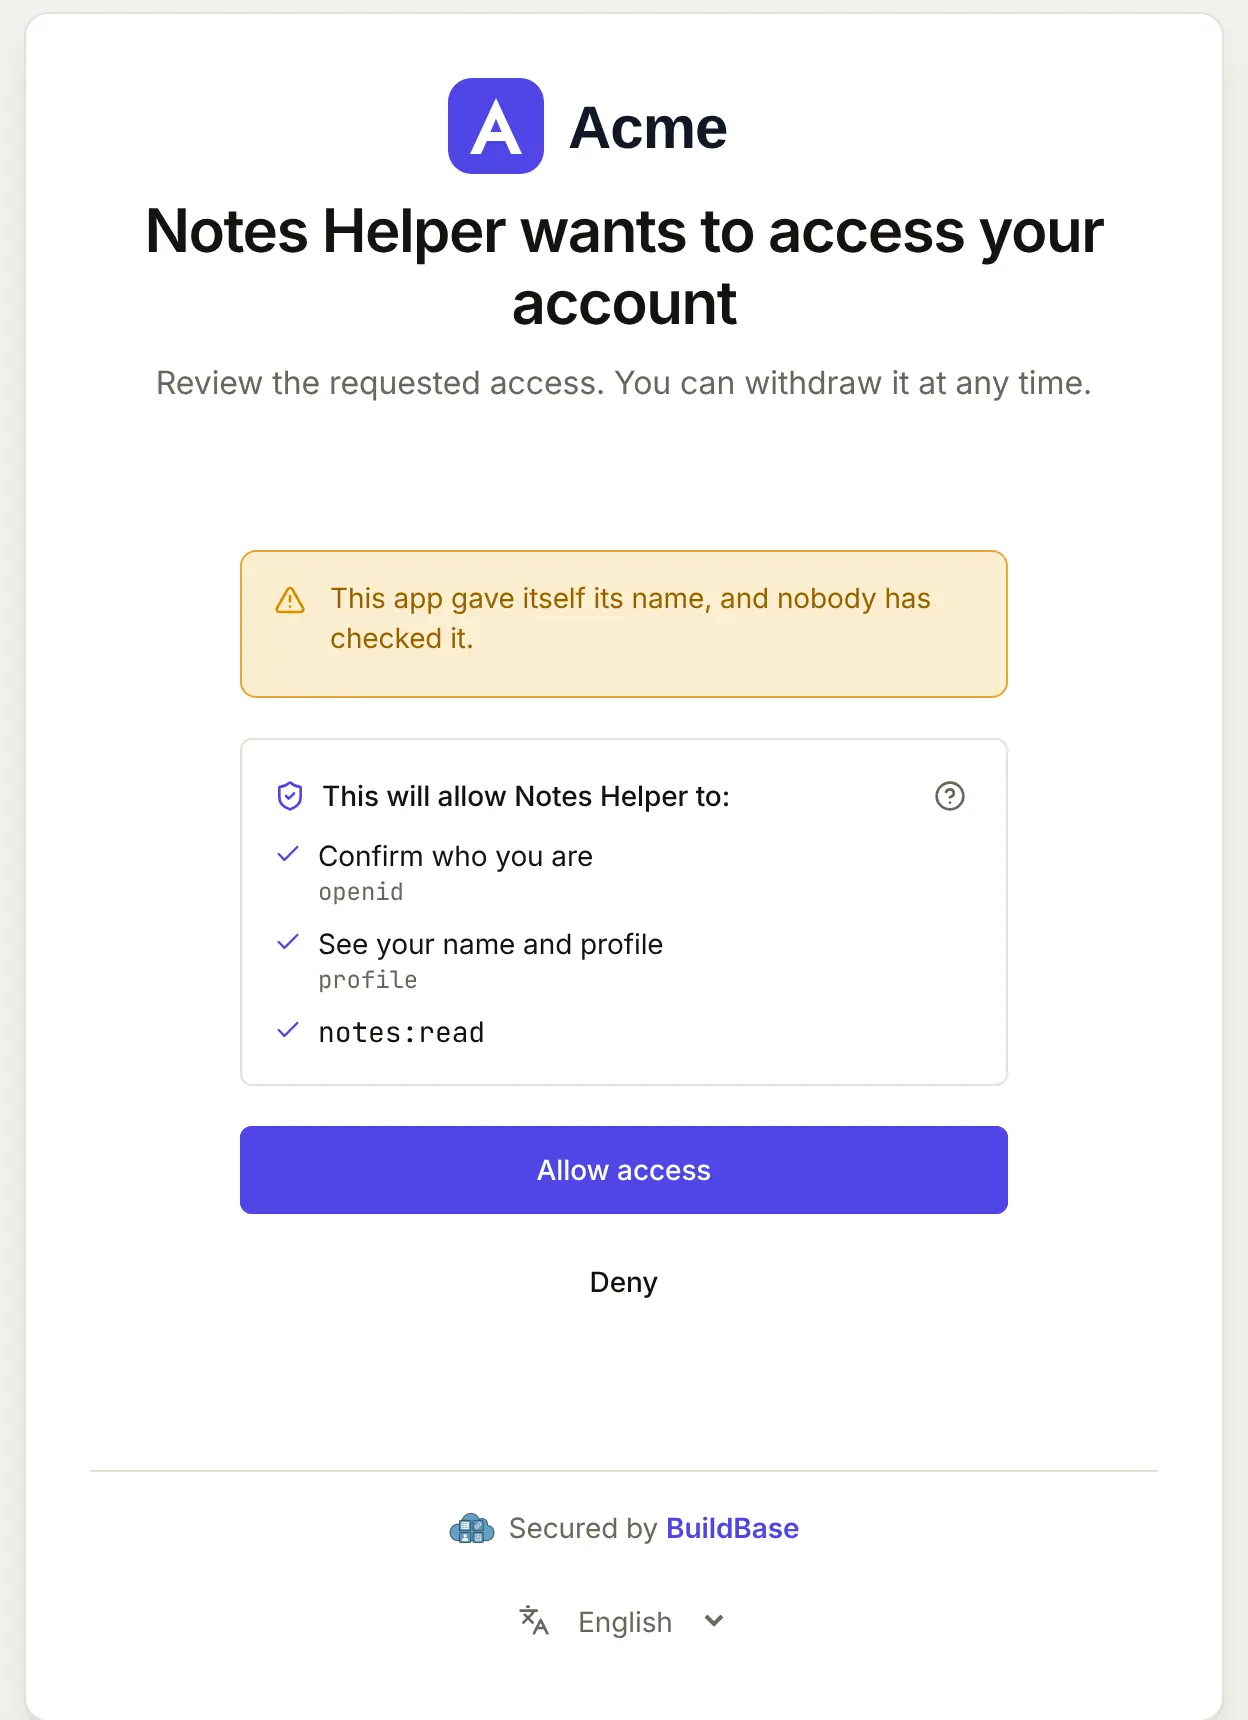
- Your sign-in page in their local browser, and your consent screen, naming the client as it registered itself.
- Tool confirmations in the terminal, unless they set
"trust": trueon the server entry, which skips them. Mark read toolsreadOnlyHint: trueso your users can trust them knowingly. - A filtered tool list if they use
includeToolsorexcludeTools; keep tool names stable so those lists keep working.
When Gemini CLI connects, your user approves it on your consent screen. Here it is for an agent that registered itself:
If something goes wrong
| What your user sees | Why | What to do |
|---|---|---|
| The server never connects | It was added with url (SSE) | Tell users to use httpUrl or --transport http |
| No sign-in starts | The 401 has no usable WWW-Authenticate header | Run agent doctor and fix what it reports |
| The sign-in page opens but registration fails | Let agents register themselves is off, or no base client | Turn it on with a base client in agent access |
| No browser opens | The user is on a headless machine | They sign in on a machine with a browser |
| A call fails with no clear message | Gemini CLI's output is short | Ask the user for the output of gemini --debug and /mcp list |
Related
- Connect an agent to your app: every client on one page, the MCP Registry, and agents in code.
- Let your users connect Claude Code to your app and Let your users connect Codex to your app.
- Use BuildBase in Gemini CLI: the same client in BuildBase in your AI tools.
- Google's own guide: MCP servers with Gemini CLI.
Frequently asked questions
- How does Gemini CLI find my sign-in page?
- From your server's 401 challenge. It reads the protected-resource metadata the challenge names, then your authorization server's metadata, and runs the sign-in in a local browser.
- Can my users connect from a headless machine?
- Not with Gemini CLI's OAuth sign-in, which needs a local browser. Without one, a user needs a token your server accepts, sent as a header.
- Why does my server not connect when added with url?
- In Gemini CLI, url means the older SSE transport. Your app serves Streamable HTTP, which is httpUrl in settings.json or --transport http on the command line.