
Your team and its roles
Invite your team to the BuildBase console, decide what each person and API key can reach, hand the organization over, and see who changed what.
Bring your teammates into the BuildBase console and decide what each of them can see and change. This page is about your own team at https://console.buildbase.app: the people who build and run your app. The people who sign in to your app are its users, and their roles live in their own workspaces: see permissions and roles for those.
Each person on your team has a tier and a role:
| What | Decides | Where |
|---|---|---|
| Their tier | Owner, admin or member: who may invite and remove people and read the audit log | Settings, then Users |
| Their role | What they can see and change in each part of the console | User management > Users, the person's page, Change role |
Invite your team
Open Users in the console (opens the console in a new tab)-
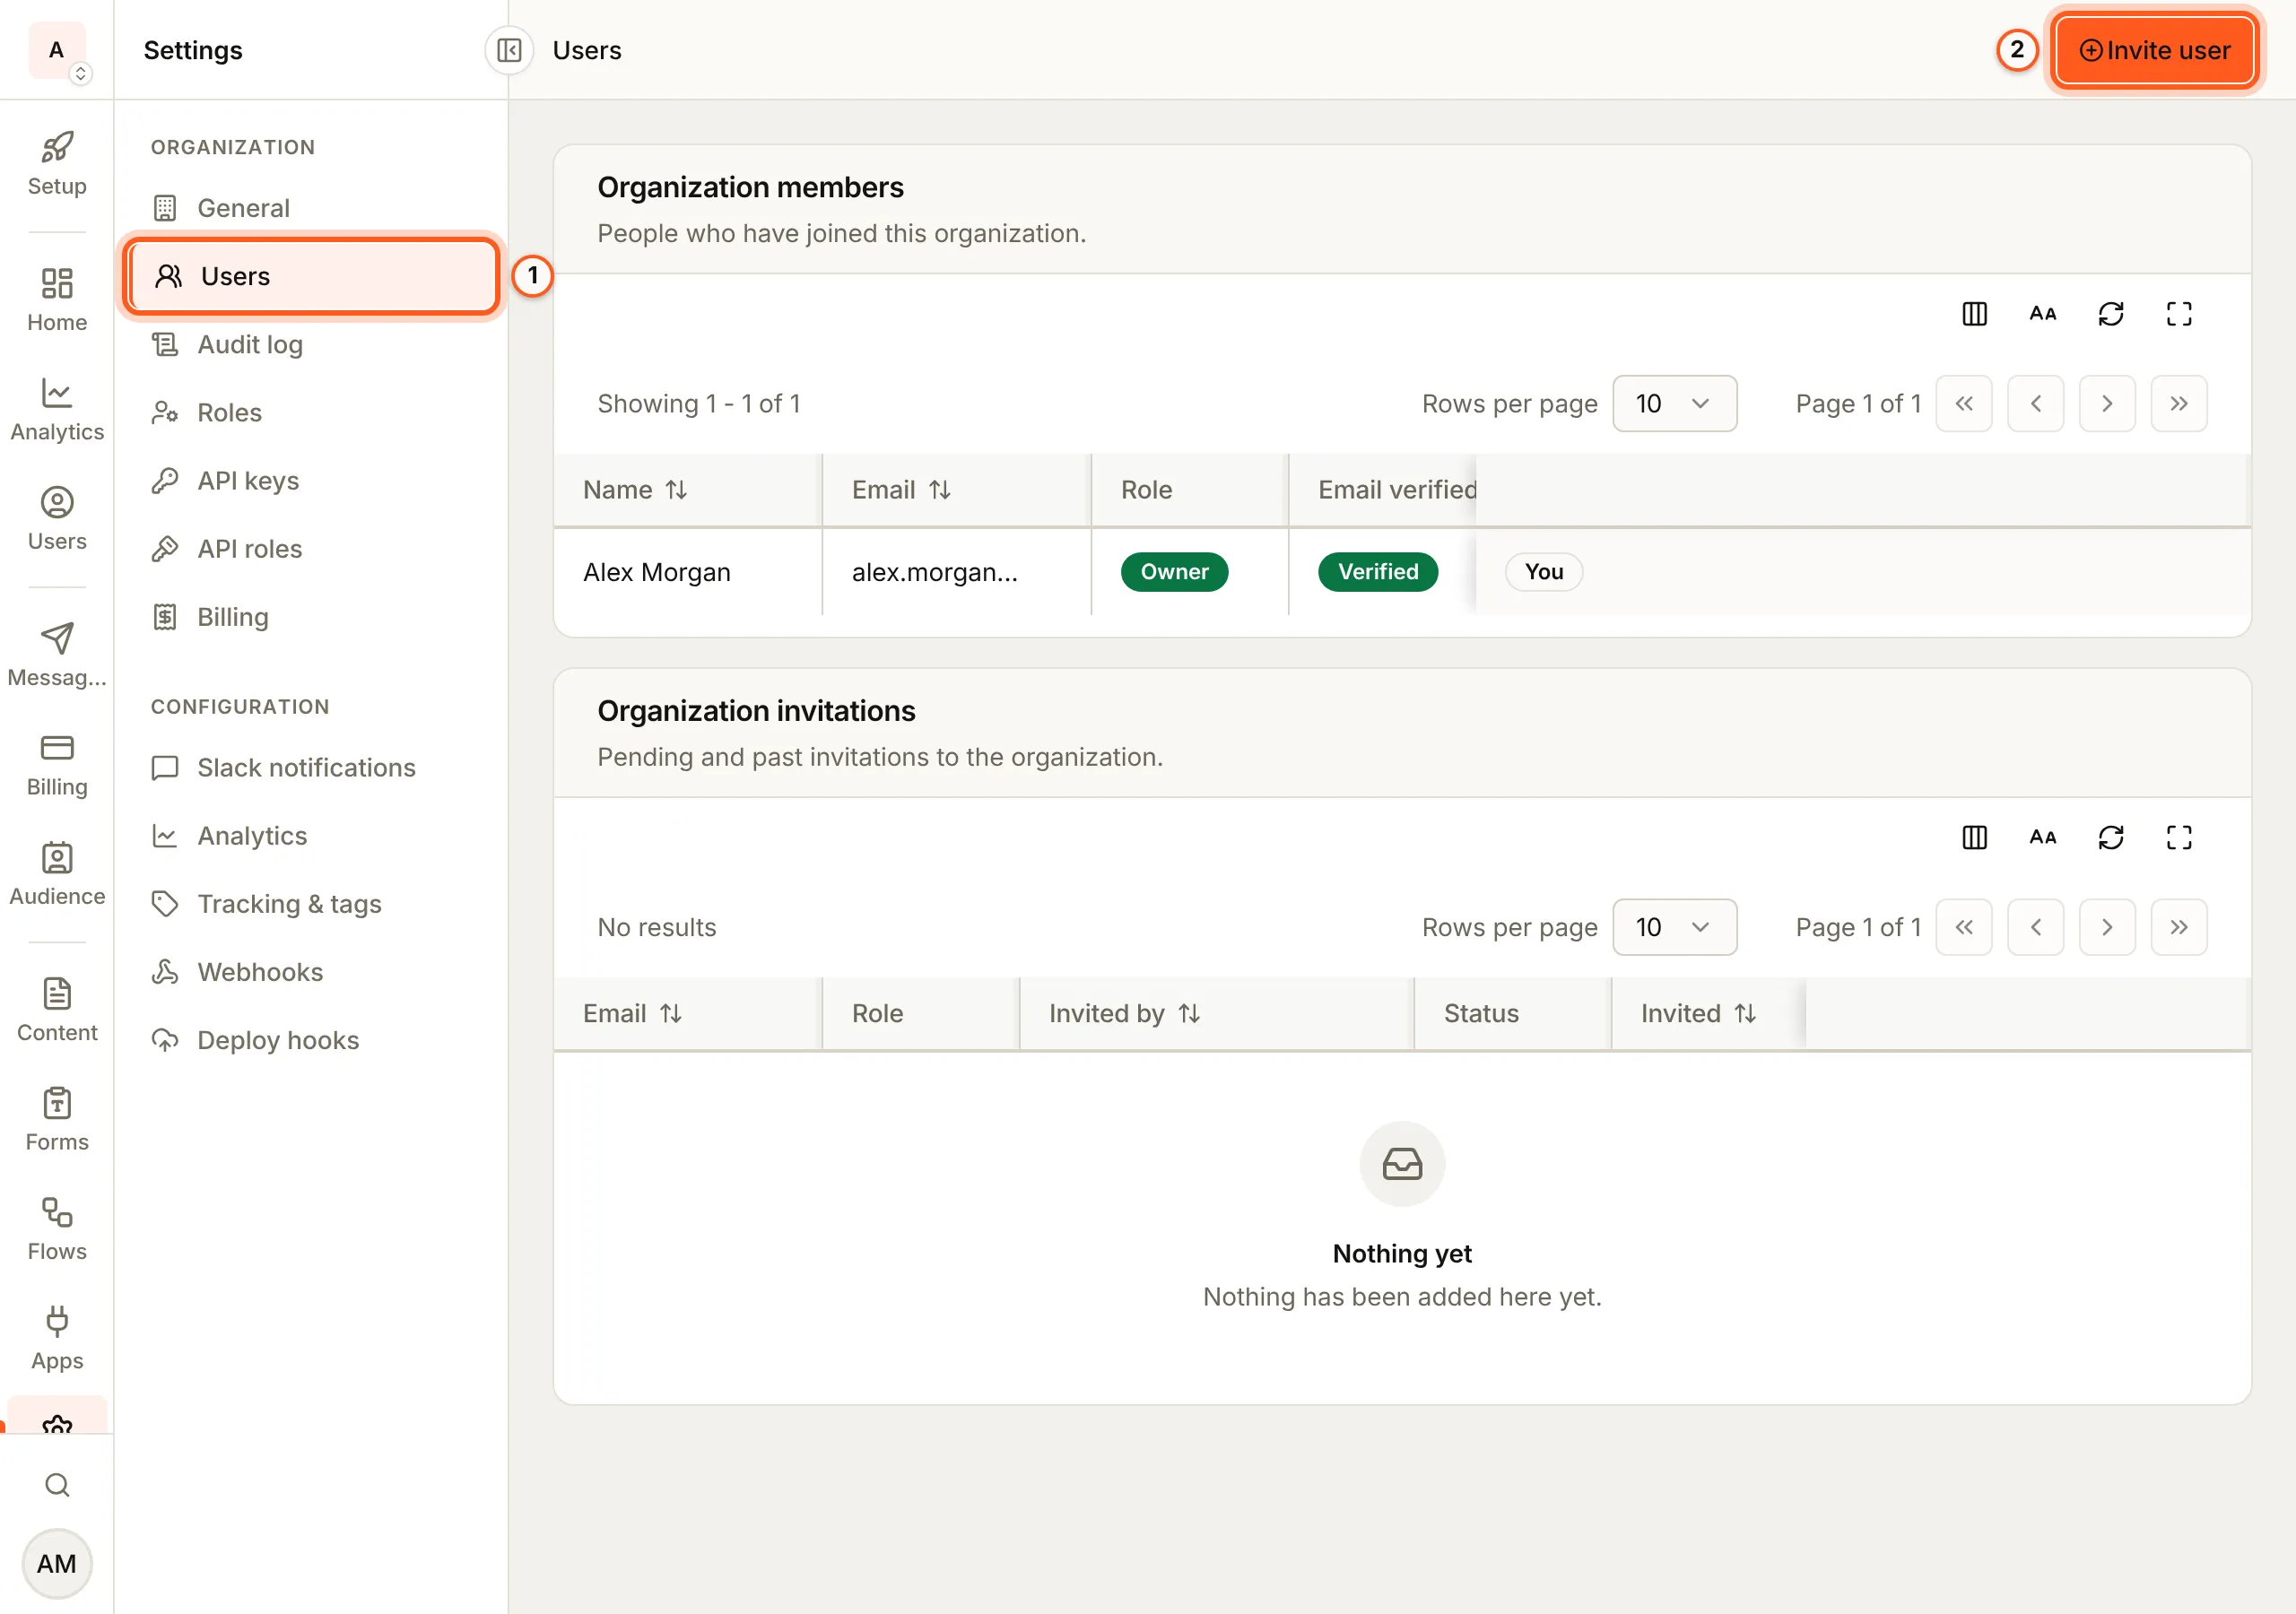
In the left rail choose Settings, then Users under Organization, and press Invite user.
-
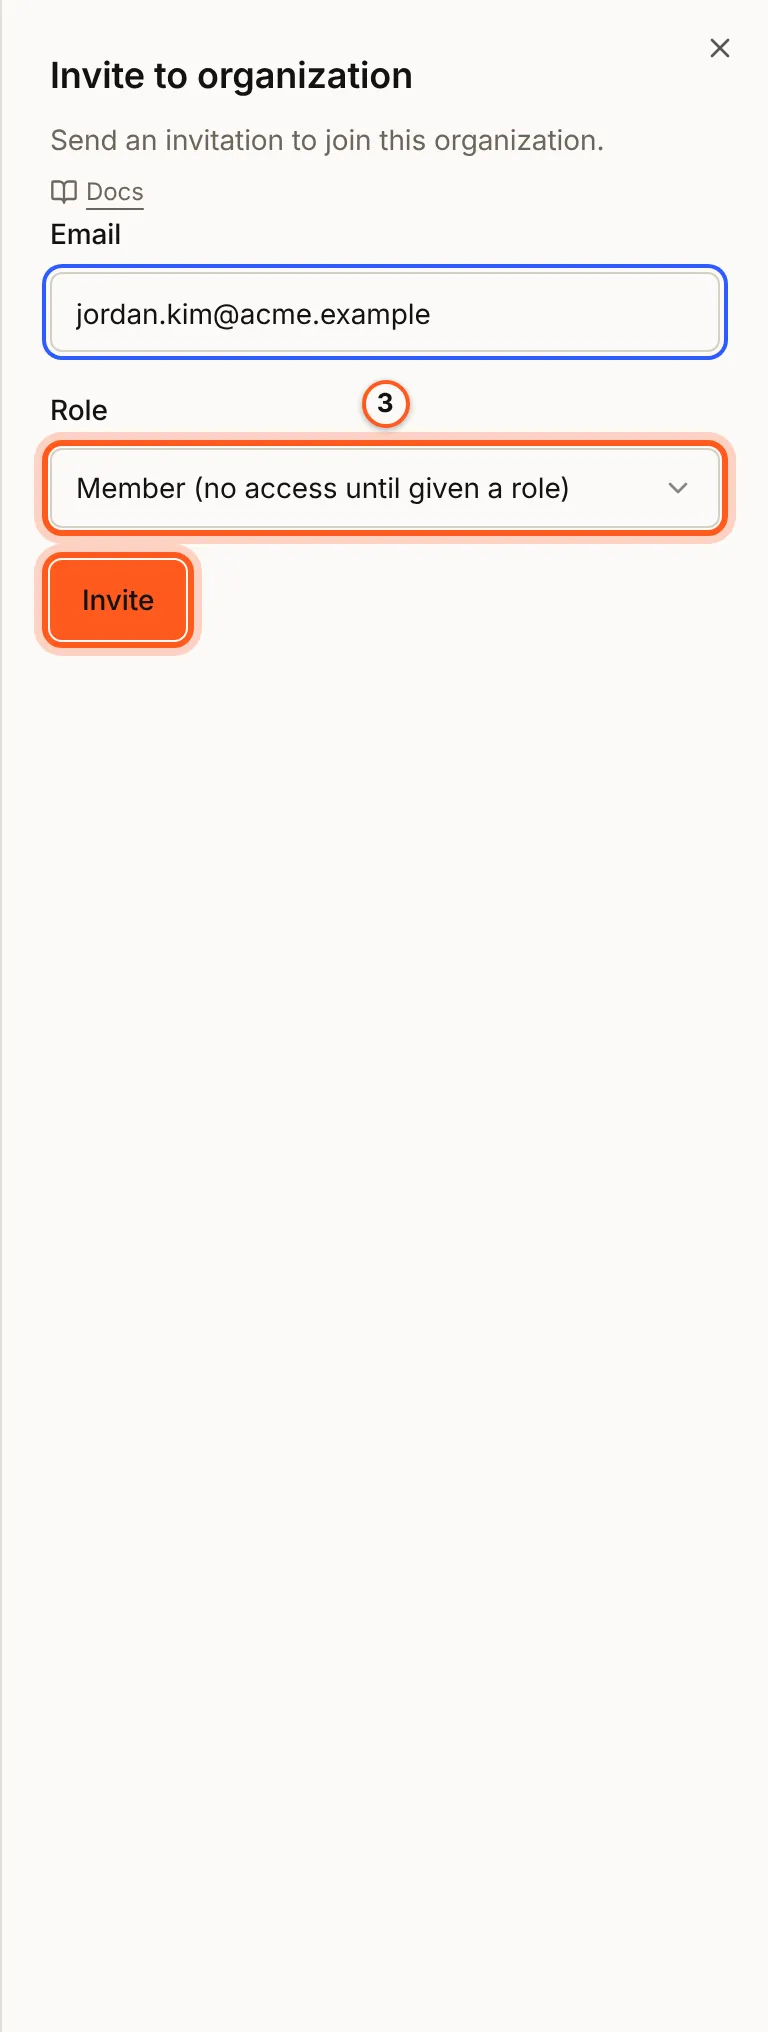
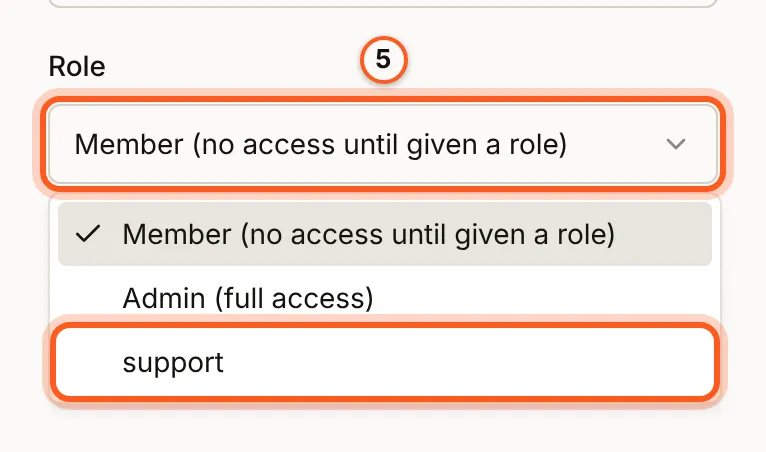
In Invite to organization, enter their Email and pick a Role: Admin, Member (no access until you give them a role), or a role you made under Roles (make a role). Press Invite.
-
They get an email. Once they sign in to the console, they accept it from My invitations in their avatar menu (your account).
The invitation waits under Organization invitations, with Resend and Revoke.
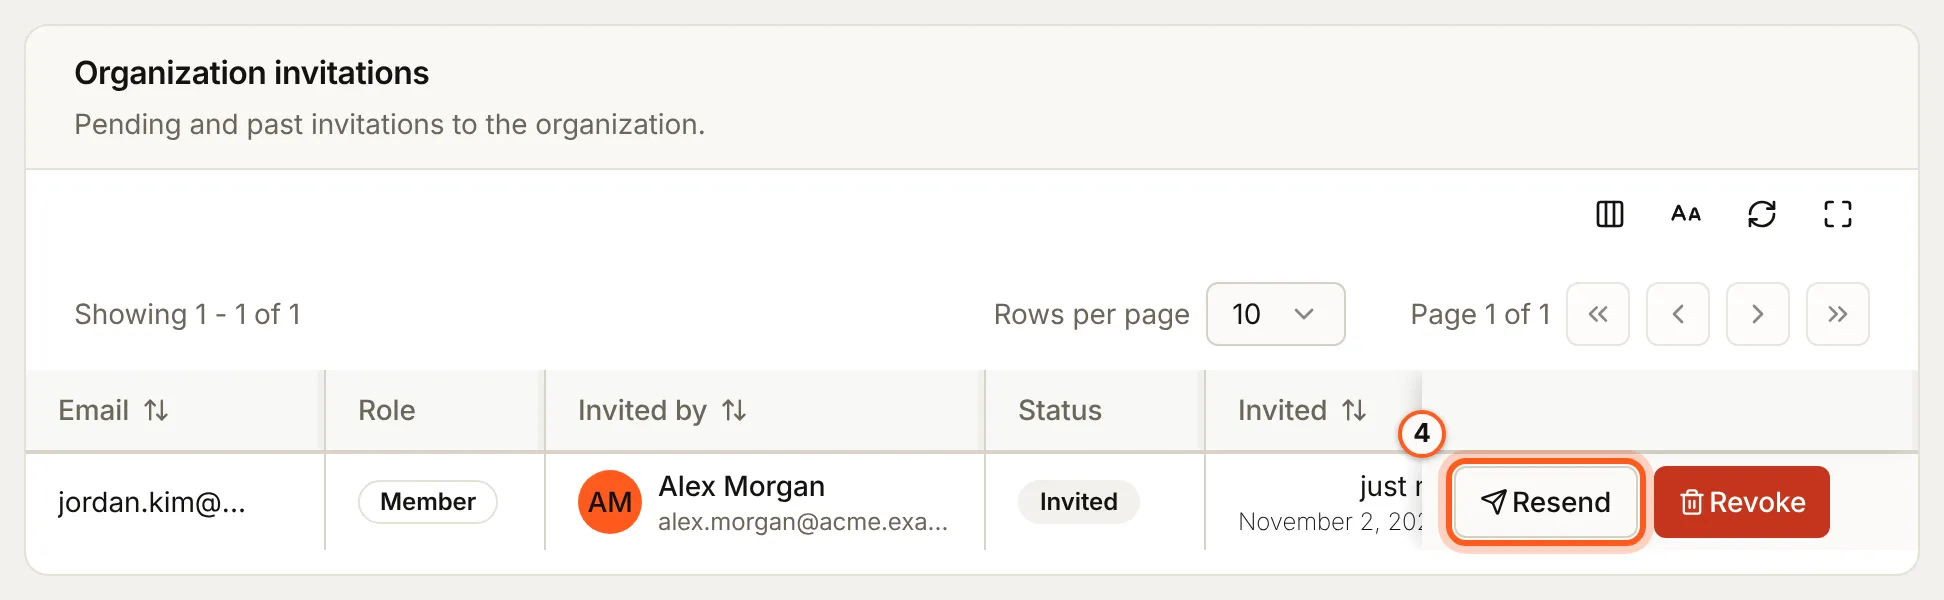
An invitation lasts 14 days. Resend sends it again and restarts the 14 days, at most once every five minutes. Revoke cancels it.
Your plan sets how many people your organization can have, and the counter beside Invite user shows where you are. It counts members, not invitations. So you can have more invitations open than you have room for, but one accepted after the limit is reached is refused.
Owner, admin and member
The tier decides who looks after the team itself.
| Tier | Can |
|---|---|
| Owner | Everything. No permission check applies to the owner, so they can never be locked out. They hold the organization's billing. There is one per organization |
| Admin | Invite and remove people, and read the organization's audit log |
| Member | Neither. What they can reach depends on their role |
Make admin and Make member on a person's row move them between admin and member. Neither changes their role. The owner's tier changes only when you hand the organization over.
Roles
A role decides what a person can see and change in the console. Three are built in:
| Role | Gives |
|---|---|
| Owner | Every permission, without a check |
| Admin | Every permission, including those of modules added later |
| User | Nothing. It's the default for a new member, so they see a no-access page everywhere until you give them a role you made yourself |
Make a role
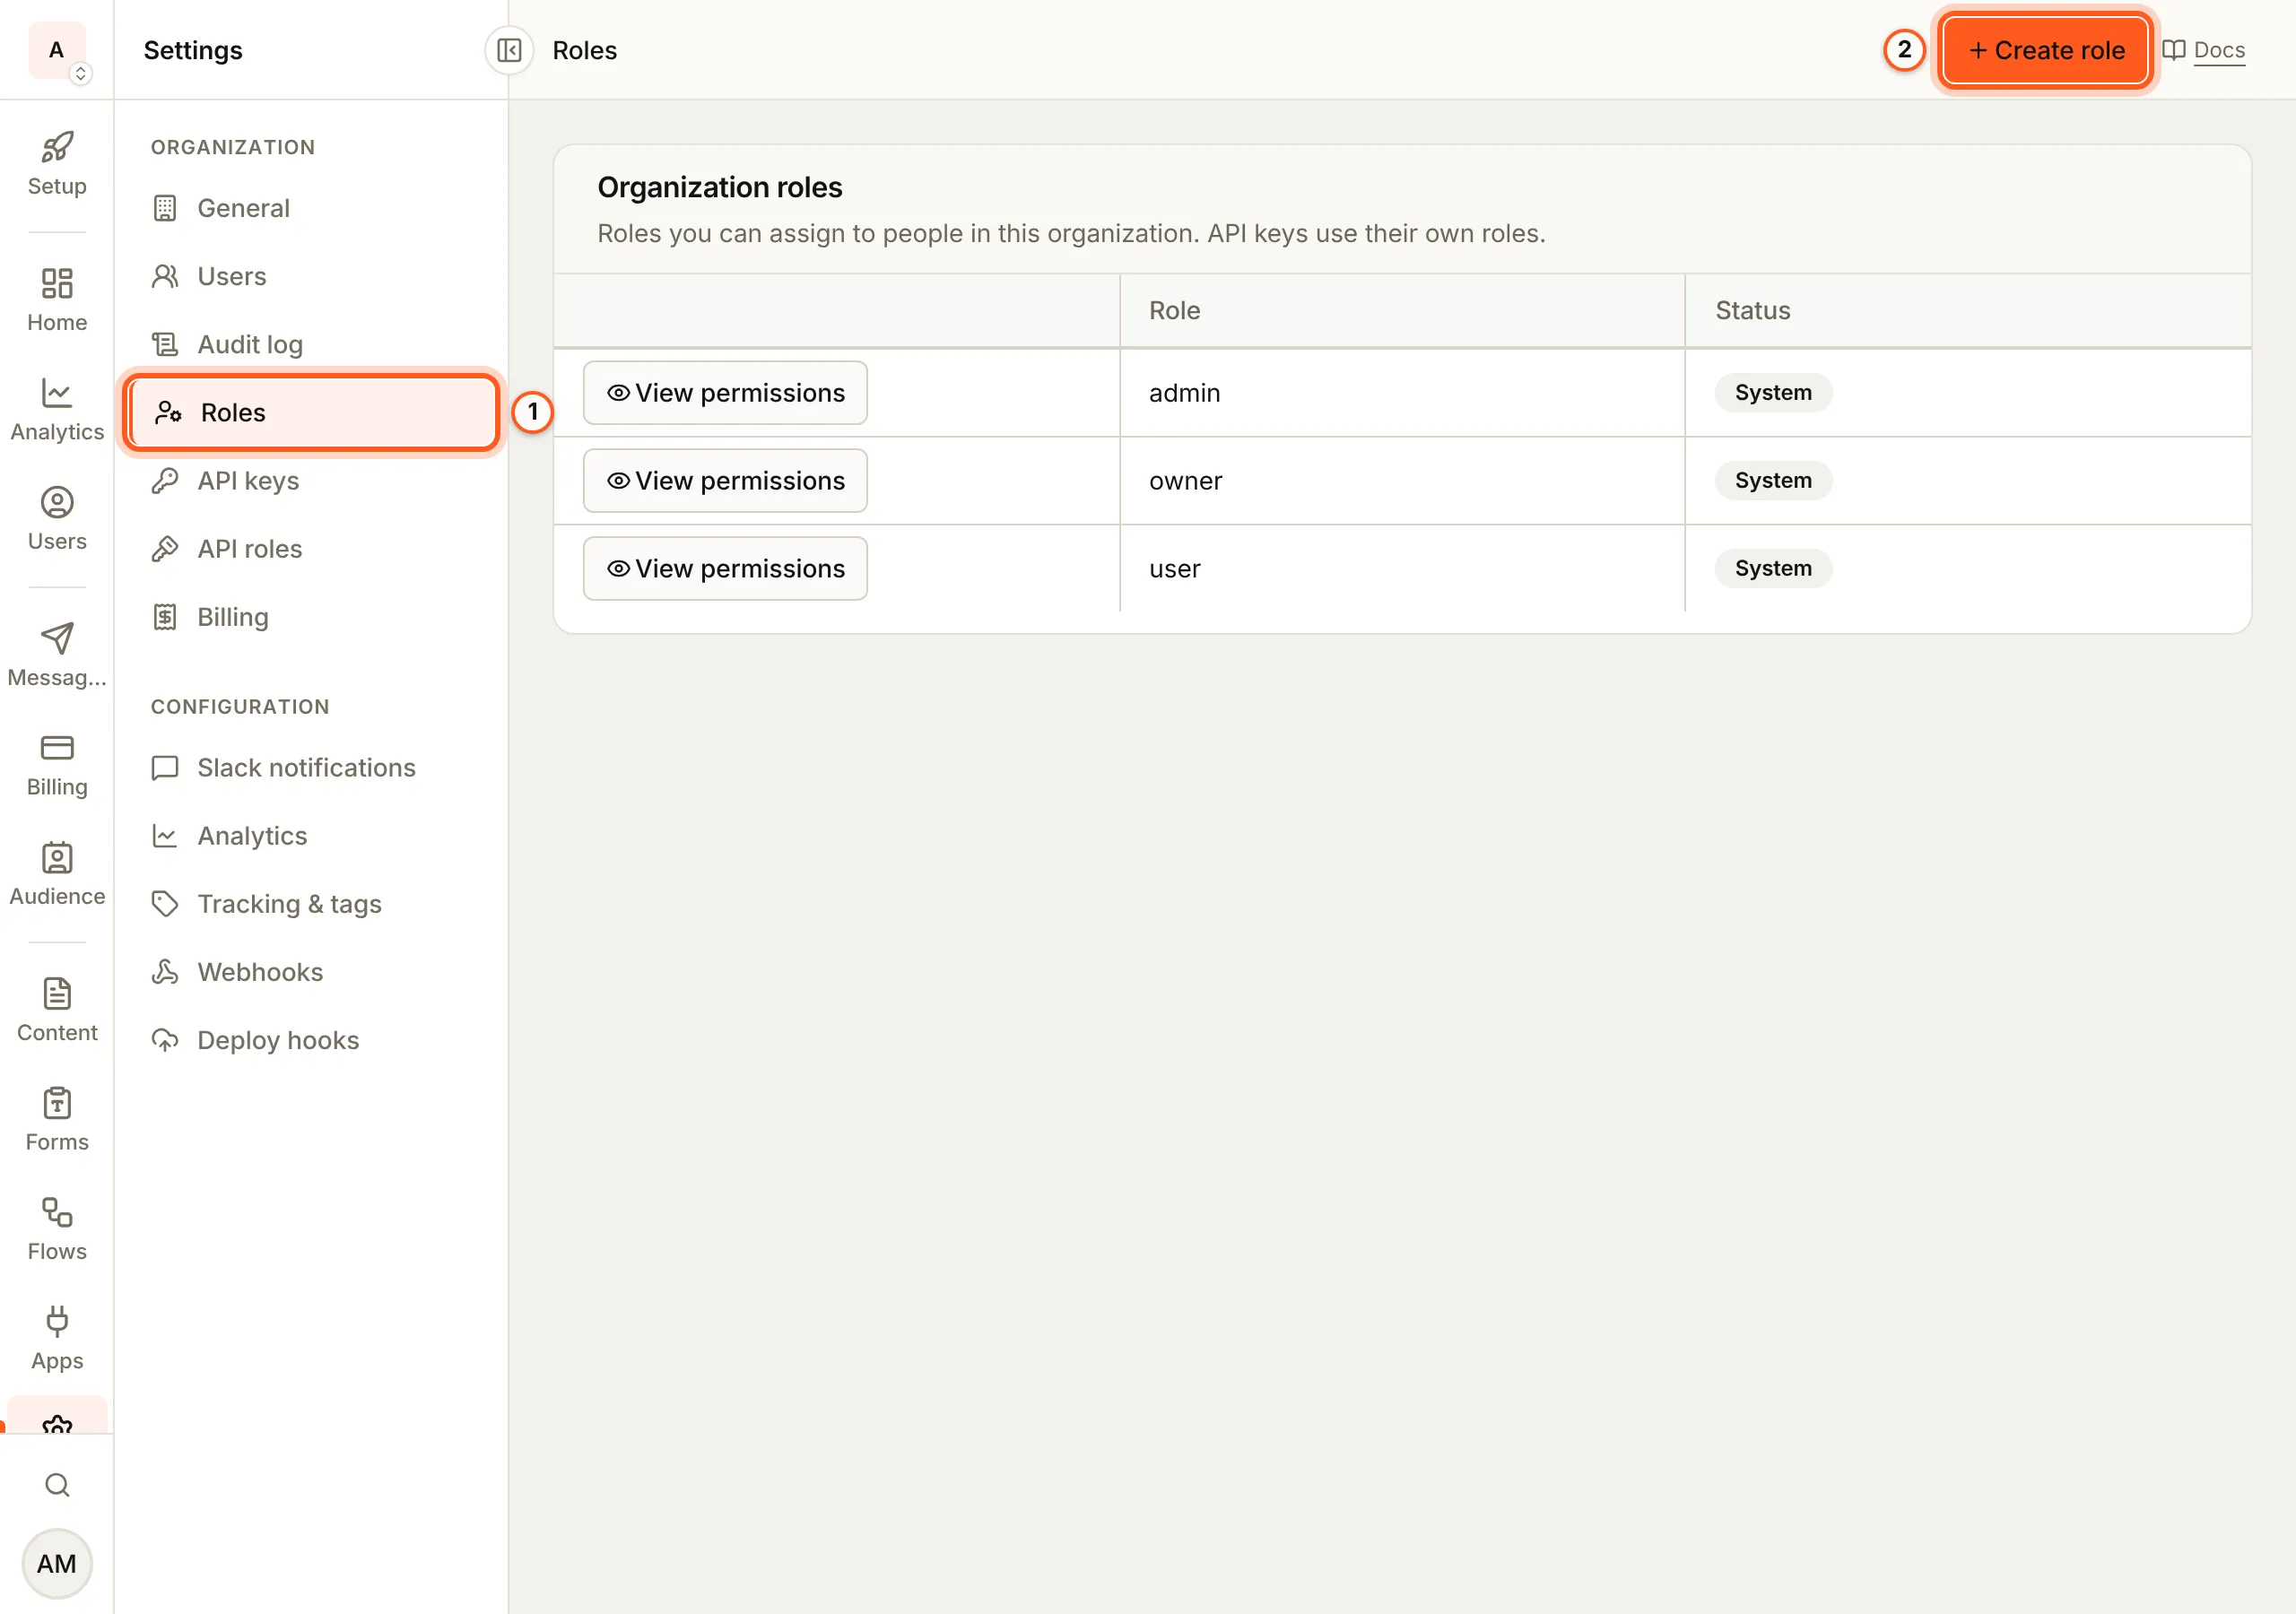
Open Roles in the console (opens the console in a new tab)- In the left rail choose Settings, then Roles under Organization. Organization roles lists the built-in roles, marked System, and yours.
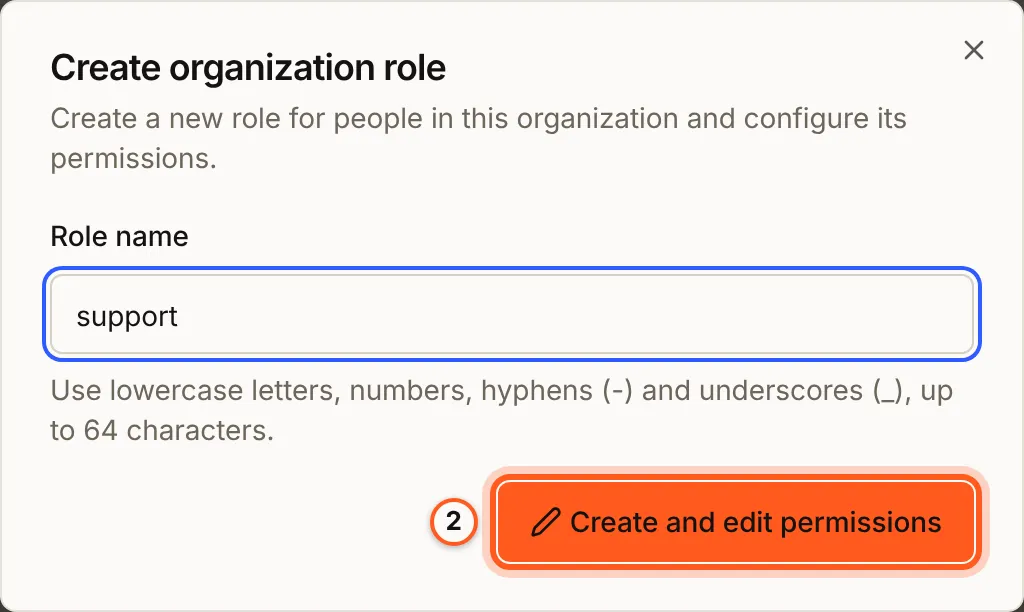
- Press Create role, give it a Role name (lowercase letters, numbers, hyphens and underscores, such as
support), and press Create and edit permissions. Your plan sets how many roles you can make.
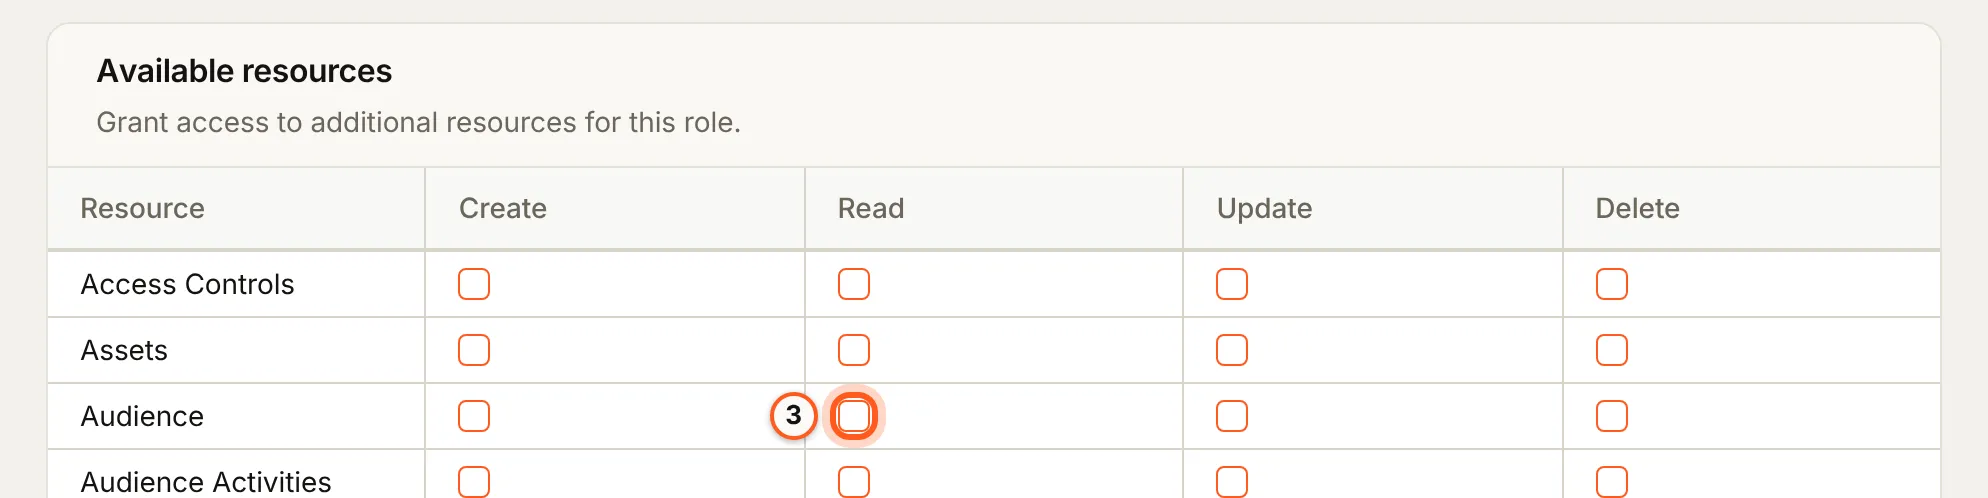
- Under Available resources, tick what the role may do: each part of the console (users, audience, auth settings, emails, workflows, API keys and the rest) against Create, Read, Update and Delete. A support role, for example, might read users and your audience, and change nothing.
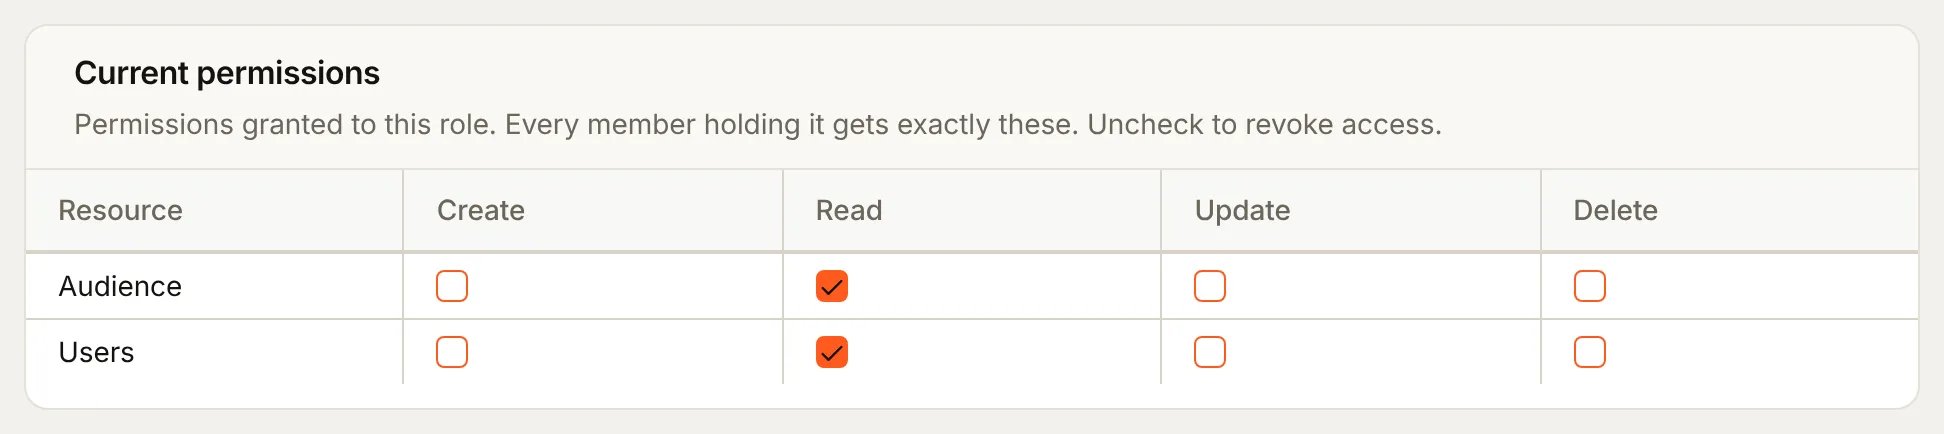
- Press Save permissions. What you ticked moves up to Current permissions, which is what everyone holding the role gets; untick a box there to take it away.

- Give the role to someone: choose it under Role when you invite them, or on their page under Users with Change role.
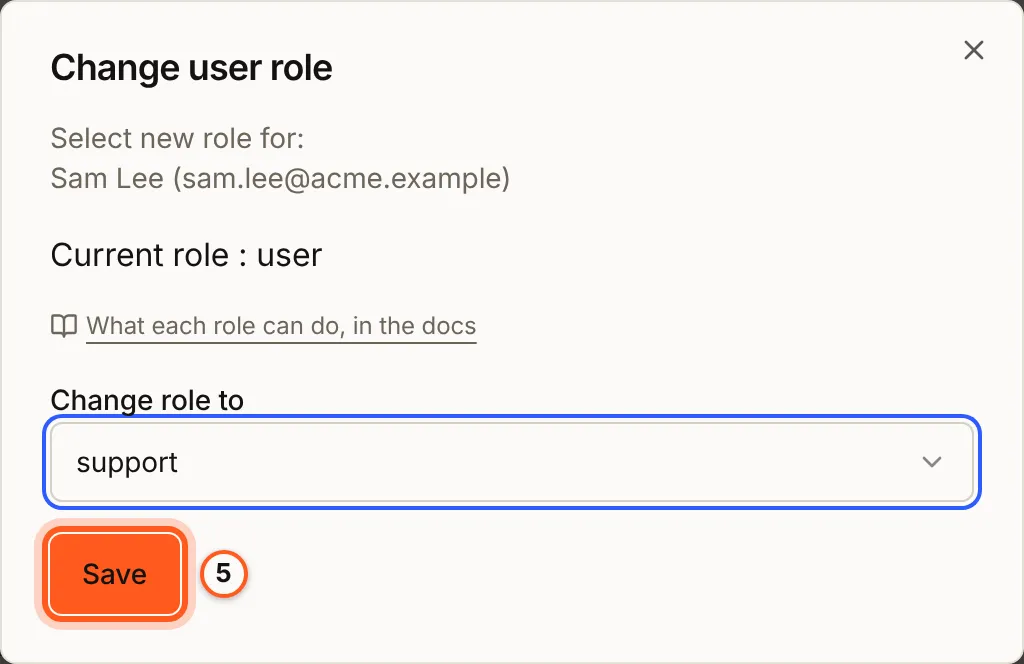
Nobody can hand out more than they hold:
- a role can only include permissions its maker has
- you can give someone only a role that fits within your own
- an owner's role is never changed from here
A role change also reaches a console session that's already open. The person's next request runs with the role they now hold, and the keys they made are checked against it at once.
API roles
An API key lets your own code, or another service, call BuildBase without a person signing in. Keys get roles of their own. These are kept apart from the roles people hold. A role written for an integration can't end up on a person's account, and key roles never show when you change someone's role.
Open API roles in the console
(opens the console in a new tab)- In the left rail choose Settings, then API roles under Organization, and press Create API role. It works as a role does above: a name, then Save permissions on what it may reach.
- Give a key its role when you make it, under API keys (API keys).
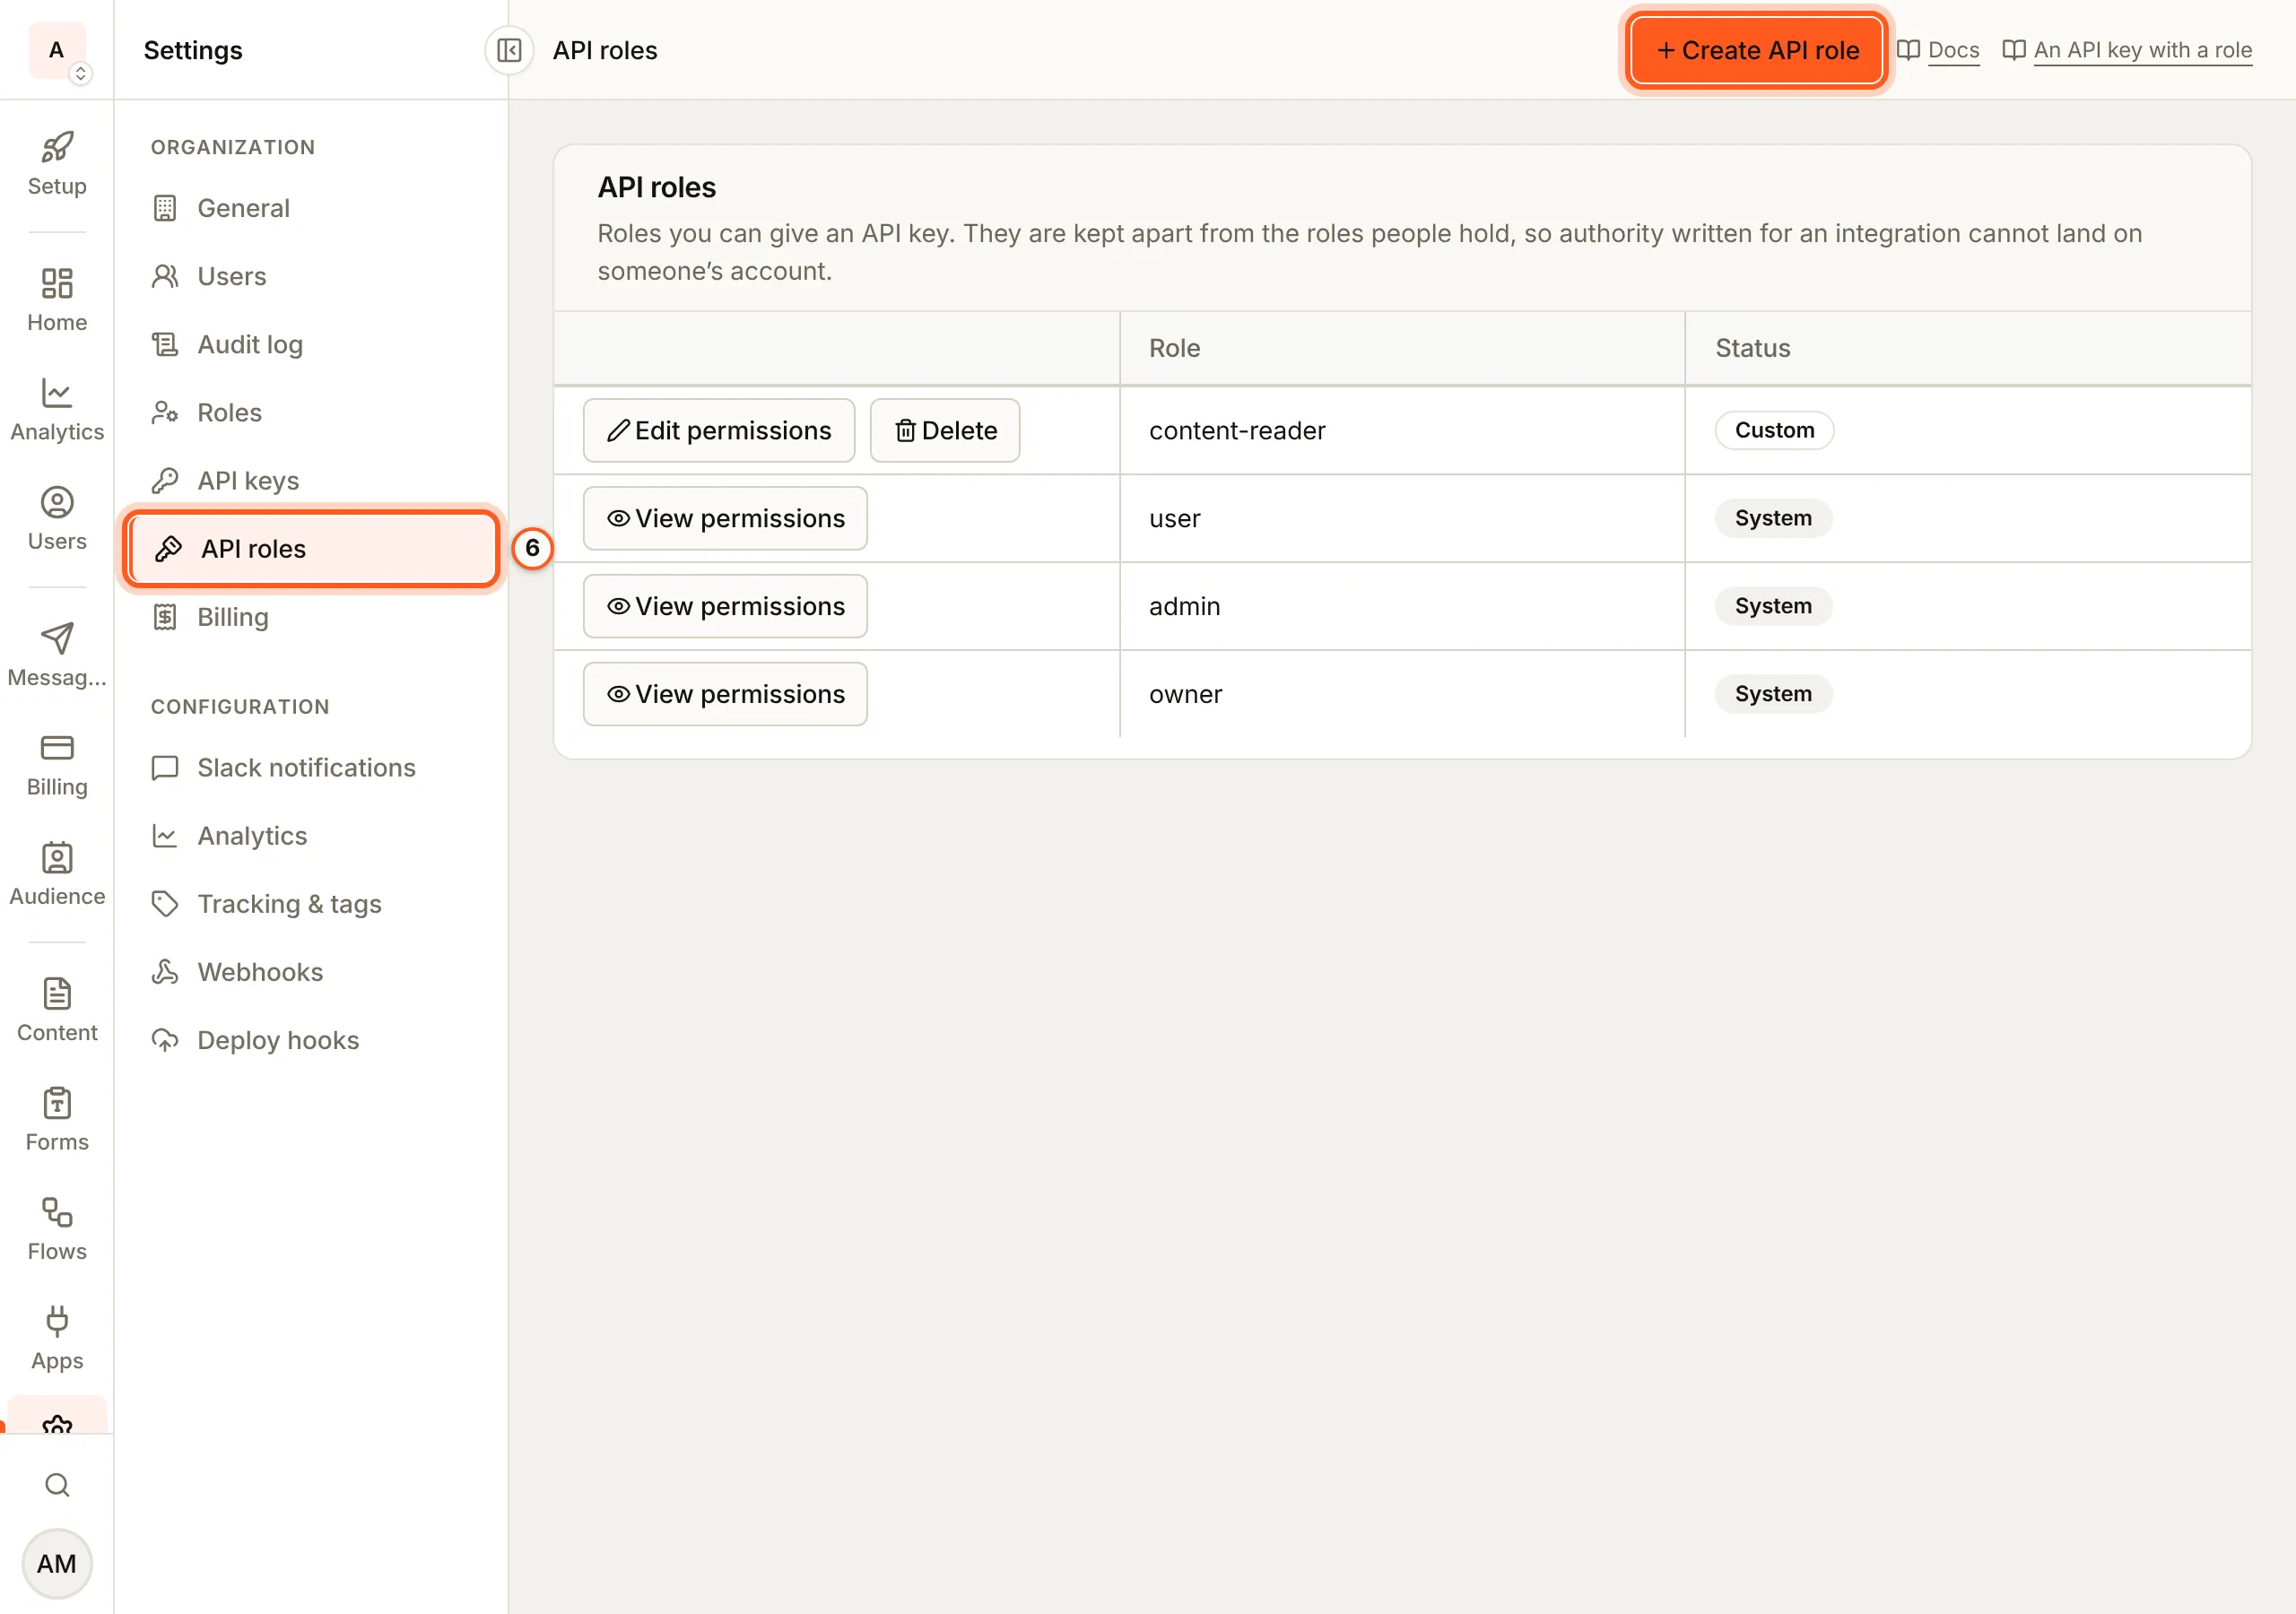
A key can never do more than the person who made it can do today. If that person is demoted and the key's role now goes beyond theirs, the key stops working. Remove someone from the organization and every key they made is revoked. See the admin API for what a key's role allows.
Remove someone, or leave
Remove on a person's row takes them out of the organization and all its workspaces. It works on their very next request, not when their console session would have run out. When you remove someone:
- their console sessions end
- their sessions in your organization end
- every API key they made is revoked
- they get an email saying so
Anyone but the owner can also leave an organization on their own. Two people can neither be removed nor leave, so an organization always has someone to run it:
- the owner (hand the organization over first)
- the last owner or admin
Hand the organization over
Only the owner can hand the organization to someone else, and only to someone already in it. It's an offer they accept, not an instant transfer:
- Under Settings, then Users, press Offer ownership on the person's row. The other admins are told.
- They see the offer on their My invitations page, and choose Take ownership or Decline offer. The email only tells them the offer is waiting. Opening a link in it changes nothing, so a mail scanner that follows links can't accept it.
- If they take it, they become the owner and take on the organization's billing, and you become an admin. You can't undo that on your own: they would have to offer it back to you.
An offer lasts seven days, and only one can be open at a time. Withdraw offer cancels it, and they're told. Nothing about the organization changes until the offer is accepted.
See who changed what
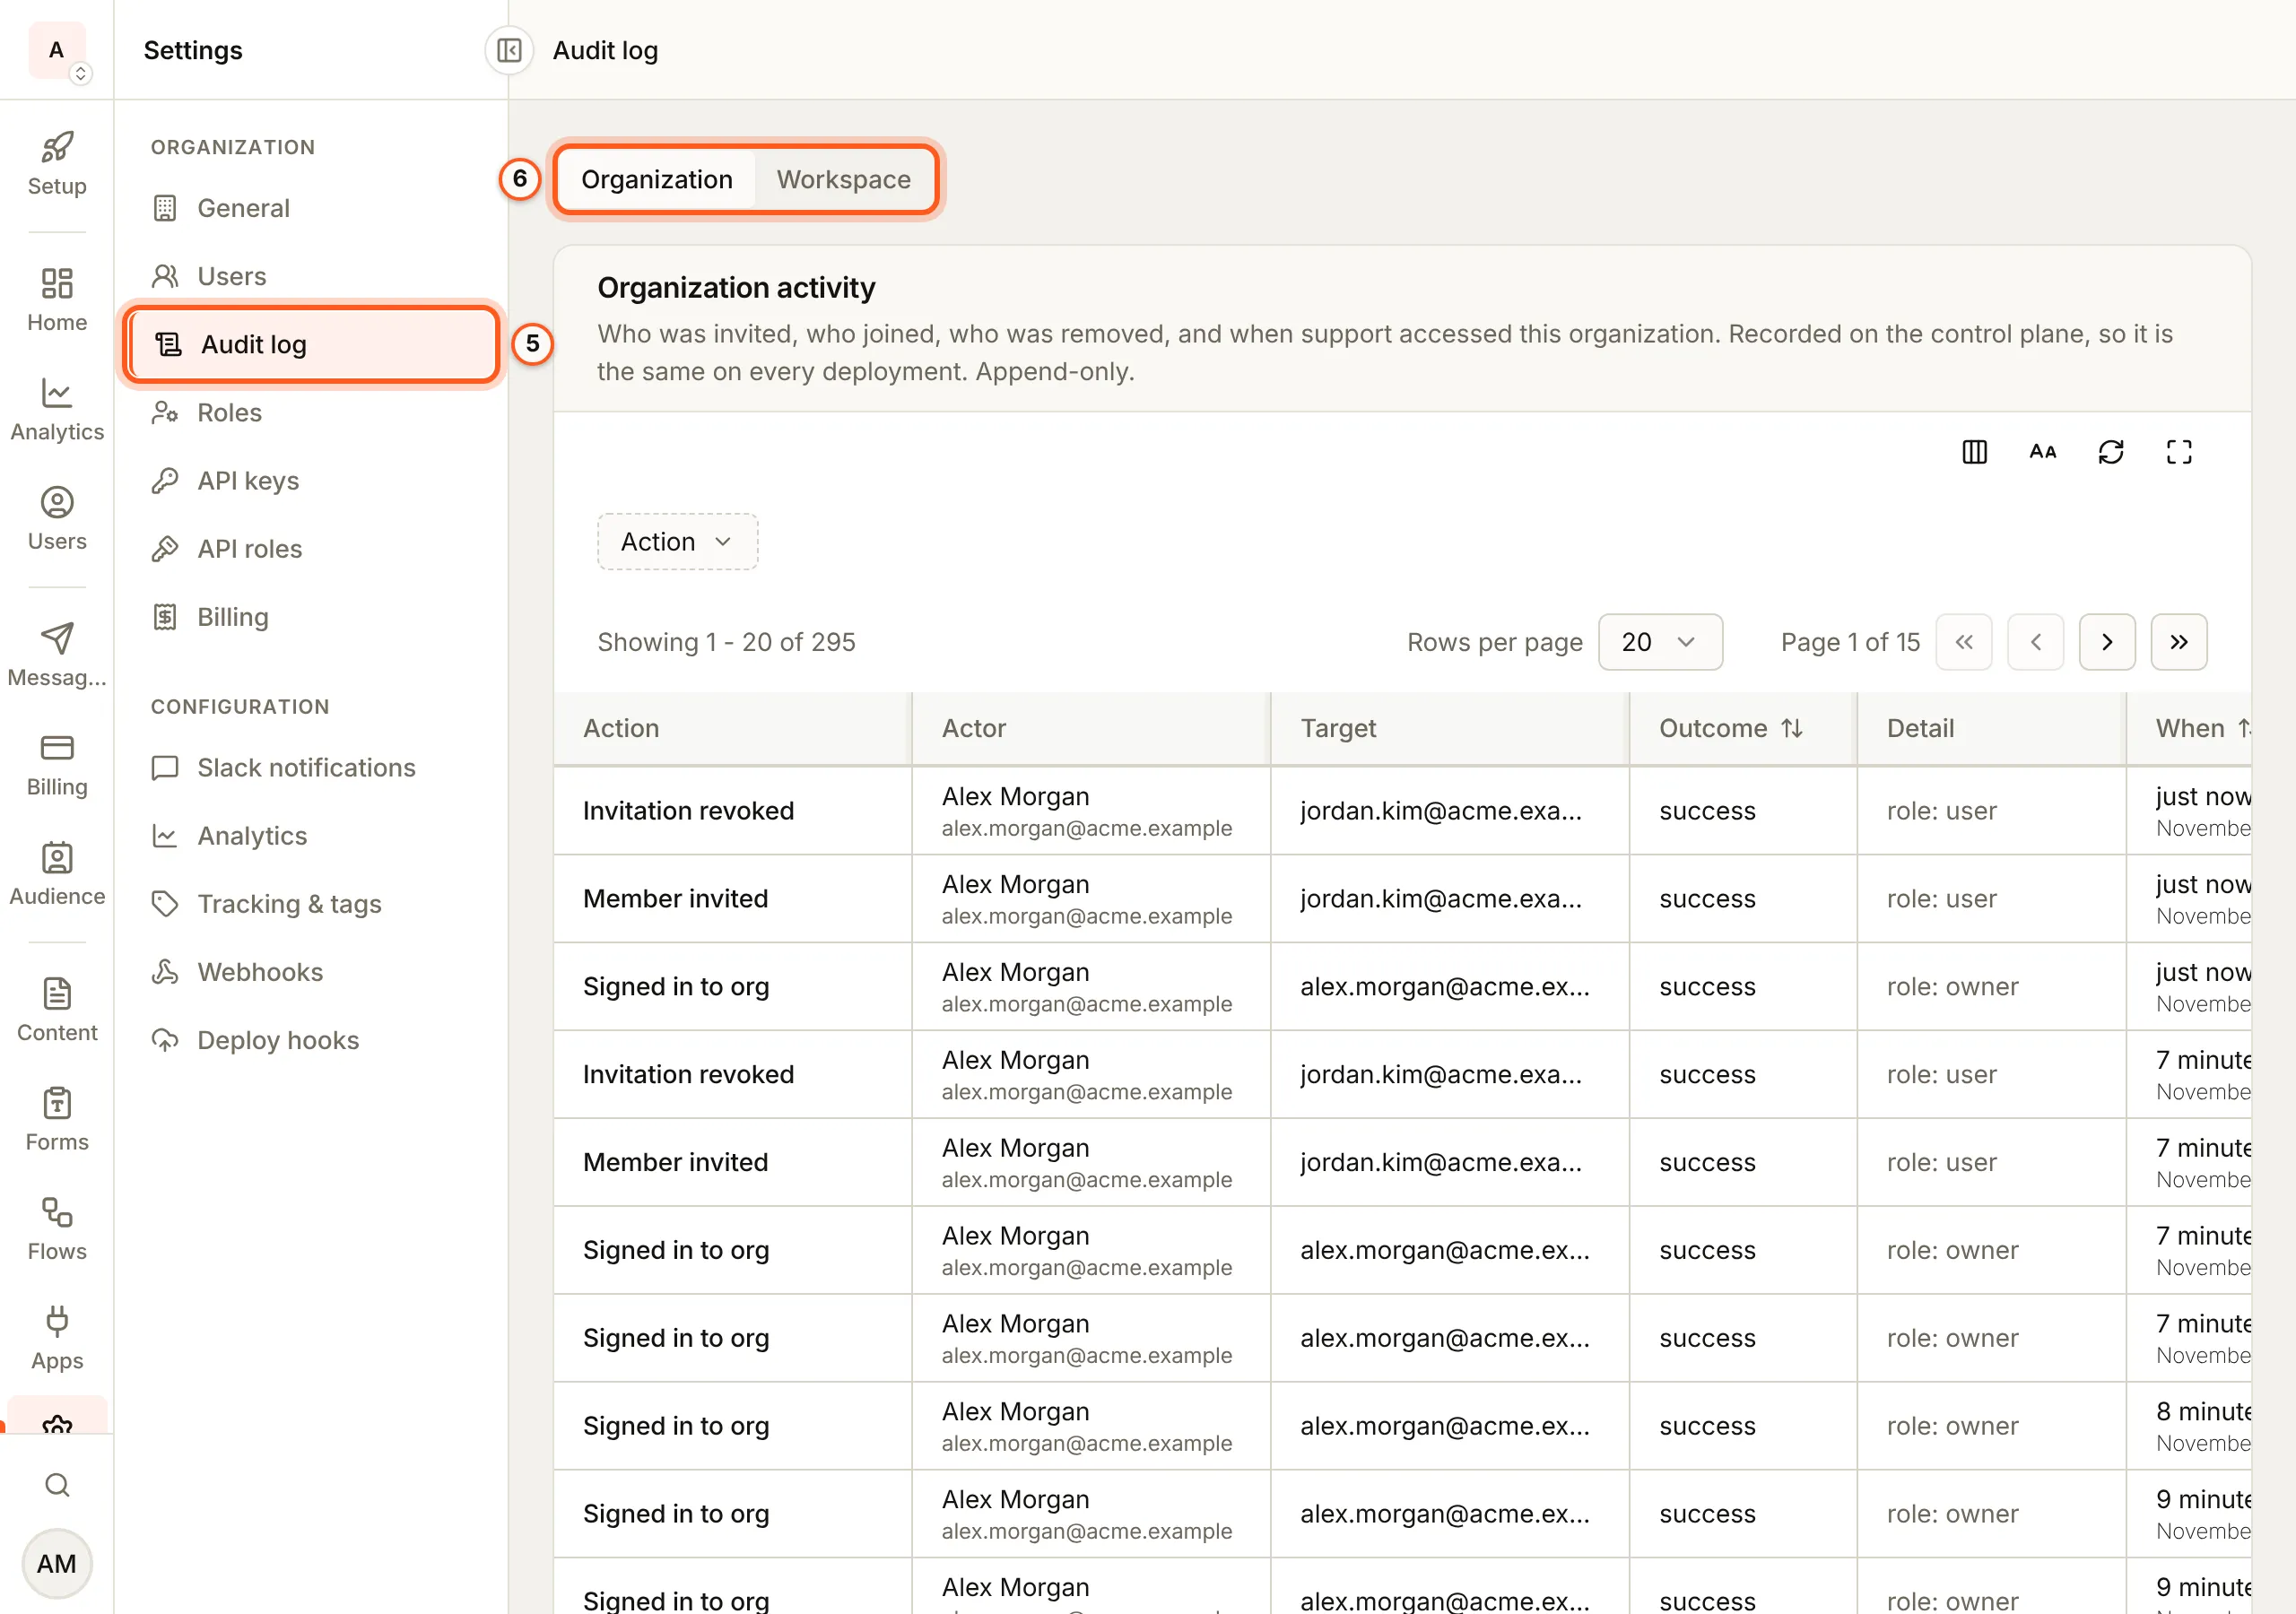
Settings, then Audit log, keeps a record of who did what, on two tabs:
- Organization is your team's history: invitations sent, resent, accepted, refused and revoked, people removed or leaving, tier changes and ownership handed over.
- Workspace is what happened inside the organization: who was given which role, who was blocked, which API key was made and which request was refused.
Membership changes also reach your webhooks (messages BuildBase sends to your server when something happens) and your workflow triggers, as these events:
organization.member_invitedorganization.member_acceptedorganization.member_role_changedorganization.member_removed
A handover sends two organization.member_role_changed events, one for each
person, with reason: "ownership-transfer".
Next Steps
- Secure your console account - two-step sign-in for your login, and requiring it for your organization.
- Admin API - what an API key and its role can call.
- Permissions and roles - the roles your app's users hold in their workspaces.