
Currencies and products
Choose your currencies, make a workspace feature your plans control, then create a category and a Feature, Limit and Quota product in pricing-page order.
Plans are made of products and priced in your billing currencies. So before the first plan, three things exist: the currencies you charge in, a category to put products in, and the products themselves. A product is one of three types:
| Type | What a plan says about it | Example |
|---|---|---|
| Feature | On or off: the workspace has it or does not | Priority support |
| Limit | A ceiling on how many of something a workspace has | Team members |
| Quota | An amount a workspace can use in each period | Reports per month |
No product carries a price. Prices, and how much of each limit and quota a plan includes, are set on the plan's version, in the next guide.
Before you start
- Stripe connected (Connect Stripe): until then, Products and Product categories are not in the Billing menu.
- An owner or admin of the organization, for the currencies.
1. Choose your billing currencies
Open organization settings in the console
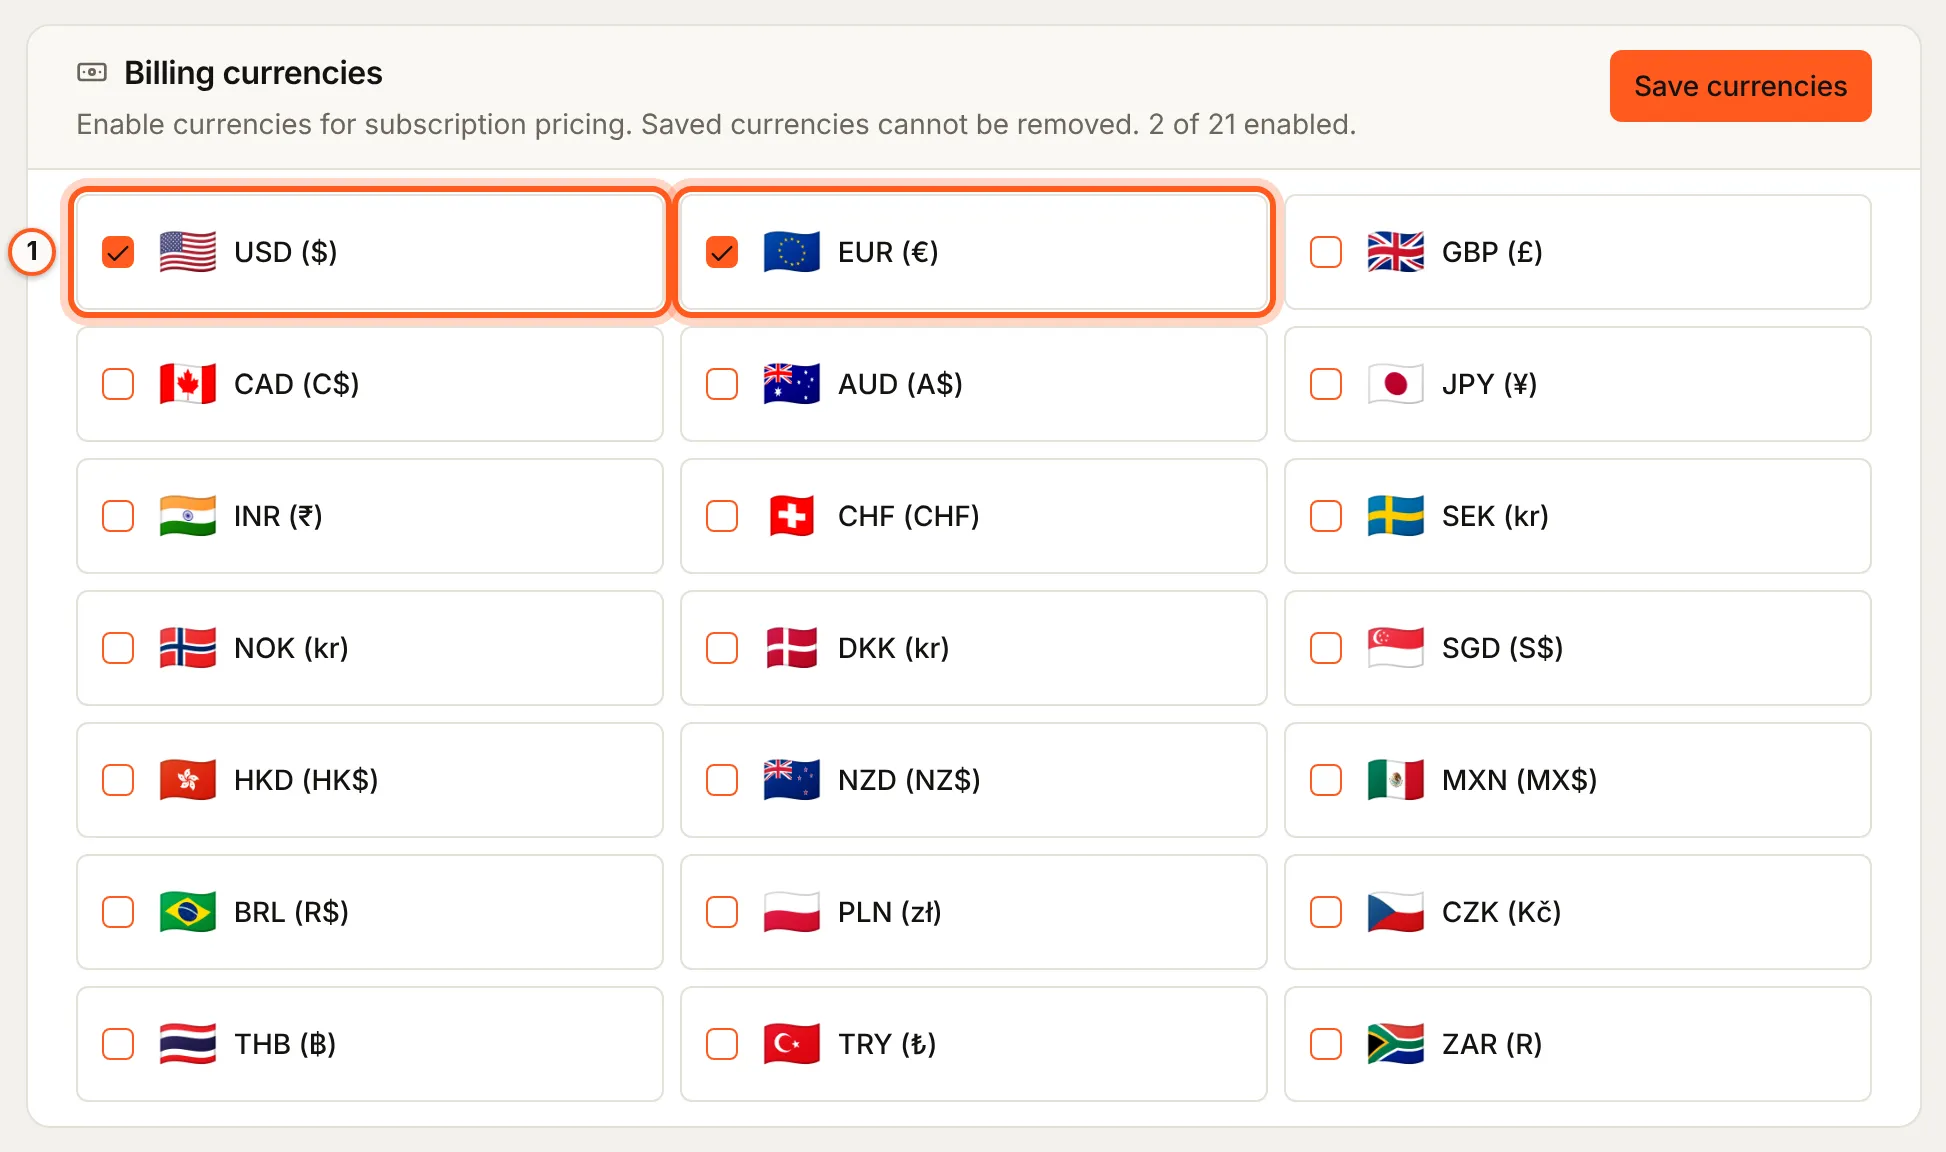
(opens the console in a new tab)In the left rail choose Settings, then General under Organization. In the card Billing currencies, tick each currency you charge in, here USD and EUR.
2. Save them
Press Save currencies. Confirm before saving lists what you are adding and says what it means: "Once saved, these cannot be removed. All plan versions will need to support these currencies." Press Save currencies in it.
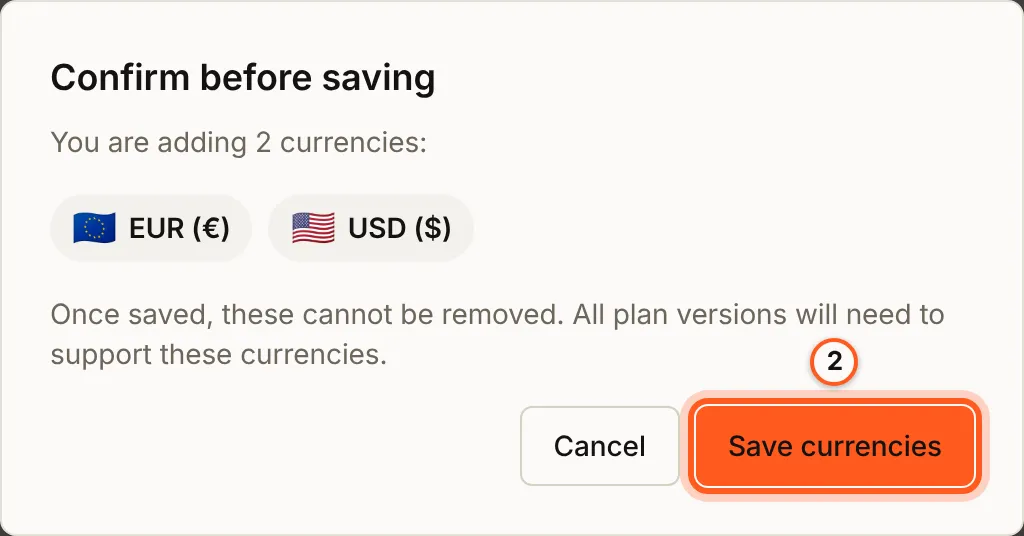
No plan version can be created until the organization has a billing currency. Add a currency only when you are ready to price every plan in it.
3. Make a workspace feature your plans control
A Feature product switches a workspace feature on for the workspaces whose plan includes it. That feature has to exist, and has to be one the plans decide.
Open workspace features in the console
(opens the console in a new tab)In the left rail choose Users, then Features under Workspaces. Create the feature if it is new (workspace flags), then press Edit on its row. Switch on Enabled and Subscription managed, and press Update.
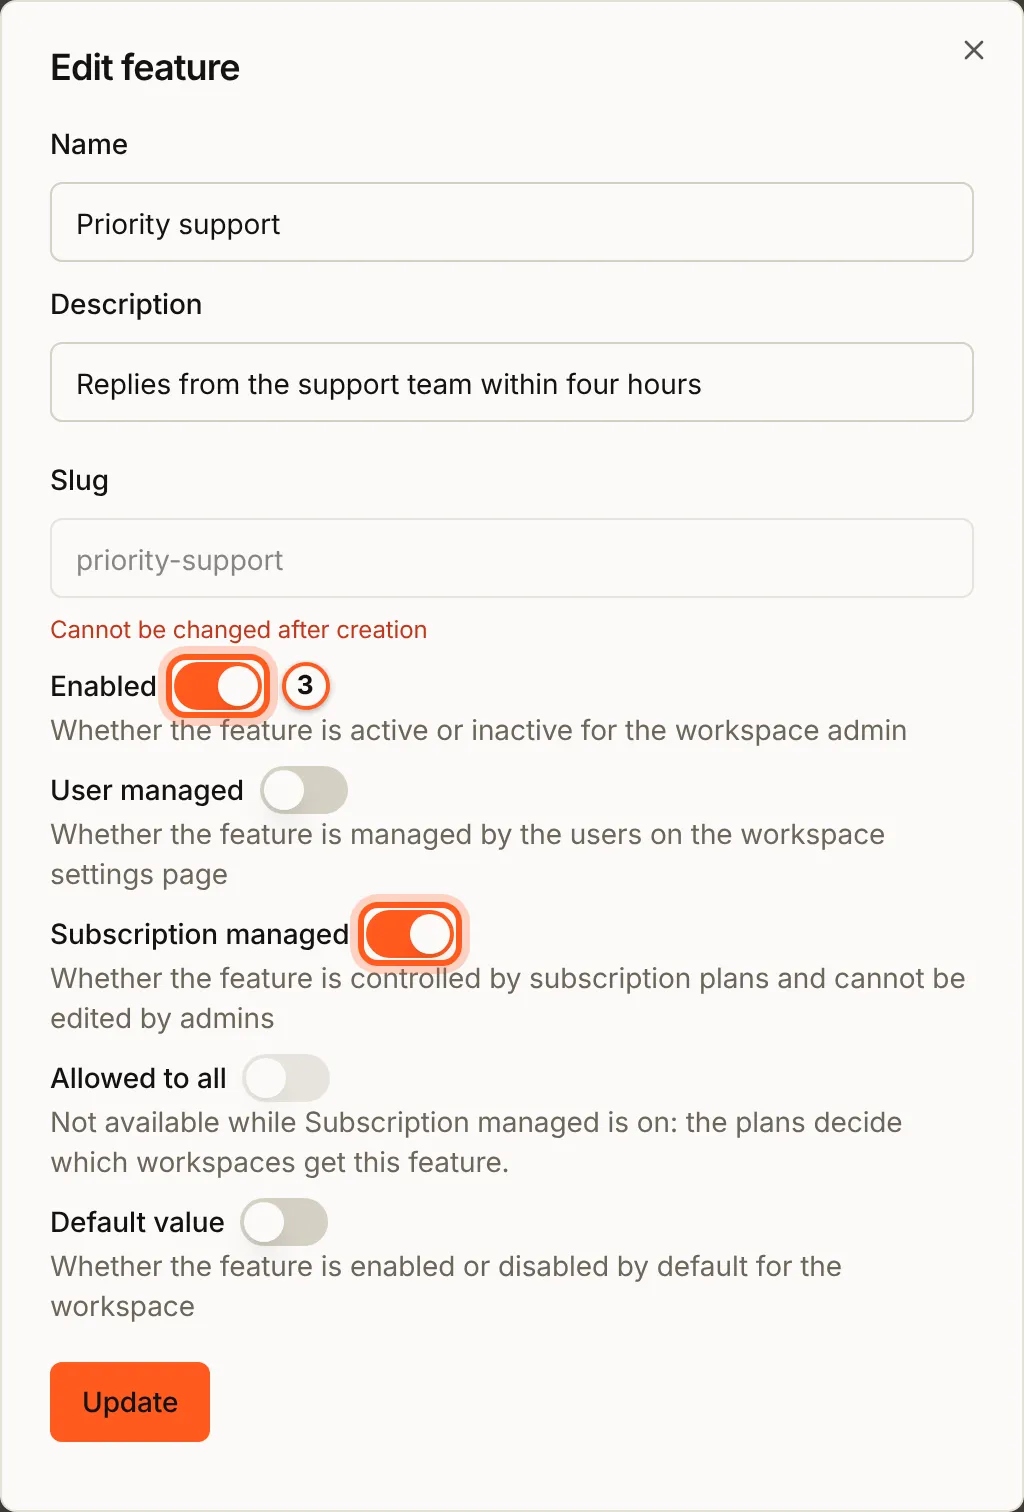
With Subscription managed on, Allowed to all is not available: the plans decide which workspaces get the feature. Skip this step if you sell no Feature product.
4. Create a product category
Open product categories in the console
(opens the console in a new tab)In the Billing menu choose Product categories, then press Create category. Fill Name and Slug, here Core features and core-features. Sort order places the category in the pricing comparison table, lowest first. Press Create.
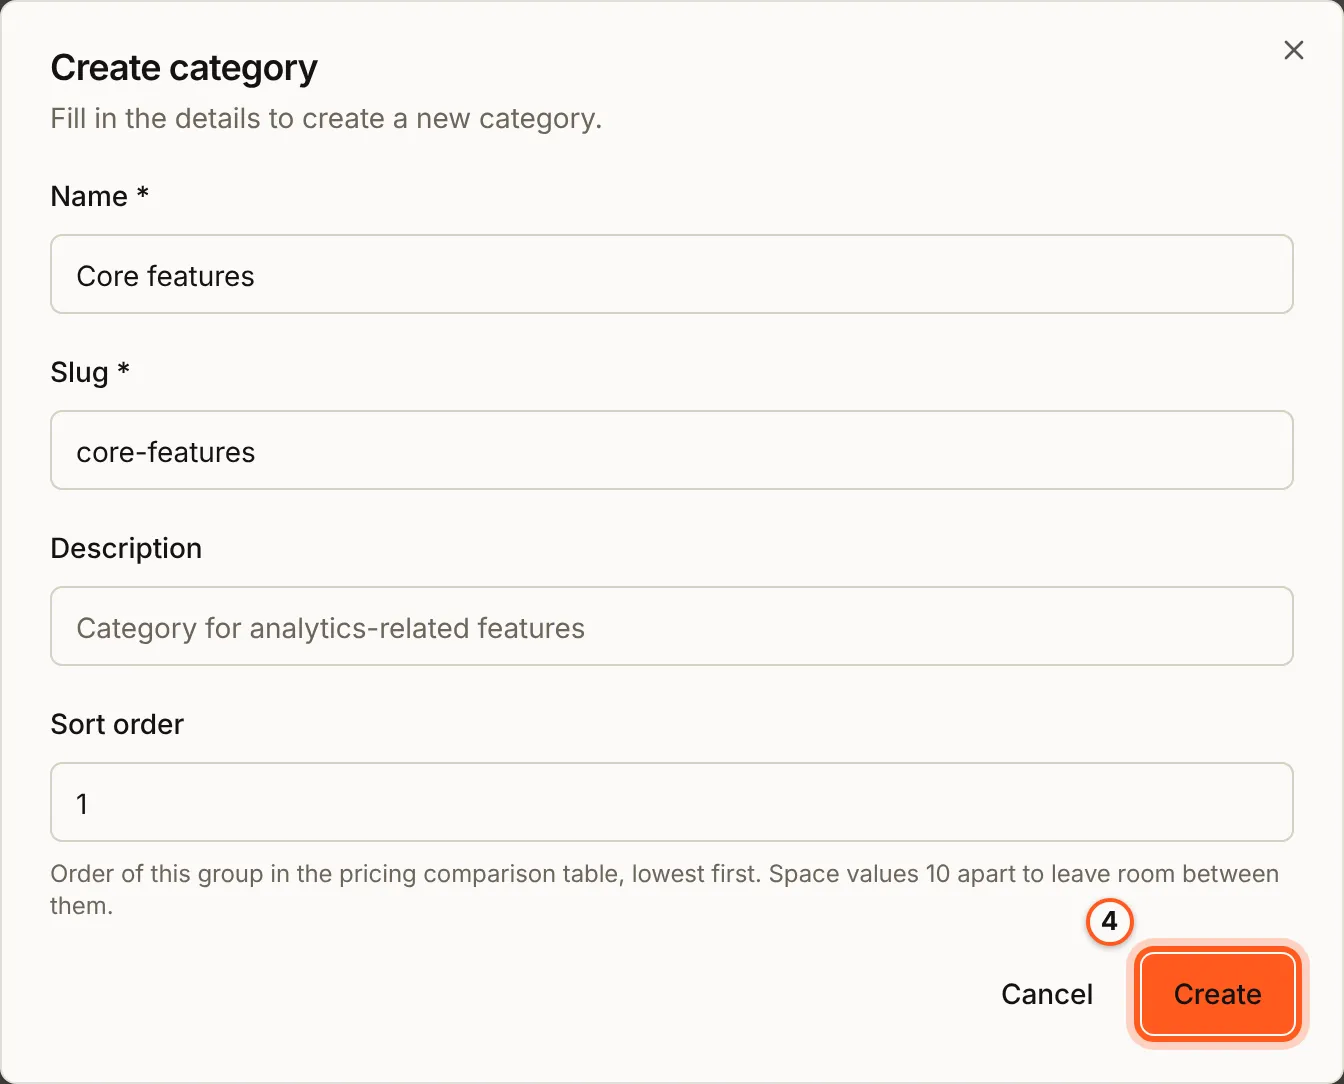
Every product needs a category, so create at least one before the products.
5. Create a Feature product
Open products in the console
(opens the console in a new tab)In the Billing menu choose Products, then press Create product. Choose Type Feature, fill Name and Slug (Priority support, priority-support), a Description and the Category. In Workspace feature, choose the feature from step 3, then press Create.
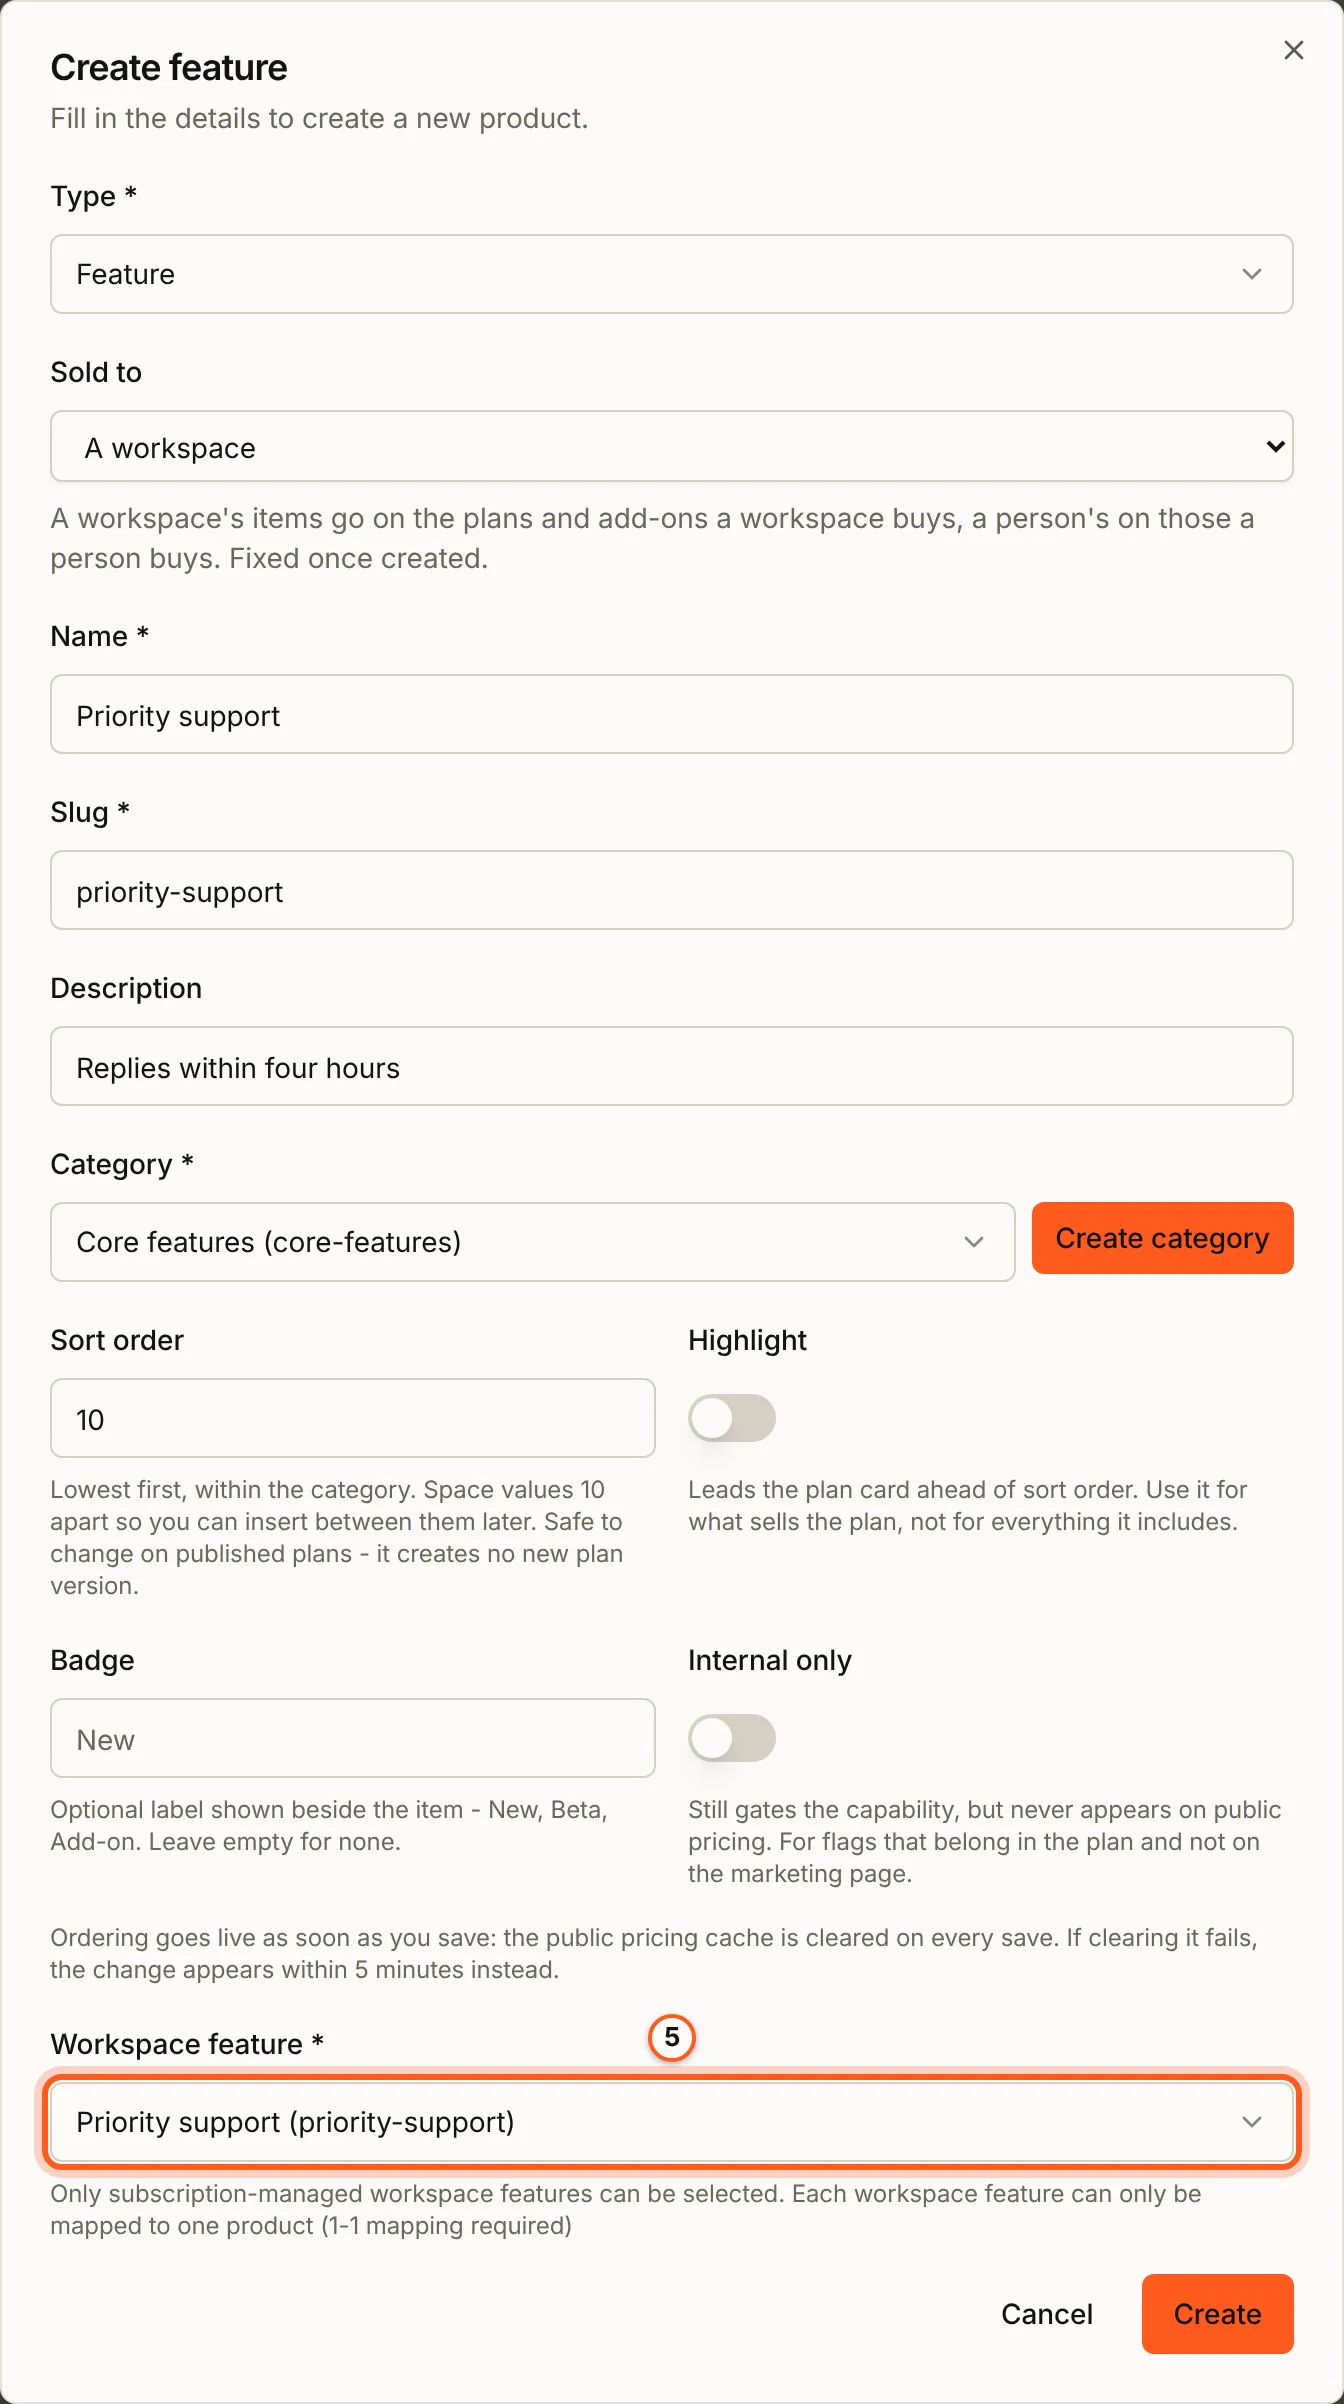
Workspace feature lists only subscription-managed features, and each one maps to one product.
6. Create a Limit product
Press Create product again, and choose Type Limit. Fill Name and Slug (Team members, team-members), a Description and the Category, and press Create.
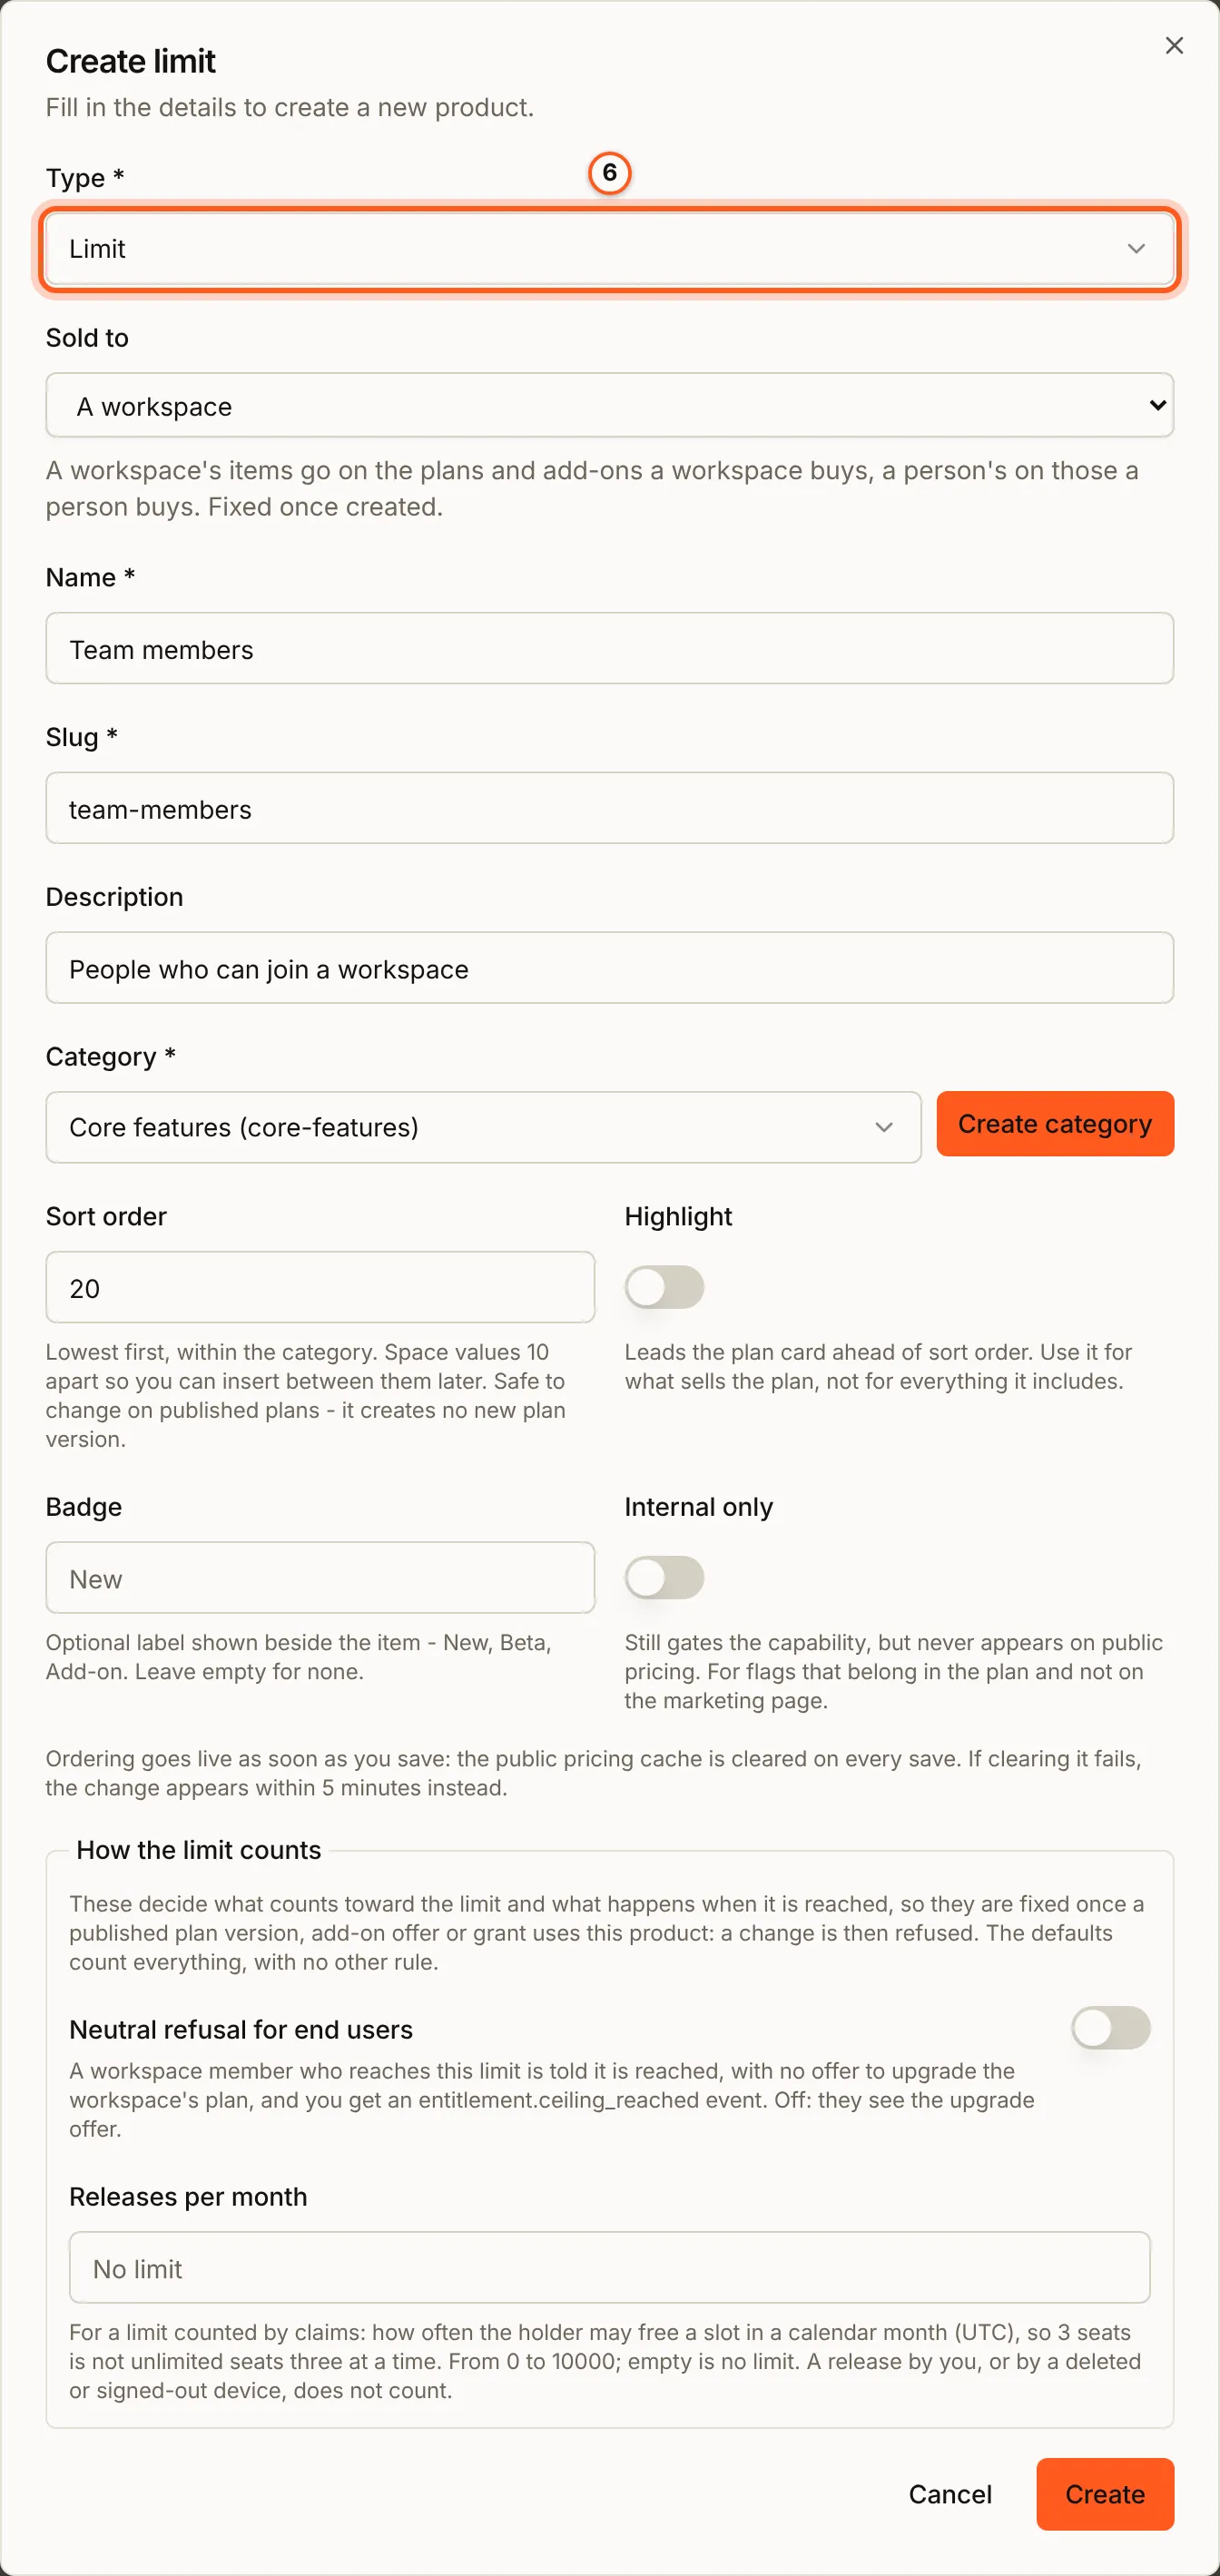
How the limit counts decides what counts toward the limit and what happens when it is reached. The defaults count everything, with no other rule. Once a published plan version, add-on offer or grant uses the product, these settings are fixed.
7. Create a Quota product
Press Create product once more, and choose Type Quota. Fill Name and Slug (Reports per month, reports-per-month), a Description and the Category, and press Create.
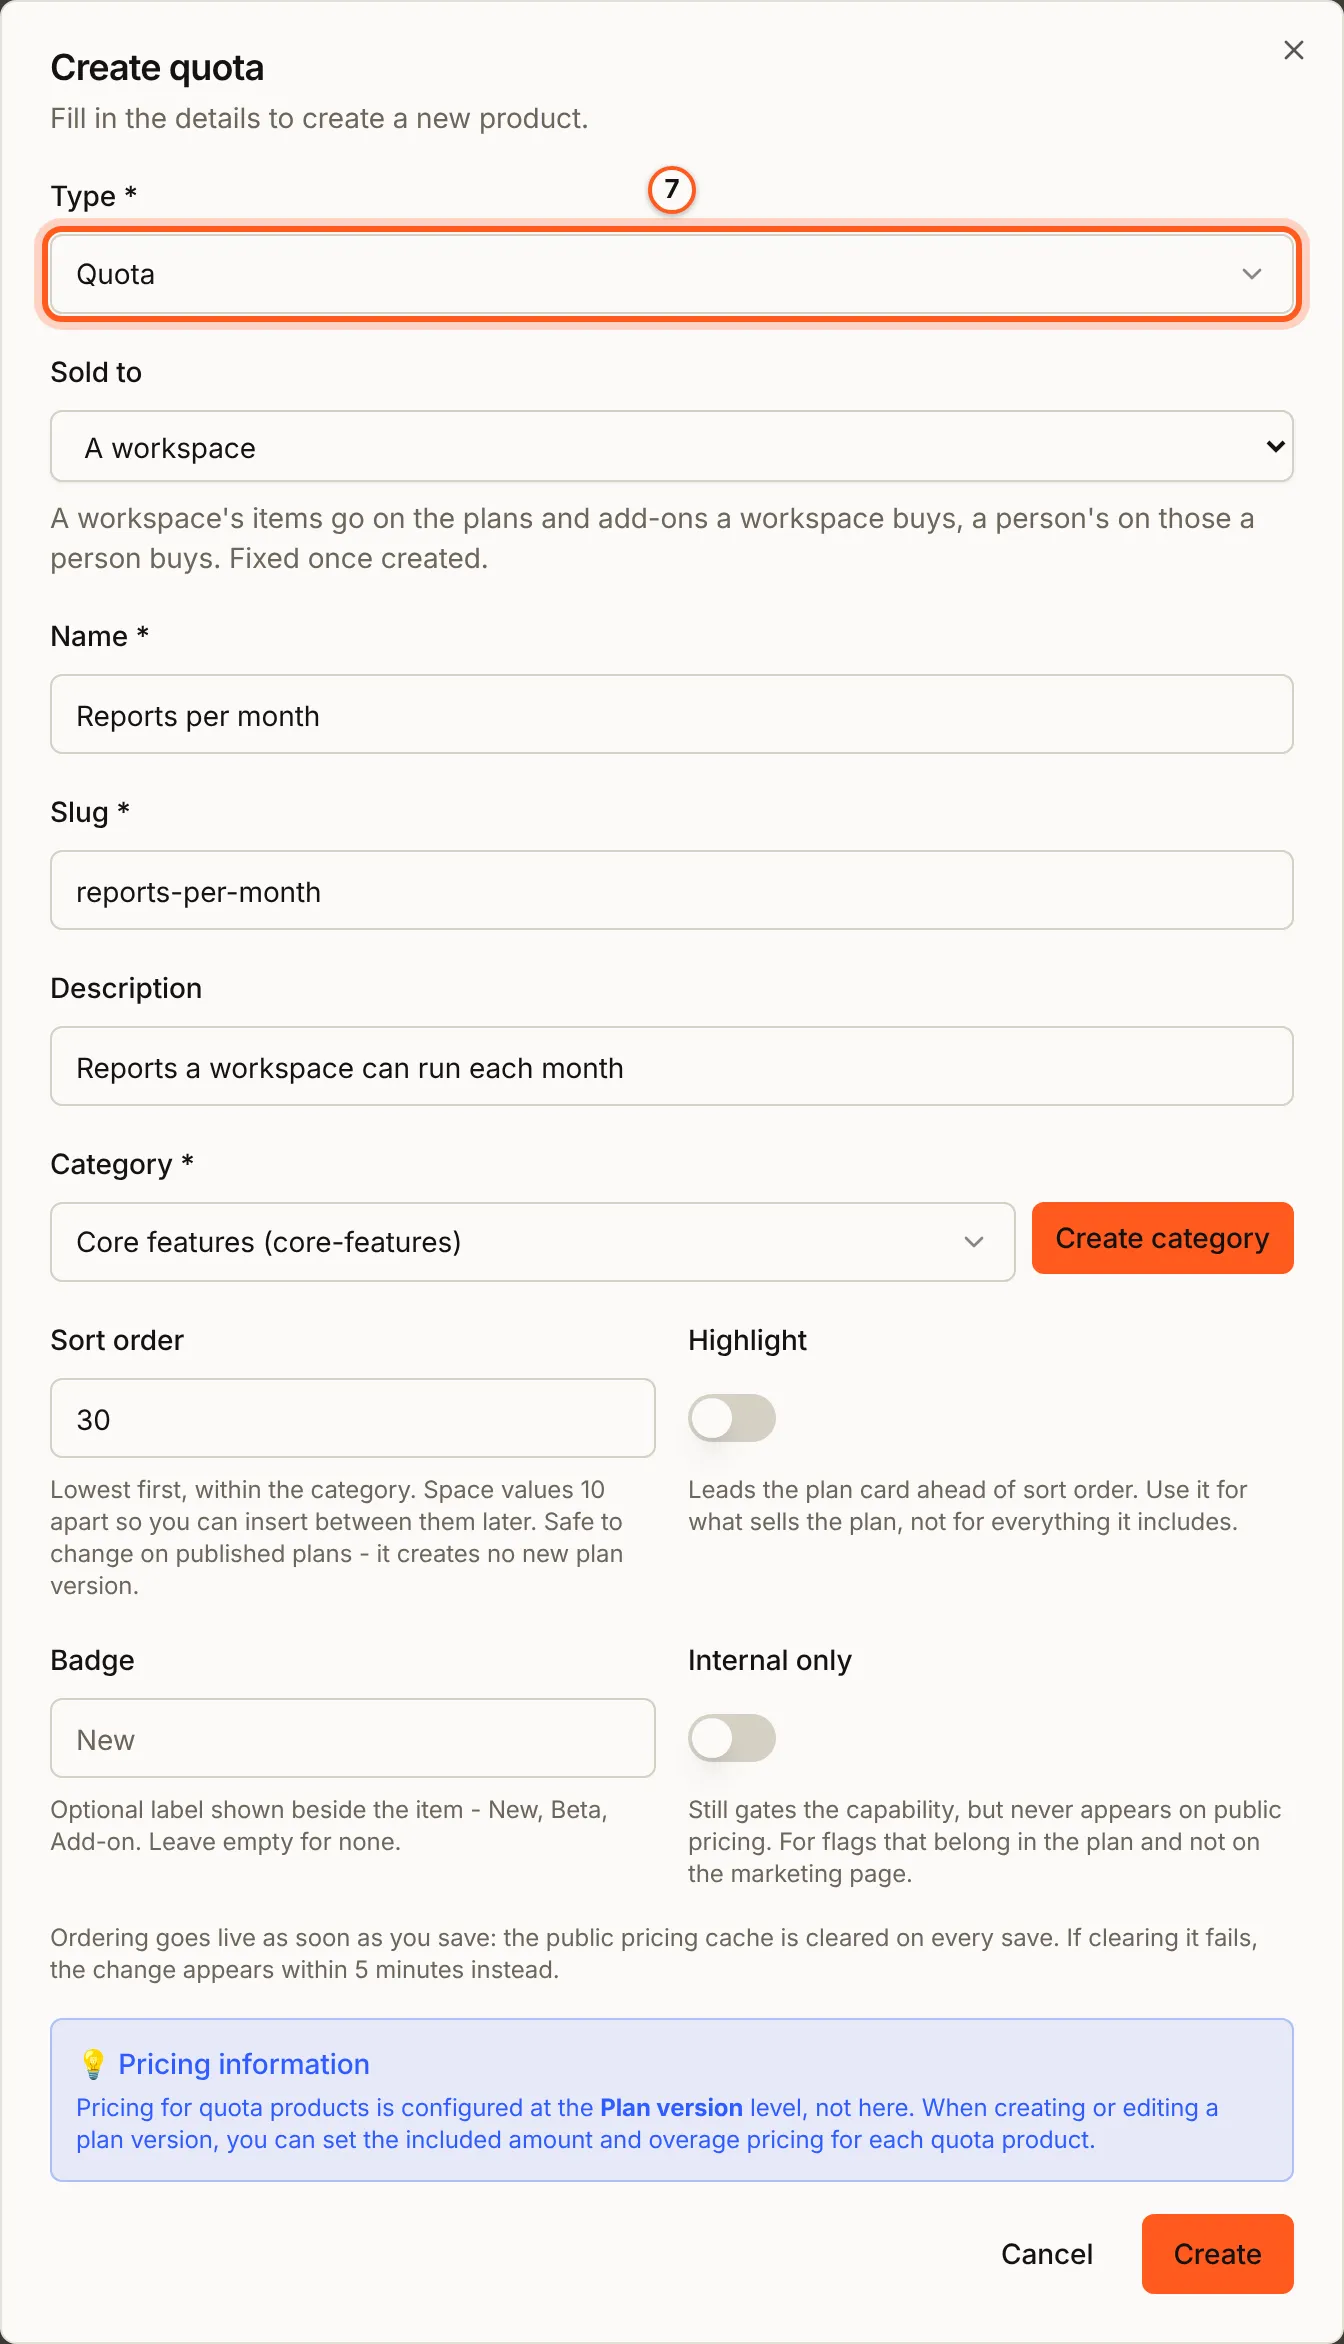
How much a plan includes, and what more costs, are set on the plan version.
8. Arrange the pricing page
On Products, press Reorder. Arrange the pricing page lists each category with its products, in the order of your pricing page's comparison table. Drag a row, or use its arrows, then press Save order.
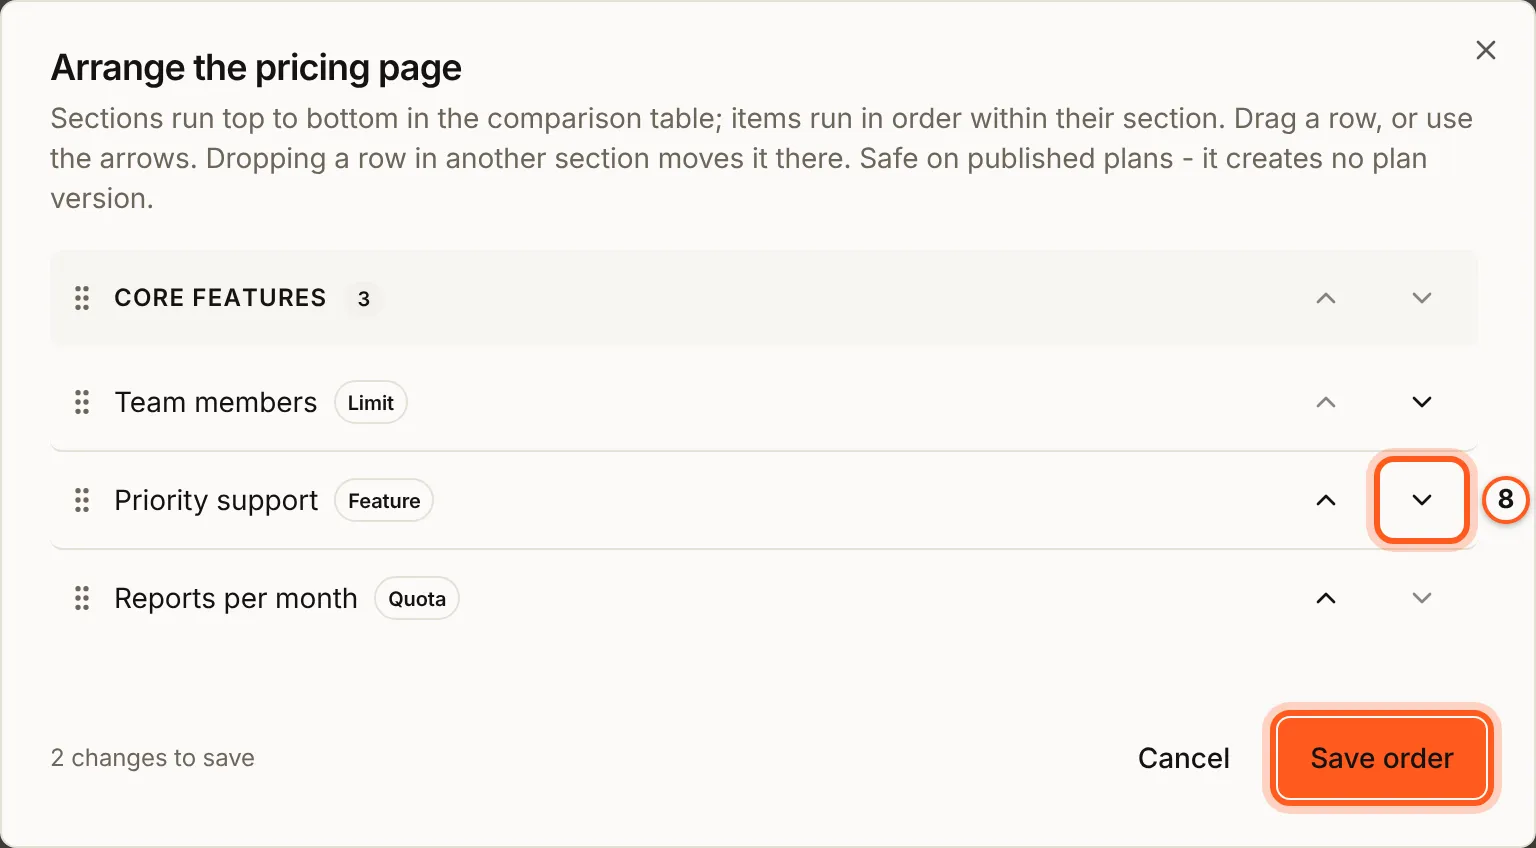
The order is safe to change on published plans: it creates no plan version.
Check that it worked
- Settings > General, Billing currencies: your currencies are ticked and can no longer be unticked.
- Billing > Products lists the three products, with their type and category, and the Feature product with its workspace feature.
Things to watch out for
- A saved currency stays. Pick the currencies you mean to charge in; every plan version has to support them.
- The type, slug and Sold to of a product are fixed once it is created. To change one, create another product.
- One product per workspace feature. A workspace feature maps to one product only.
- What has been sold stays as it was sold. While a published plan version, a published add-on offer or a held grant sells a product, the edits that would change what its holders bought are refused (
CATALOG_ITEM_SOLD, see error codes).
Next steps
- Your first plan - a plan and its first version, priced and published
- Entitlements - check a feature, limit or quota by its slug in your app
- Workspace flags - the features a Feature product switches on