
Connect Stripe
Paste your Stripe keys into BuildBase, let it create the webhook endpoint Stripe sends payments to, and turn on Stripe Tax if you collect tax.
BuildBase takes payments through your own Stripe account. You give it two keys from Stripe, and Stripe sends BuildBase what happens to each payment through a webhook endpoint, which BuildBase can create for you. Until the keys are saved, nothing else in billing is offered: plans, products and pricing groups appear once Stripe is connected.
Before you start
- A Stripe account. Use test mode while you set up: checkouts take Stripe's test cards and no money moves.
- A console role that can create and update the Stripe credentials.
- Inside a non-production environment, test keys only: a live key is refused there.
What goes where
| Value | Where you get it | Where it goes |
|---|---|---|
| Publishable key | Stripe, Developers > API keys, pk_test_... | BuildBase, Public key (publishable key) |
| Secret key | Stripe, the same page, sk_test_... | BuildBase, Private key (secret key) |
| Webhook URL | BuildBase, card Webhook configuration | Stripe, the endpoint's URL (only when you make the endpoint by hand) |
| Webhook signing secret | Stripe, the endpoint you made, whsec_... | BuildBase, Webhook signing secret (only by hand) |
1. Copy your keys from Stripe
In Stripe, switch on test mode and open Developers > API keys (the API keys page). Copy the Publishable key, then reveal and copy the Secret key. The secret key lets anyone act on your Stripe account: keep it out of code, chats and screenshots.
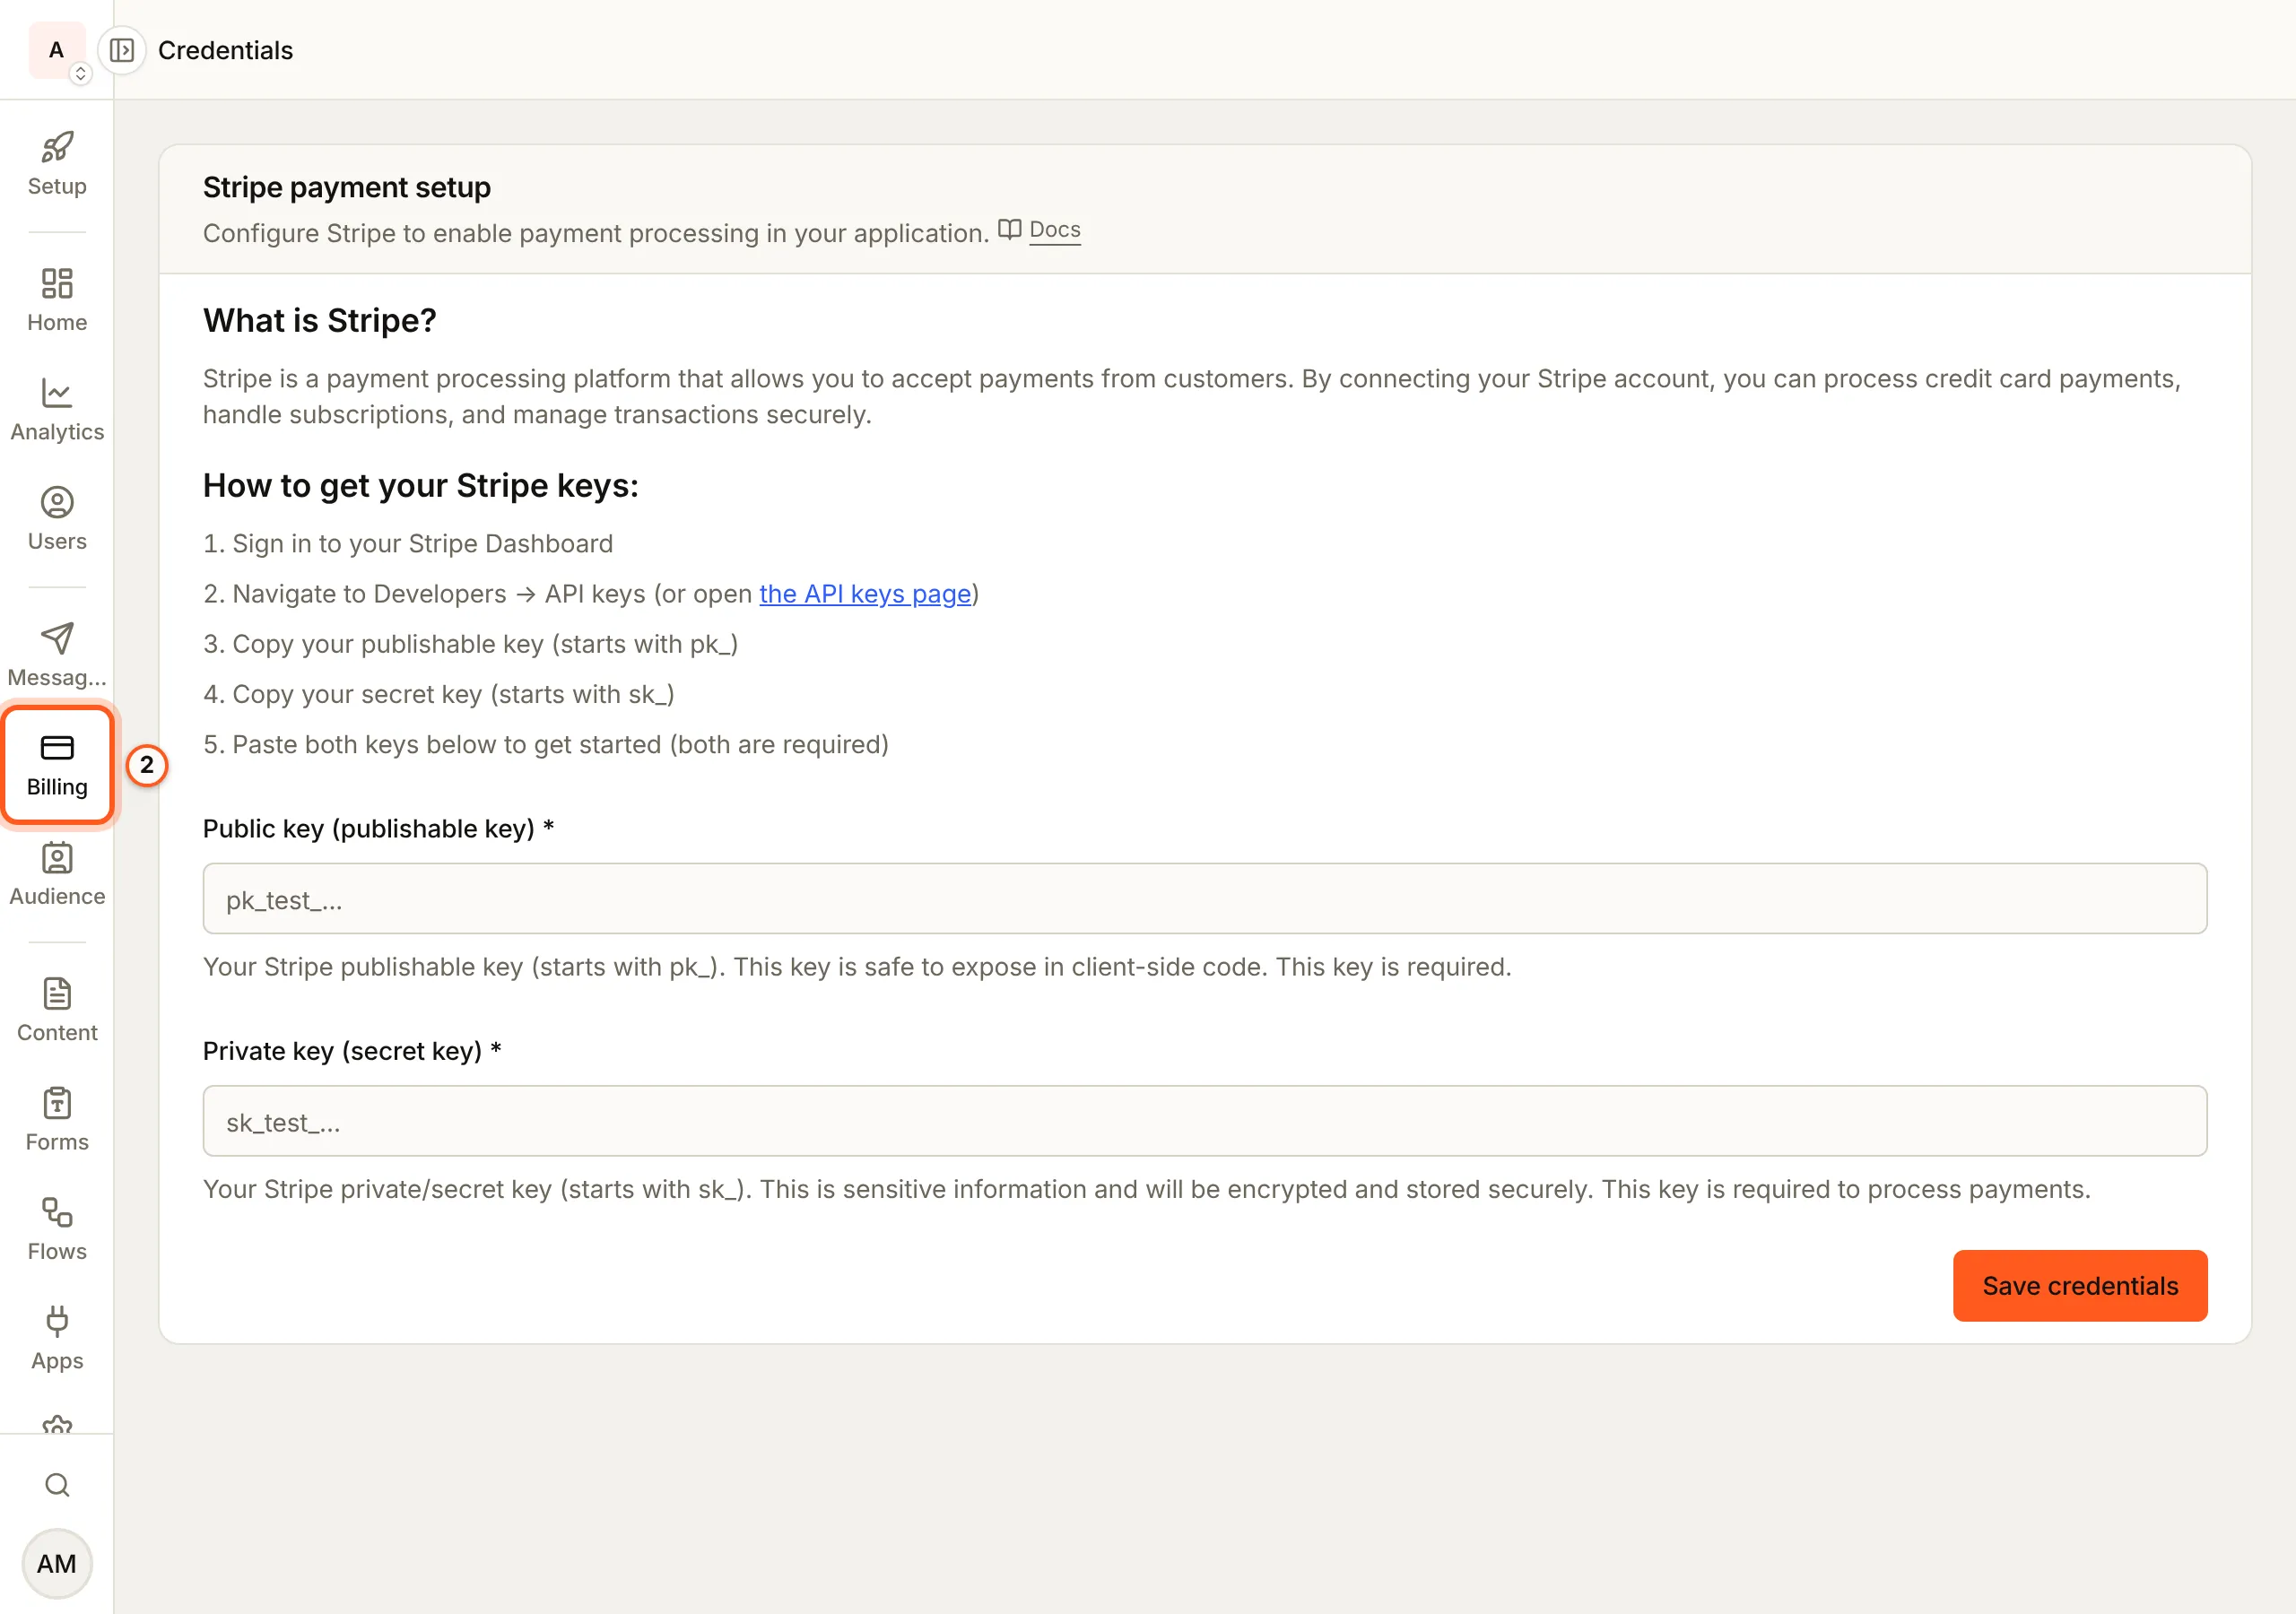
2. Open Billing in the console
Open Billing in the console
(opens the console in a new tab)In the console's left rail, press Billing. Until a secret key is saved, it opens straight onto Stripe payment setup, with no menu beside it: there is nothing else to show yet.
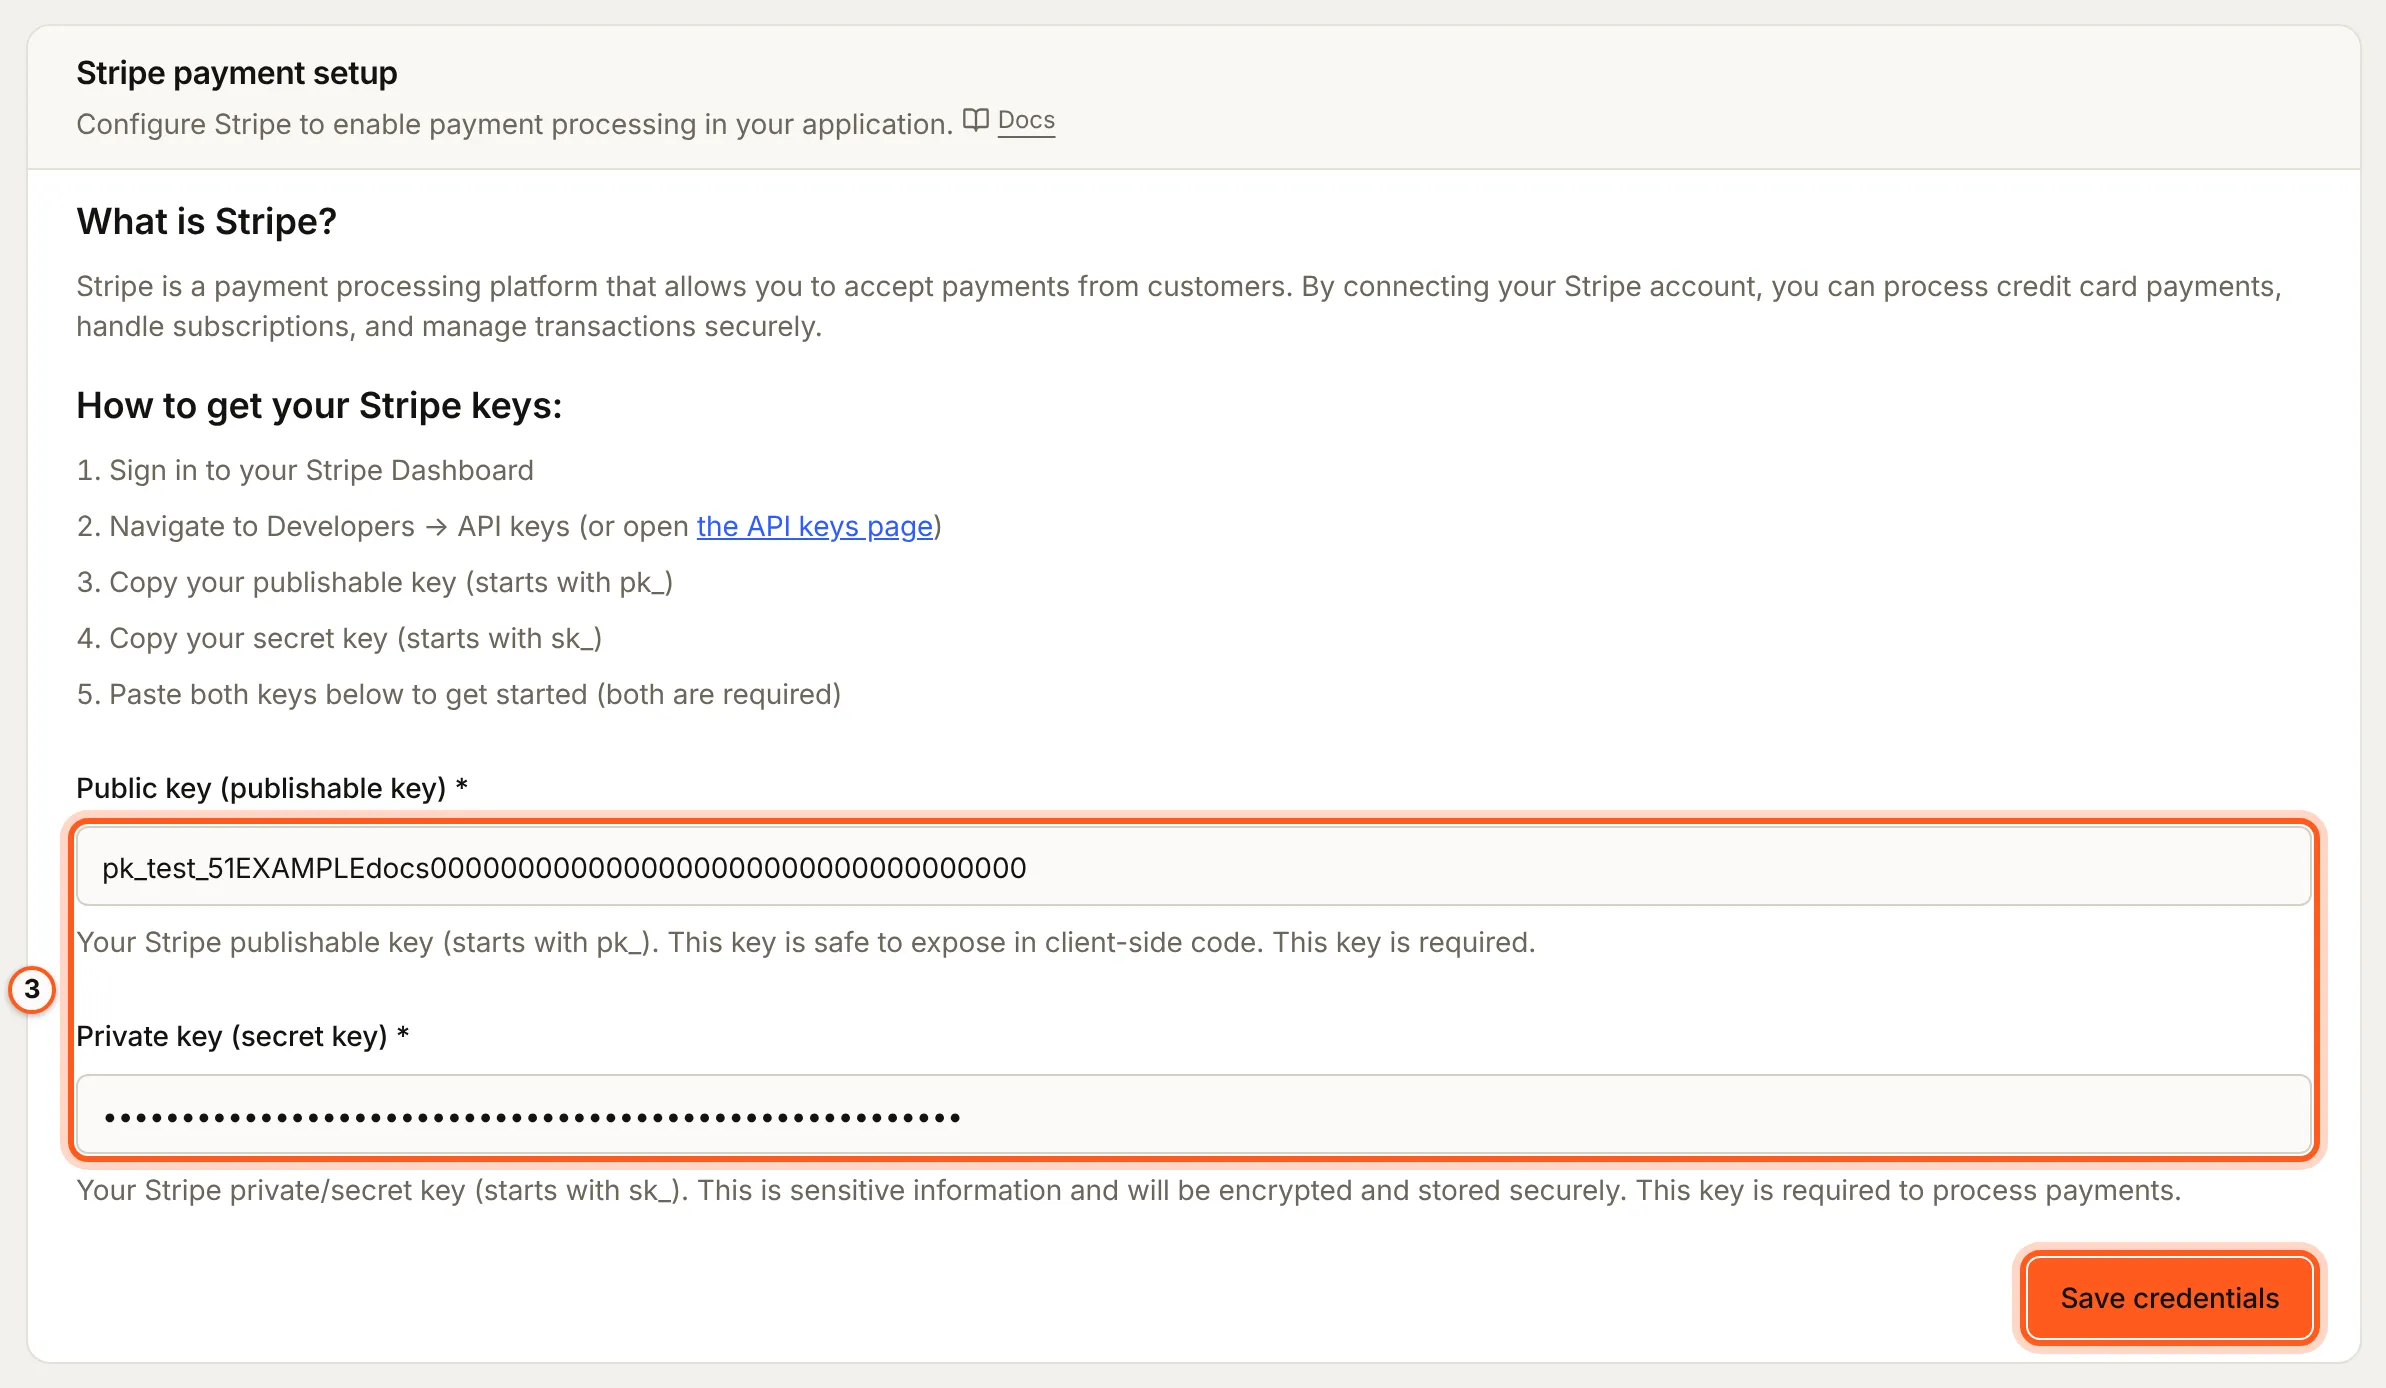
3. Paste both keys and save
Paste the publishable key into Public key (publishable key) and the secret key into Private key (secret key), then press Save credentials.
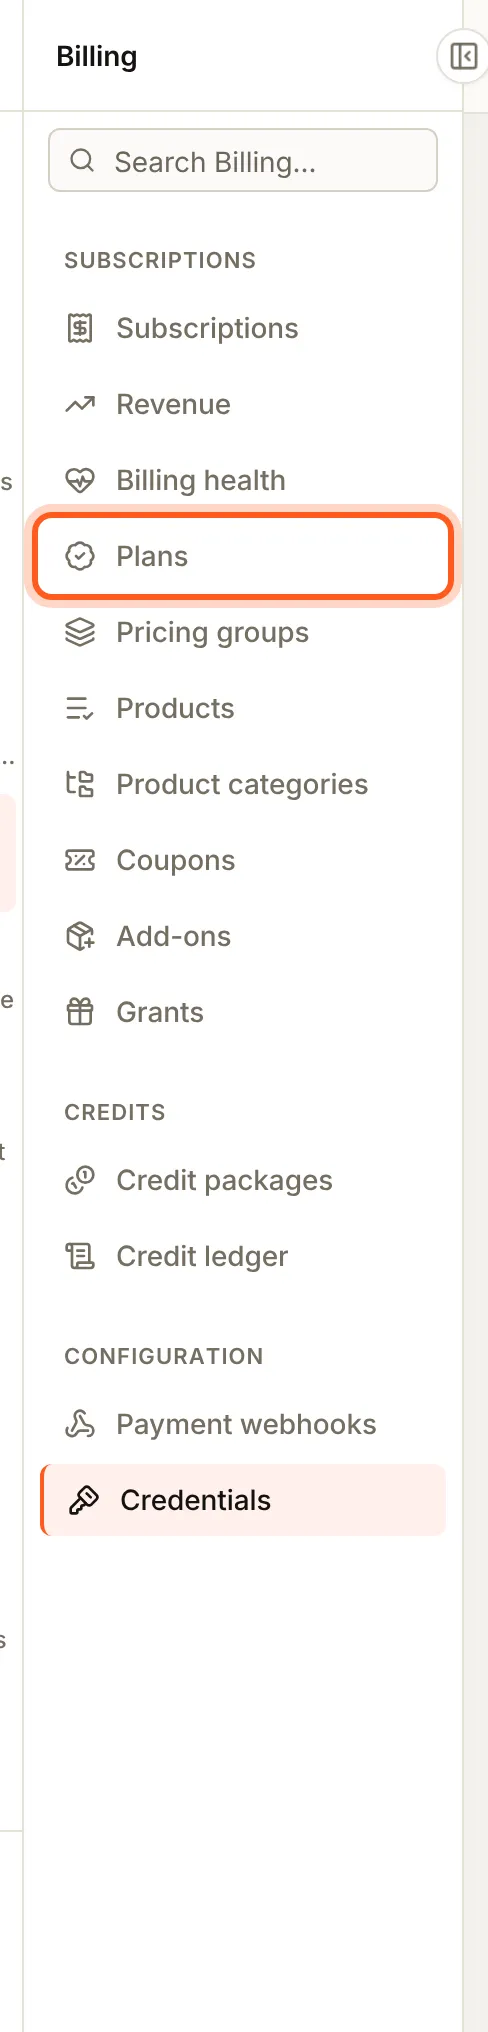
4. The Billing menu
Once the keys are saved, Billing has its menu: Subscriptions, Revenue, Billing health, Plans, Pricing groups, Products, Product categories, Coupons, Add-ons and Grants, then Credit packages and Credit ledger under Credits, and Payment webhooks and Credentials under Configuration.
The webhook endpoint
Stripe tells BuildBase about every checkout, renewal, failed payment and cancellation by sending it events. For that, your Stripe account needs a webhook endpoint pointing at BuildBase, subscribed to every event BuildBase acts on.
- On Credentials, press Check Stripe setup at the top right. Stripe setup check reads your Stripe account and changes nothing. It checks your API keys, the Webhook endpoint, recent Deliveries, Stripe Tax, and Retries and recovery emails, and says what to fix. Right after you save the keys, it reports No webhook endpoint for this URL.
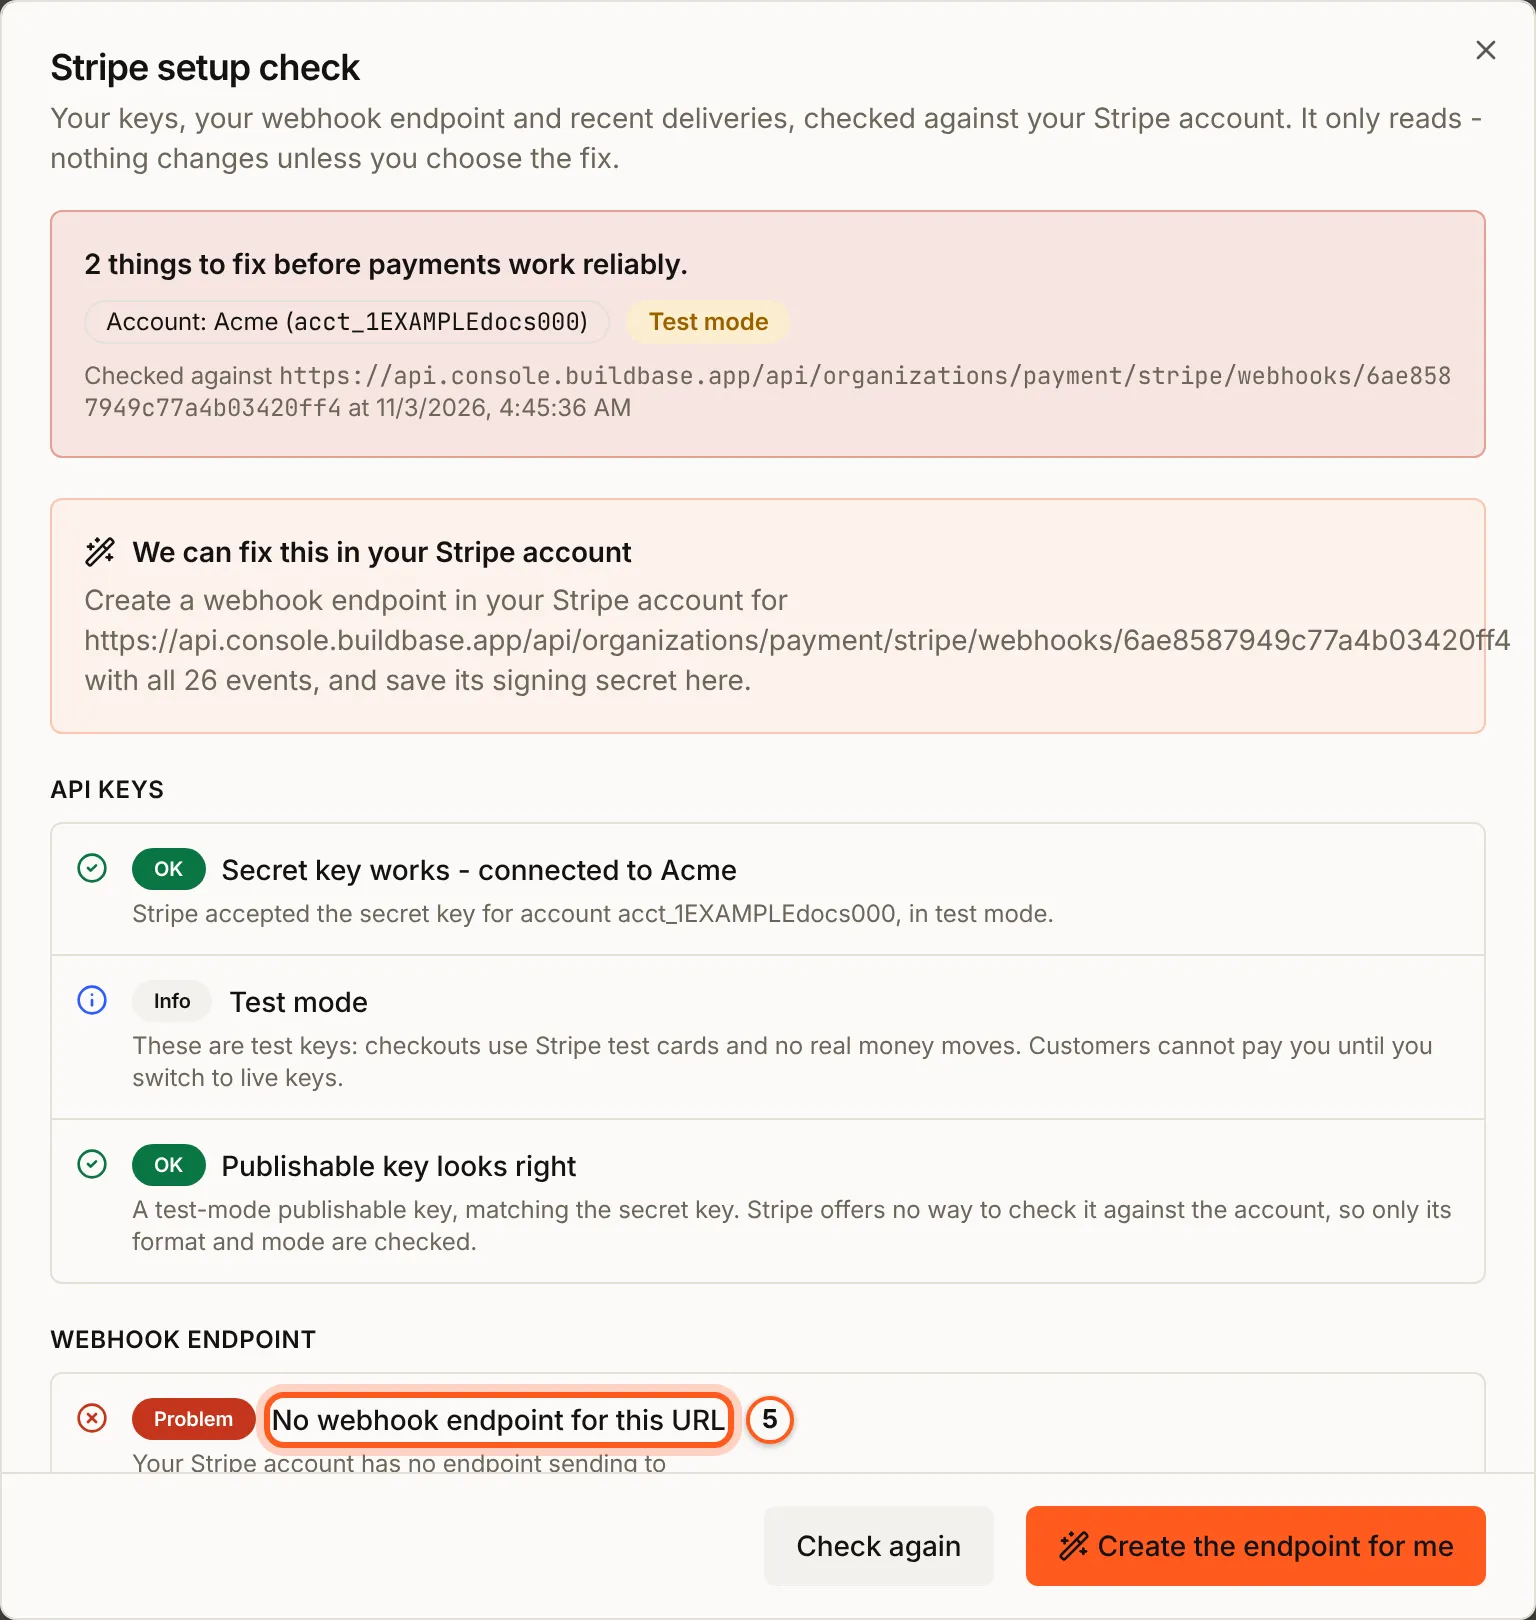
- Press Create the endpoint for me. Create the webhook endpoint in Stripe? says exactly what will be made: one endpoint for your BuildBase URL with all 26 events, and its signing secret saved in BuildBase. Only webhook endpoints change: no charge, customer or subscription is touched, and nothing is deleted. Press Create the endpoint for me again to do it, or Back.
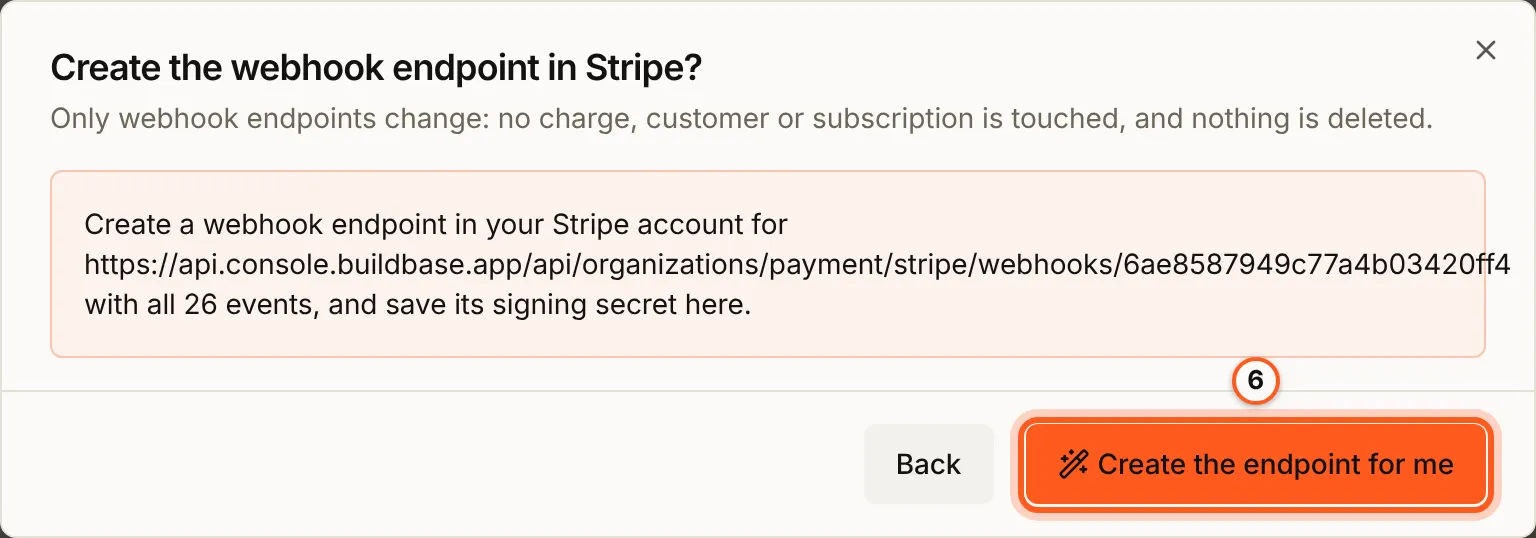
- Press Check again. Webhook endpoint now reads OK.
- In Stripe, the webhooks page of your dashboard lists the new endpoint with its events.
By hand instead
- To make the endpoint yourself, use the card Webhook configuration on Credentials. Copy the Webhook URL. Under Required webhook events, press Copy to copy all 26 event names. In Stripe, add an endpoint with that URL and tick every one of them, or Select all events. A missing event fails without a word: the dashboard looks healthy while that part of billing never happens.
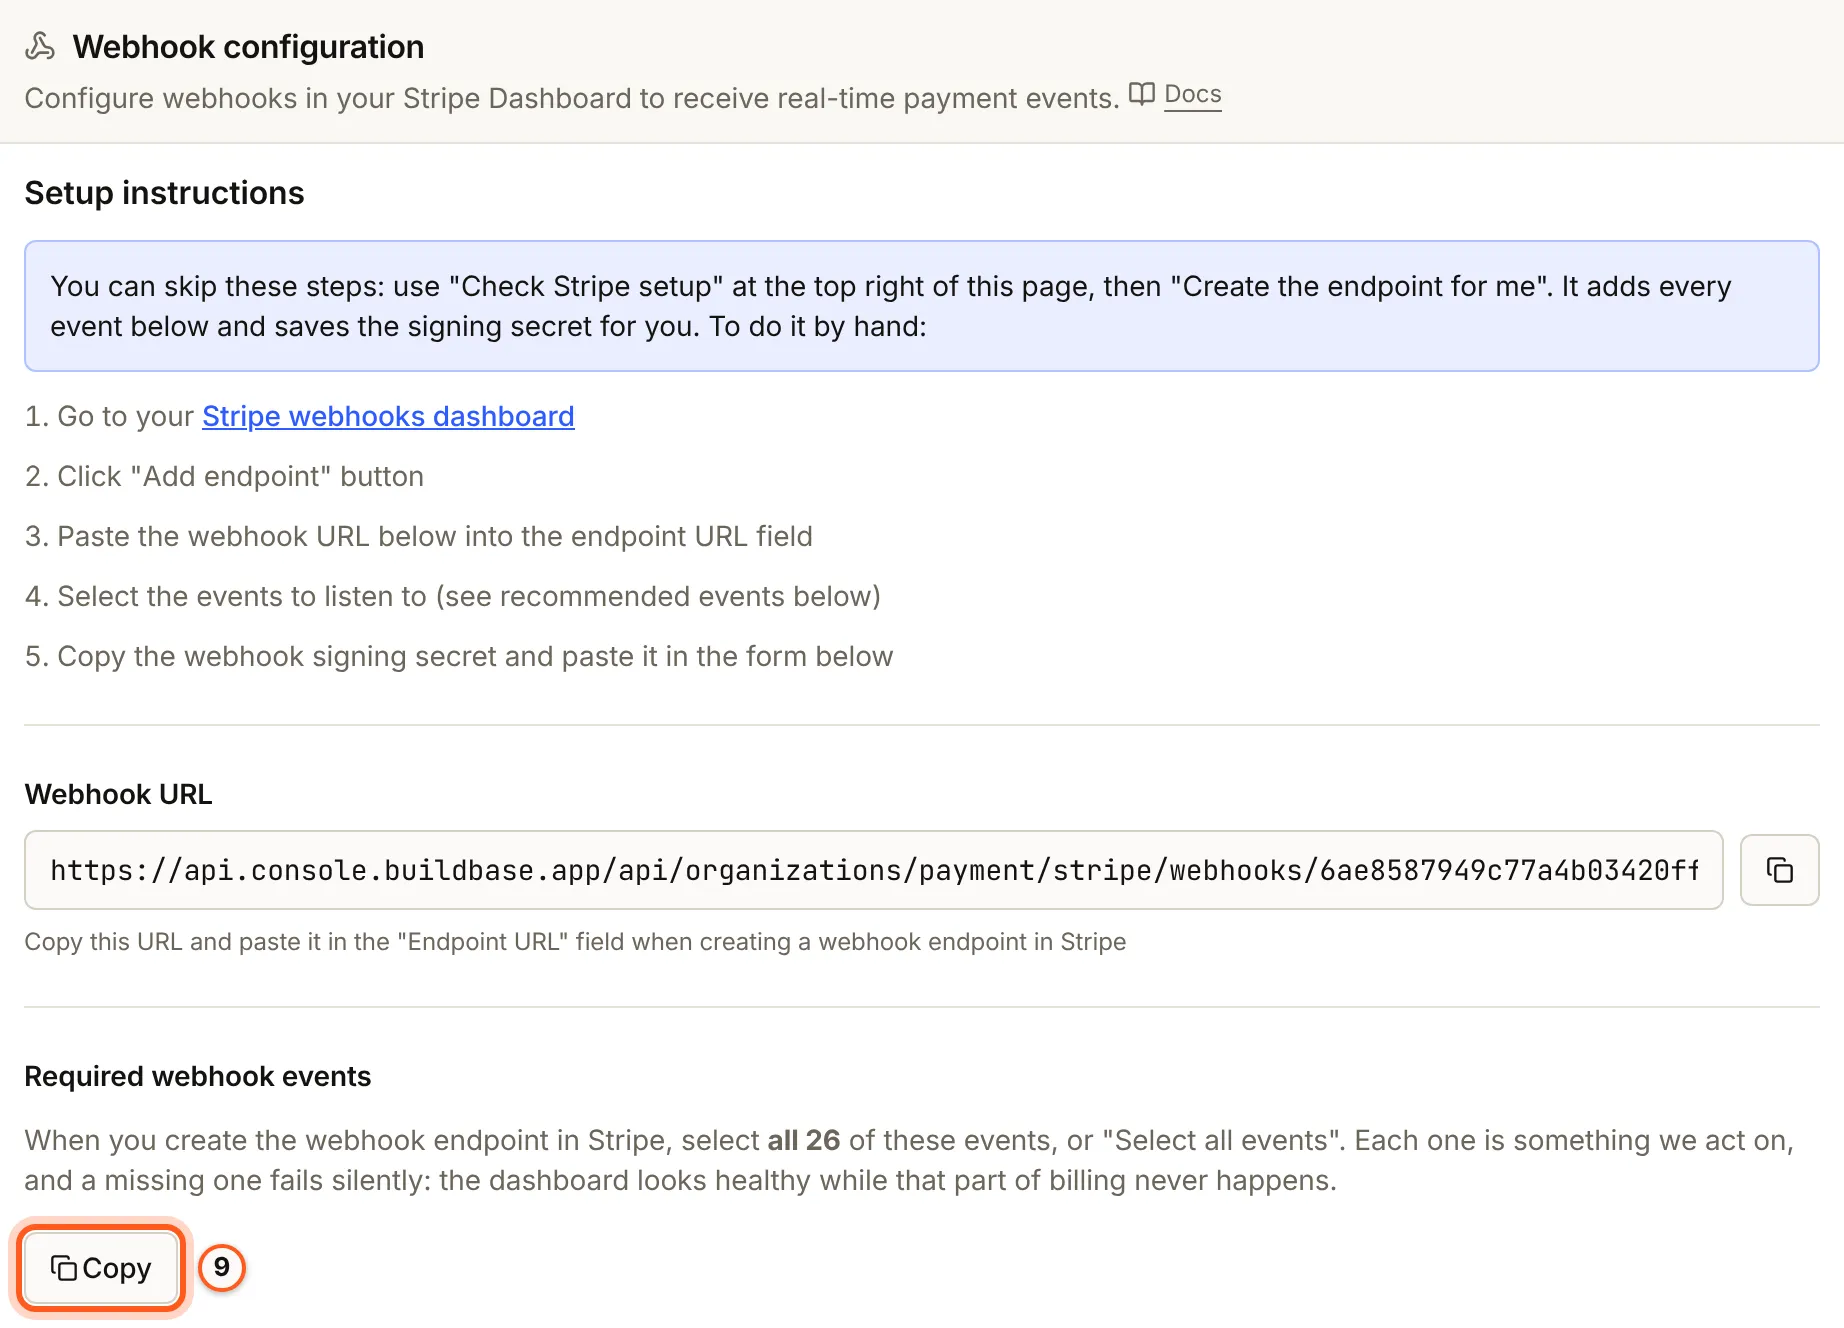
- Stripe shows the endpoint's signing secret,
whsec_.... Paste it into Webhook signing secret at the bottom of the same card and press Save webhook secret. Then press Check Stripe setup to confirm.
Tax (optional)
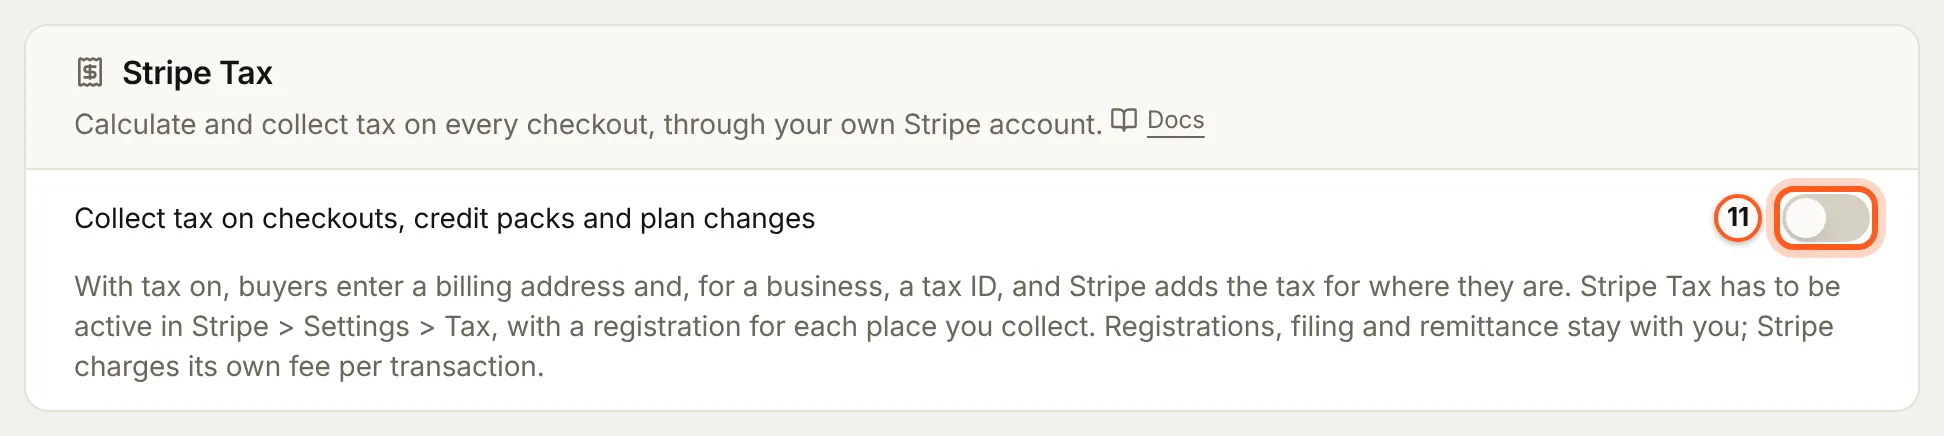
- To collect tax, first activate Stripe Tax in your Stripe account, under Settings > Tax, with a registration for each place you collect. Then switch on Collect tax on checkouts, credit packs and plan changes on the card Stripe Tax. Tax explains what changes for your customers.
Check it works
- Check Stripe setup reports OK for API keys and Webhook endpoint.
- After your first test checkout, Billing > Payment webhooks lists the events Stripe sent.
Things to watch out for
- The Billing menu stays empty until a secret key is saved.
- Keys from the wrong mode are reported by the check: keep both keys from the same mode, test or live.
- Select all events is safe. Leaving out one of the 26 events is not.
- Check Stripe setup counts the other endpoints in your Stripe account. When more than one points at your BuildBase URL, it offers Replace with one new endpoint.
- The Stripe Tax switch is refused while Stripe Tax is not active in your Stripe account.
If something goes wrong
| What you see | Why | Fix |
|---|---|---|
A live key is refused inside an environment (ENVIRONMENT_KEY_MODE) | Non-production environments take test keys only | Use the test keys there |
| Restricted key - account details are not readable | A restricted key (rk_...) without read access to the account | Give the key read access to the account, or use the secret key |
The Stripe Tax switch is refused (STRIPE_TAX_NOT_ACTIVE) | Stripe Tax is not active in your Stripe account | Activate it in Stripe under Settings > Tax, then switch it on again |
| The check could not run. Your settings were not changed. | Stripe could not be reached just then | Press Check again |
Next steps
- Billing overview - currencies, products, plans and pricing groups
- Tax - what collecting tax changes
- Failed payments - retries and recovery emails