
From sign-up to a running app
Sign up for BuildBase, make your organization, connect a sender, create a sign-in client and see your own app sign someone in, one console screen at a time.
This guide takes you from no account to an app of your own where people sign in through BuildBase. You make an organization in the BuildBase console, give it a way to send email, add a way to sign in, create the client your app signs in through, and put three values from the console into your app. Each step shows the console screen and the button to press.
Before you start
A Google account, because the console signs you in with Google. A React 18 or 19 app on Node.js 18 or later, or the Next.js starter, which has the code half of this guide done already. About fifteen minutes.
What goes where
| Value | Comes from | Goes into your app as |
|---|---|---|
| Organization ID | The dialog shown when you create the auth client, or Settings > General | NEXT_PUBLIC_BUILDBASE_ORG_ID |
| Client ID | The same dialog, or the client's row on the Settings tab of Authentication | NEXT_PUBLIC_BUILDBASE_CLIENT_ID |
| Client secret | The same dialog, and only there | BUILDBASE_CLIENT_SECRET |
Your app's address, http://localhost:3000 to start | You | The client's Redirect URLs in the console |
1. Sign in to the console
Go to console.buildbase.app and press Sign in with Google. The same button creates your account the first time.
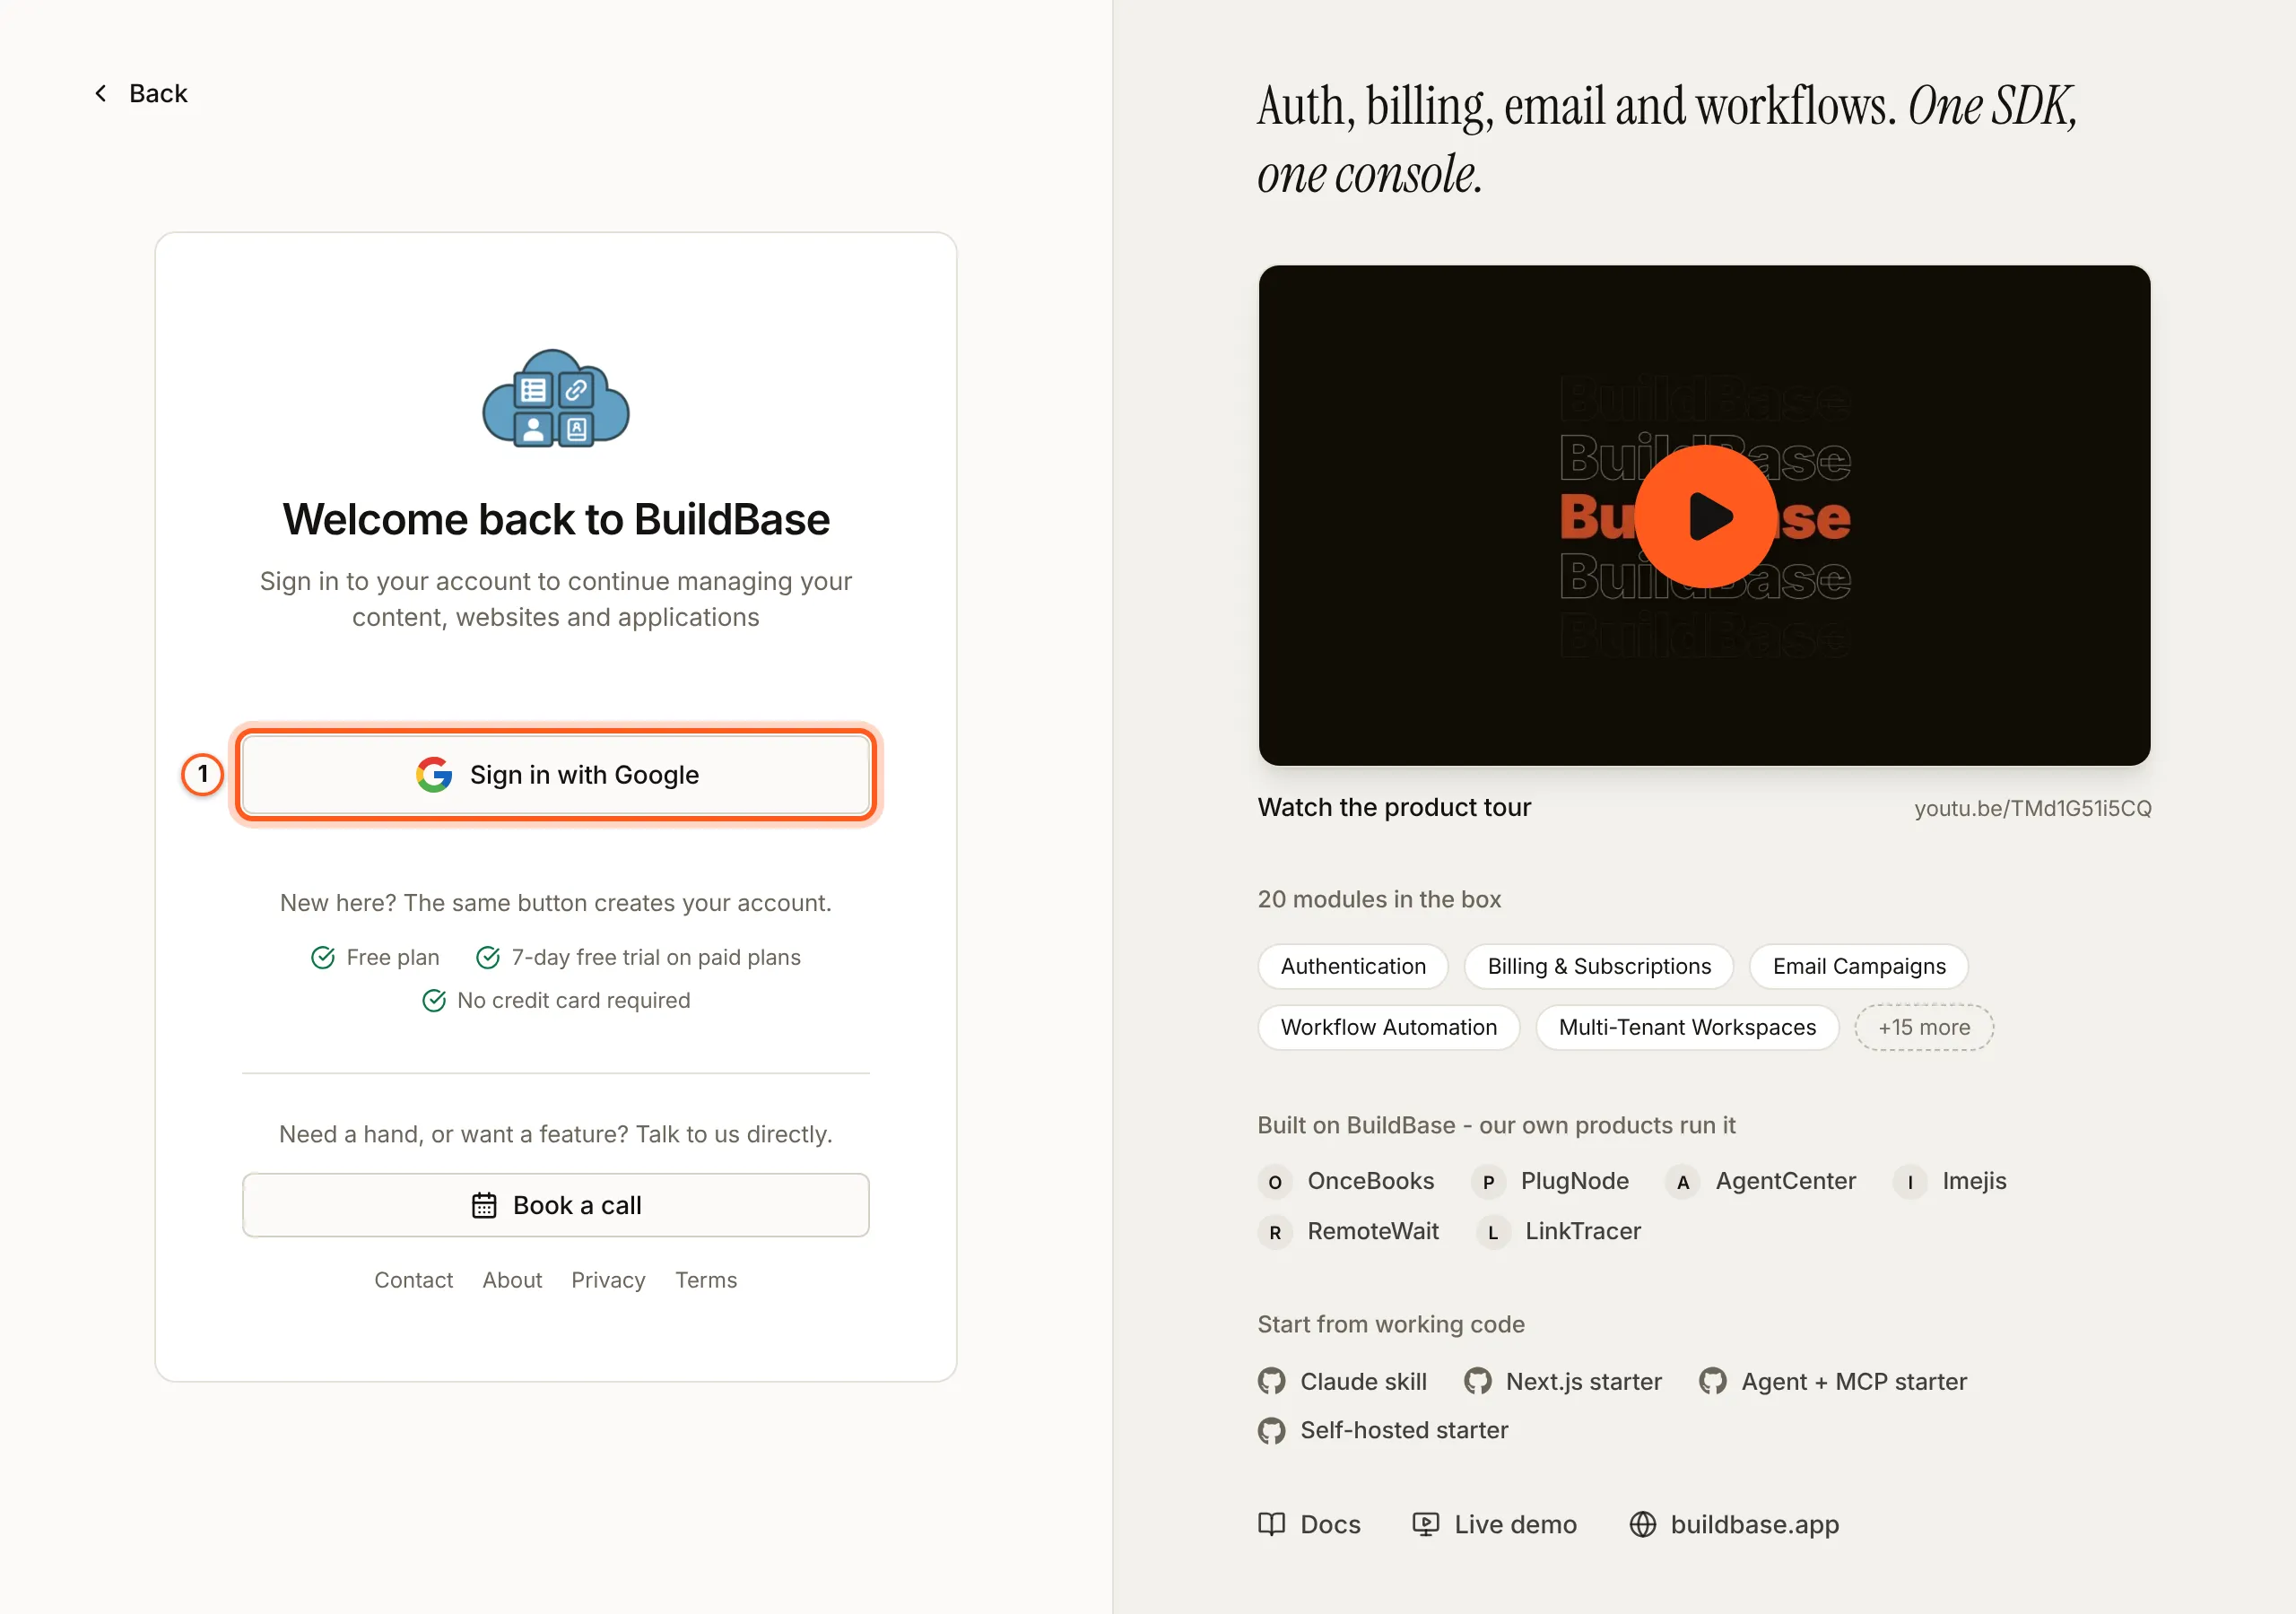
2. Make your organization
An organization holds everything you set up: your users, sign-in, email, billing and content. With none yet, the console shows No organizations yet. Press Create organization.
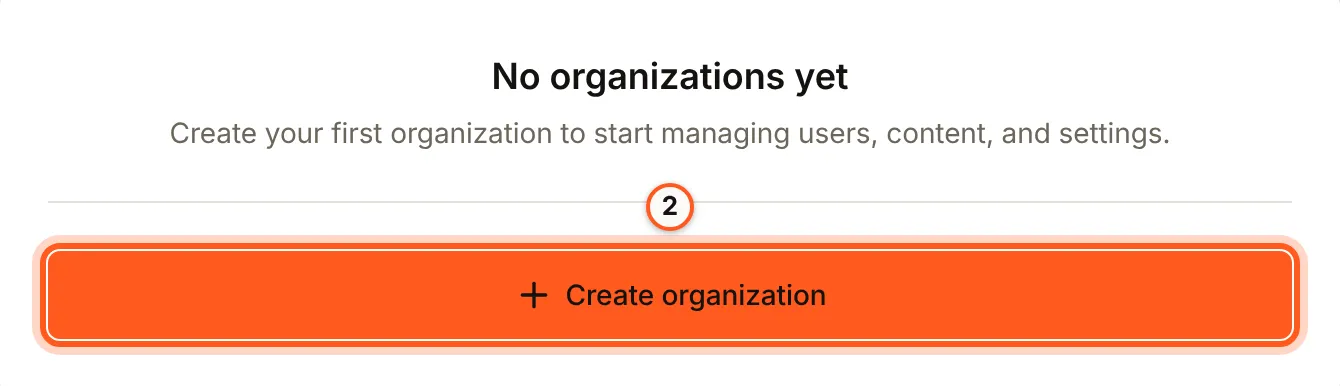
3. Name it
In Organization details, type your company or product's name in Organization name and press Create organization. The name shows across the console, in your emails and at checkout, and you can change it later under Settings > General.
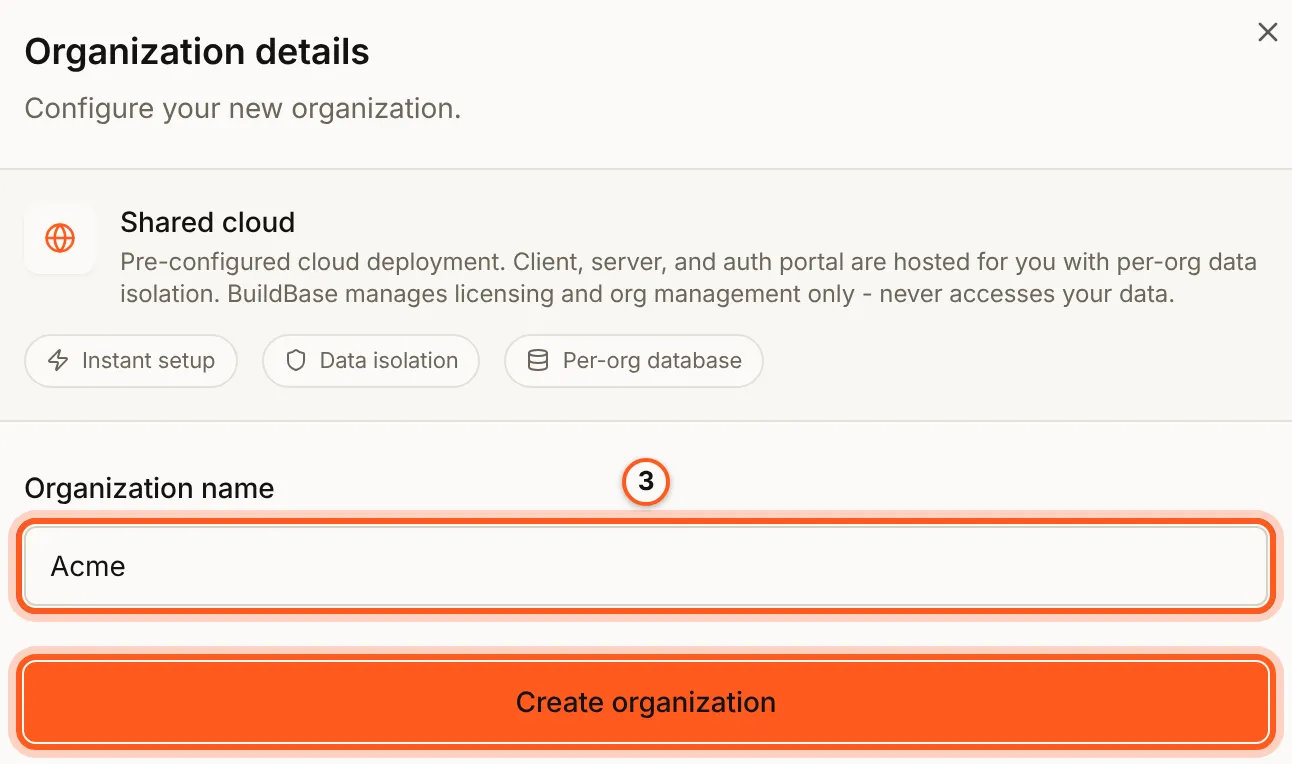
Two more choices appear on some accounts only:
- Shared cloud or Self-hosted, before the details, when your account may run BuildBase on its own servers. Pick Shared cloud to follow this guide.
- Data region, under the name, when more than one region is offered. It cannot be changed after the organization is made.
4. Pick a plan
The console then shows Start free. Press Choose a plan and pick one: the Free plan costs nothing, and every paid plan begins with a free trial, so you pay nothing today.
5. Find Get started
The console opens on Get started, under Setup at the top of the left rail. It lists every step of setting up your platform in order, in phases, and ticks each one off by checking your live data. You cannot tick a step by hand, so a ticked step really is done. Come back here whenever you are unsure what to do next.
Open Get started in the console (opens the console in a new tab)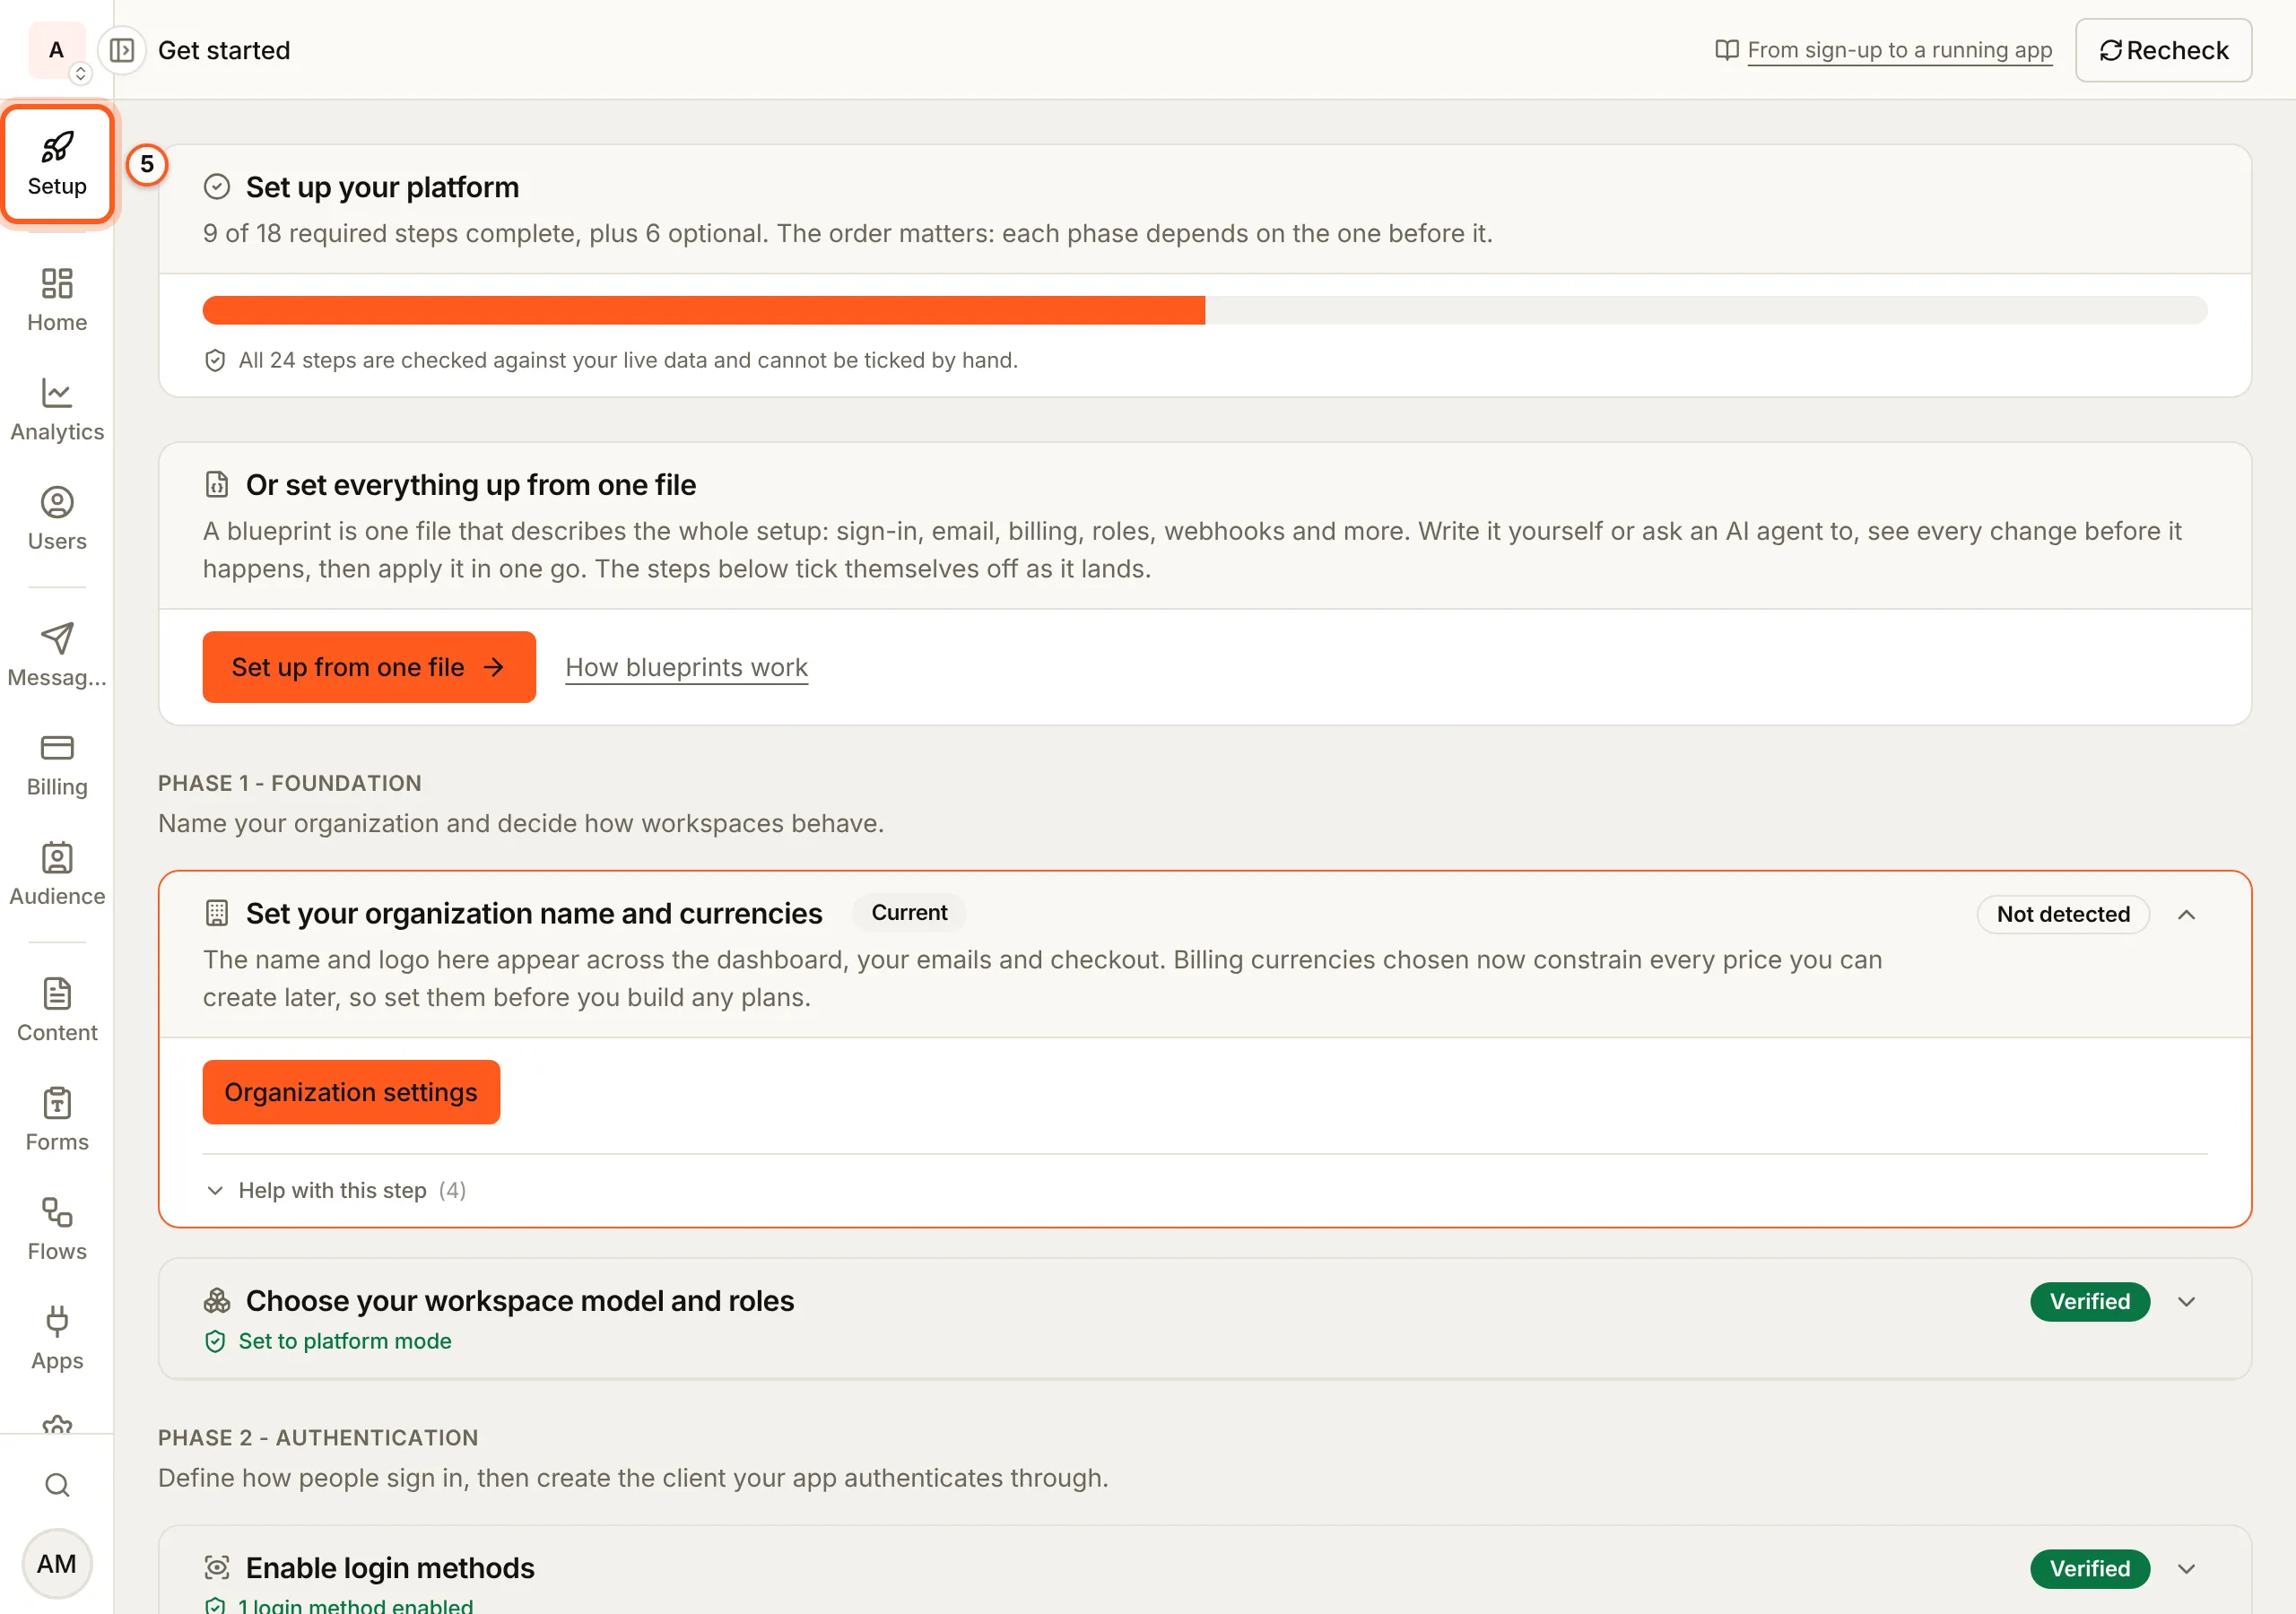
6. Connect a sender
Sign-in codes, magic links, password resets and invitations are all email, and BuildBase has no sender of its own for them. Until you connect one, a person who asks for a code never gets it, and every console page says No email sender is connected. In the left rail choose Messaging, then Sender accounts, and press Add new sender. SMTP, Gmail, Mailgun and Amazon SES all work; Sending domains has the details of each.
Open Sender accounts in the console
(opens the console in a new tab)
7. Add a way to sign in
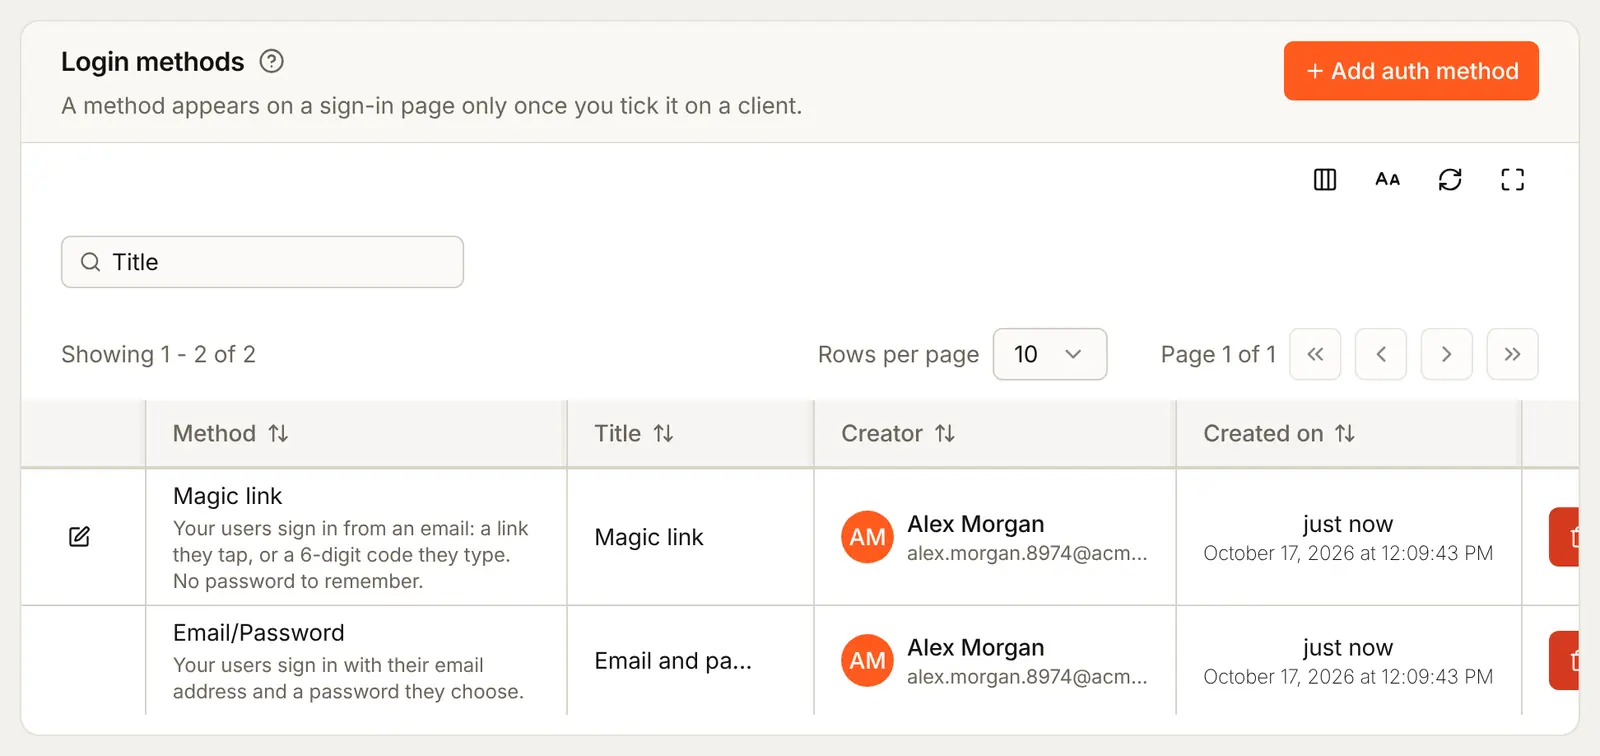
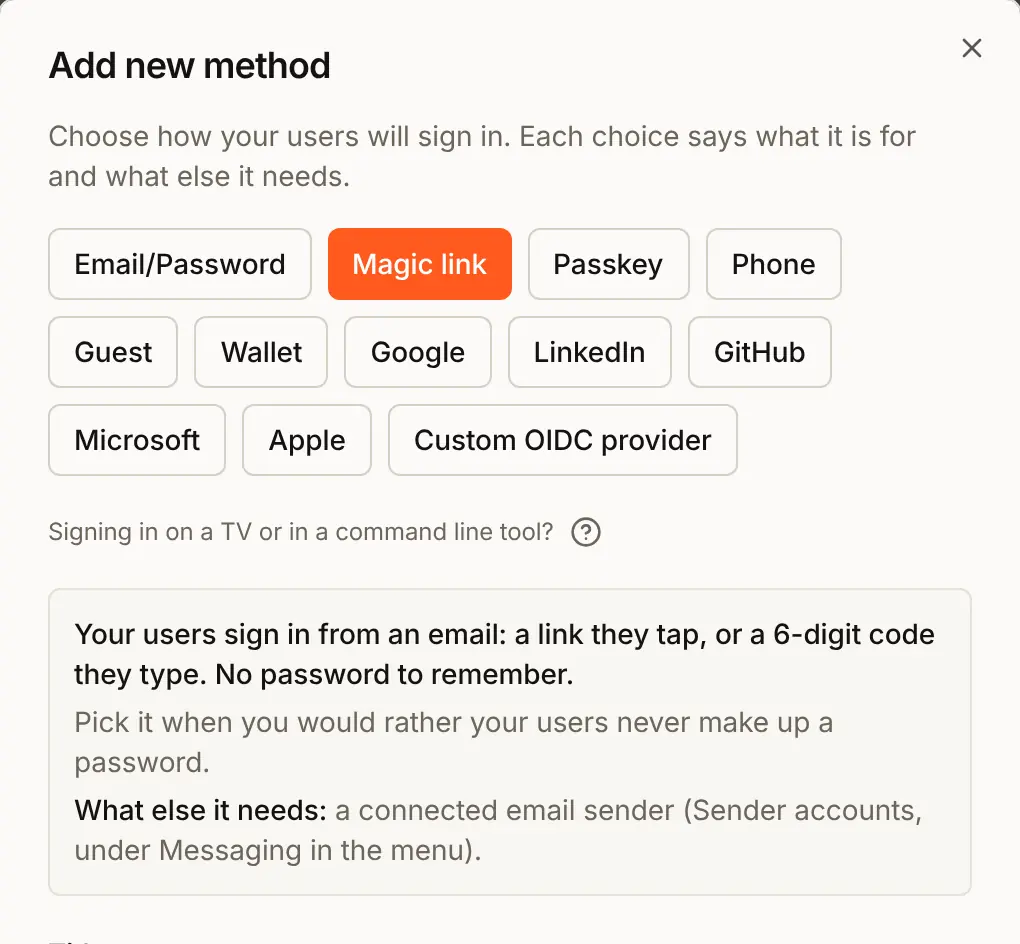
In the left rail choose Users, then Authentication under Access, and open the Methods tab. Press Add auth method and pick Email/Password or Magic link to start. You can add Google, passkeys and the rest later: each has its own guide.
8. Create the auth client
The auth client is your app, as BuildBase knows it. Open the Settings tab of Authentication and press Create auth client. Give it a Title you will recognise, such as your app's name, keep Your app's sign-in chosen, and press Create.
Open Authentication in the console
(opens the console in a new tab)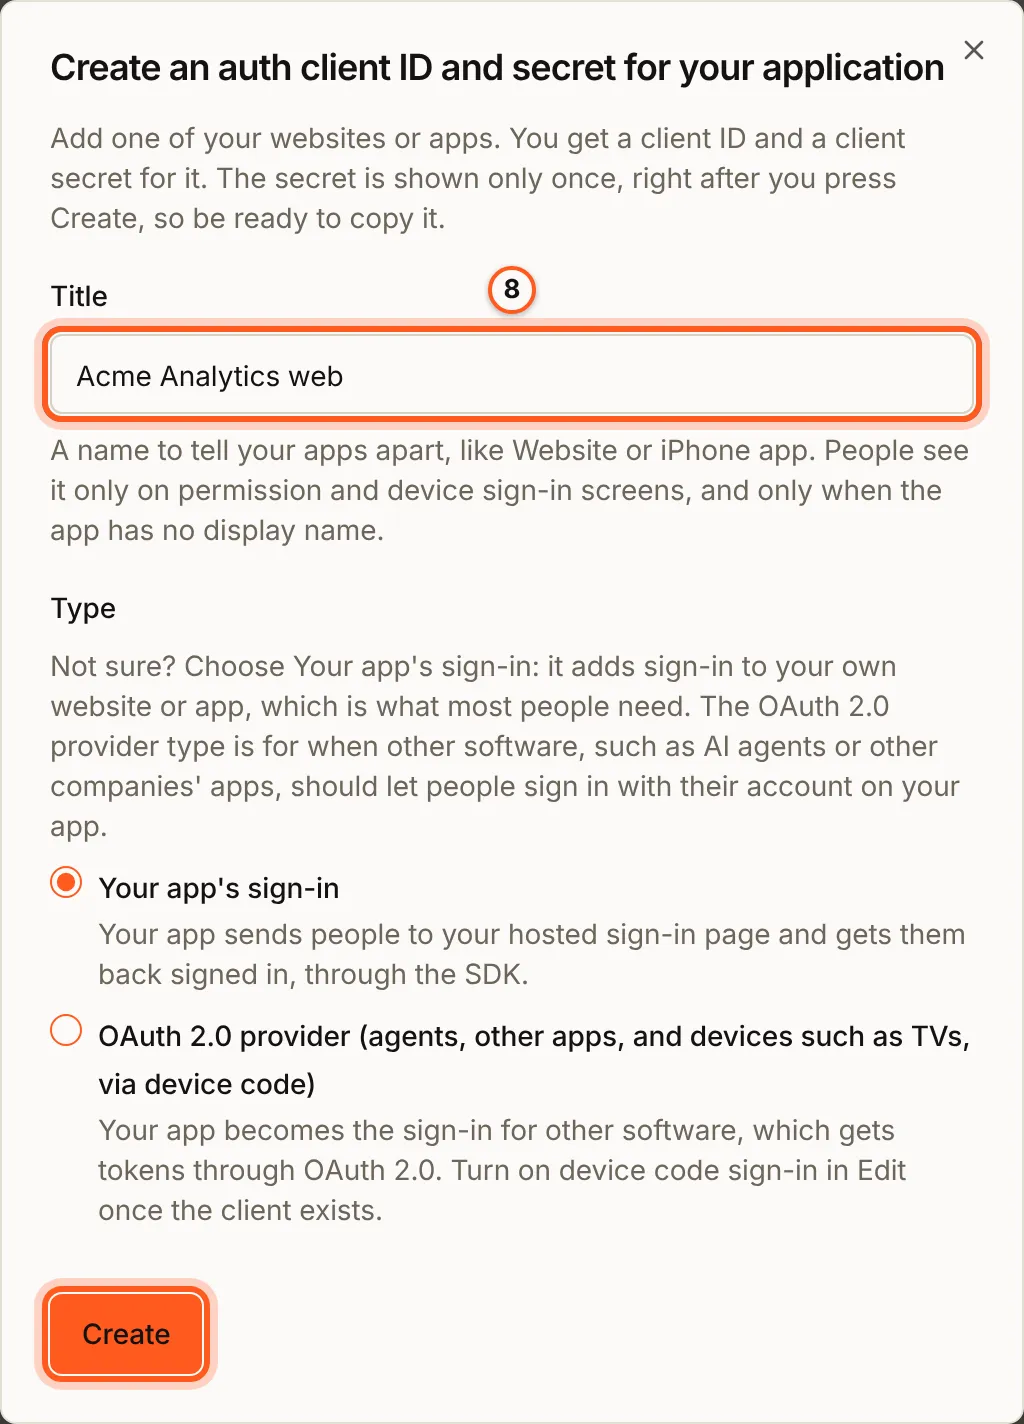
9. Copy the three values
Client created - copy the secret now shows your Organization ID, Client ID and Client secret. This is the only time the secret is shown. Press Copy all three and paste them into your app's .env.local, then press I've copied the secret.
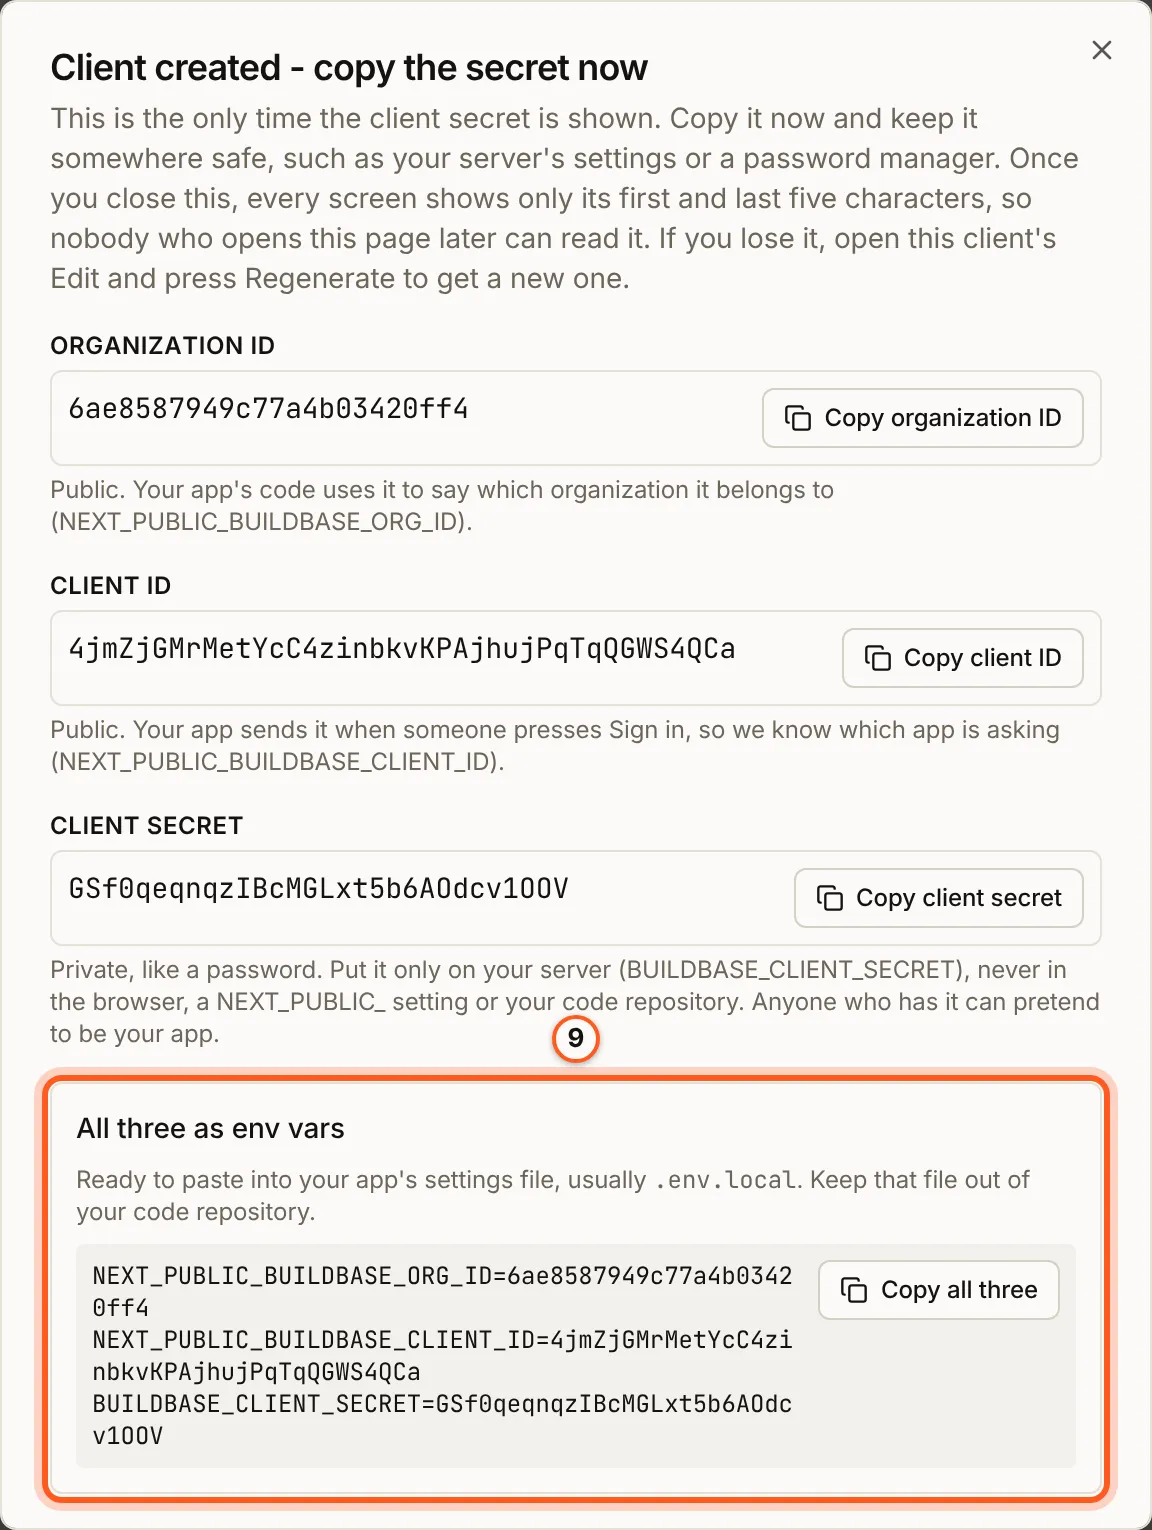
After you close it, every screen shows only the secret's first and last five characters. If you lose it, open the client's Edit and press Regenerate: the old secret stops working at once.
10. Tell the client where your app is
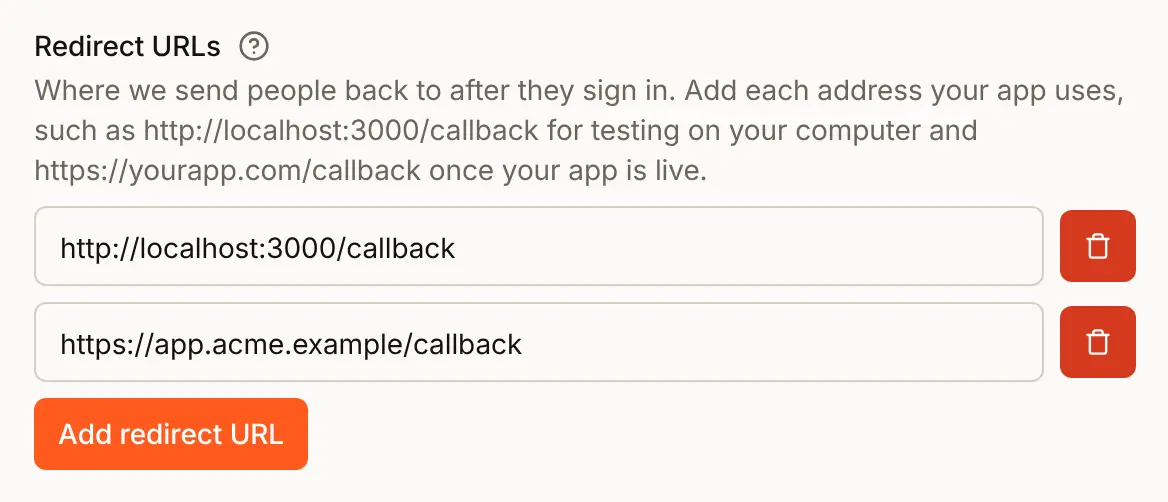
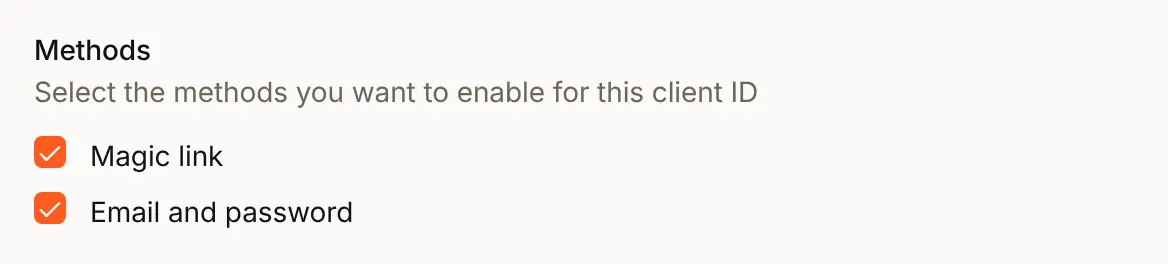
On the same Settings tab, press Edit on your client. Under Redirect URLs press Add redirect URL and enter http://localhost:3000, your app on your own computer. Under the methods, tick the ones you added in step 7. Press Update.
11. Put the SDK in your app
In your app's folder:
npm install @buildbase/sdk
npx buildbase init --org-id <your organization ID>
init writes the provider, the sign-in routes and .env.local for a Next.js, Vite or Express app, and never overwrites a file you have. It leaves the secret empty: fill in the values you copied in step 9.
# .env.local
NEXT_PUBLIC_BUILDBASE_ORG_ID=<organization ID>
NEXT_PUBLIC_BUILDBASE_CLIENT_ID=<client ID>
BUILDBASE_CLIENT_SECRET=<client secret>
Installation and the Quickstart show every file it writes, and how to write them yourself.
12. Sign in through your app
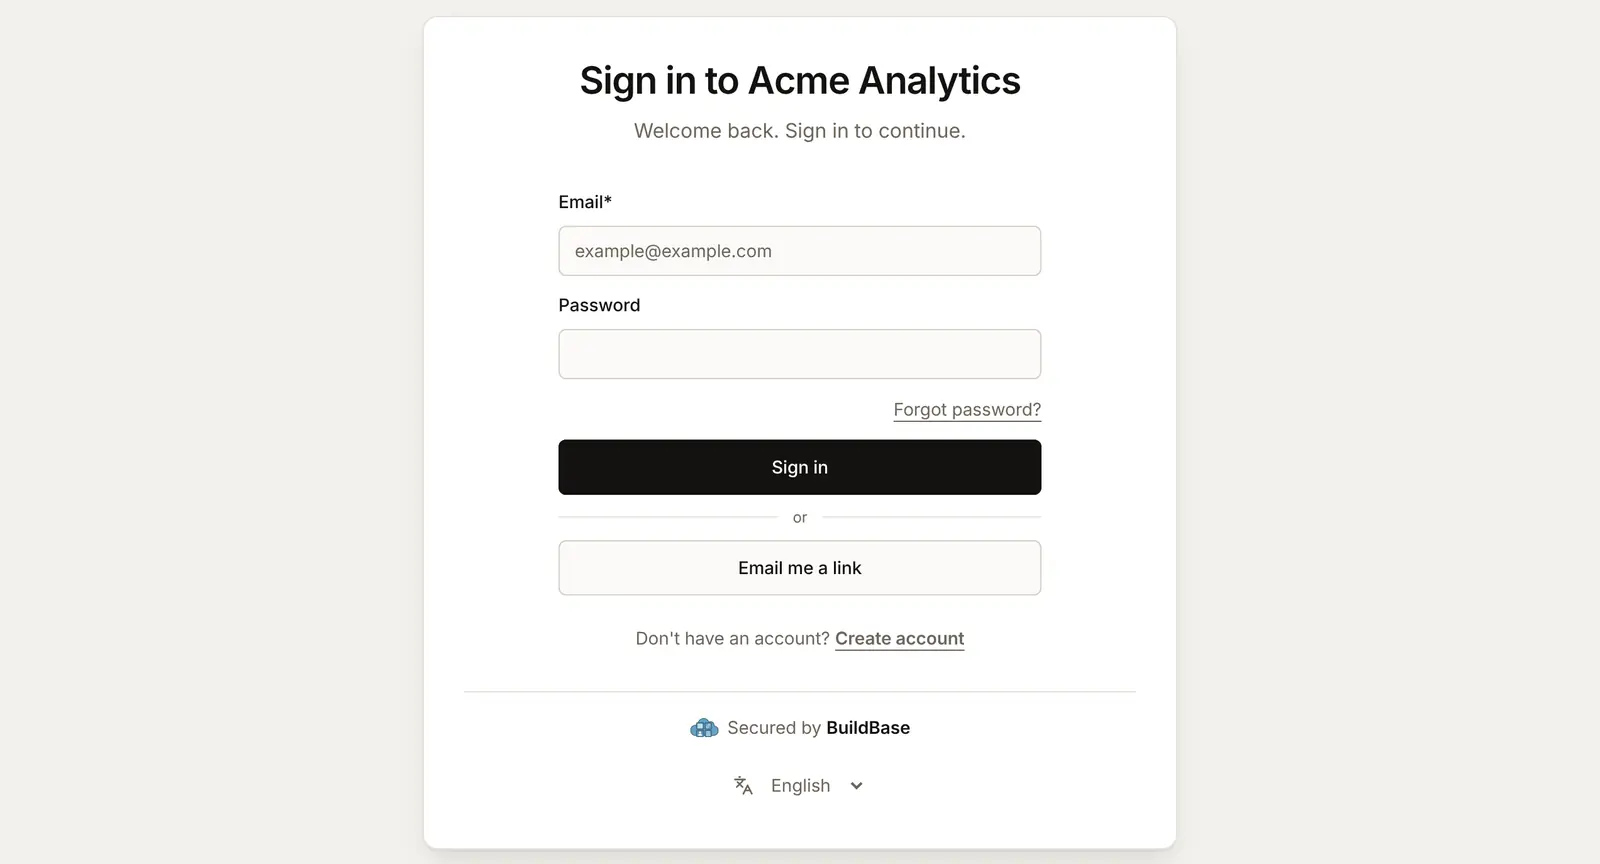
Start your app (npm run dev) and press its Sign in. Your app sends you to your hosted sign-in page, with the methods you ticked. Sign in, or create an account with Create account, and you come back to your app signed in.
13. See your first workspace
A workspace is what a team shares in your app: its members, its plan and its settings. BuildBase makes the first one for each person who signs in, unless you turn that off in the workspace settings, and the SDK's workspace switcher in your app shows it. See Workspaces.
14. See it in the console
Back in the console, Users lists the person who just signed in. On Get started, press Recheck at the top: Install the SDK in your app ticks once someone has signed in through your app, and Add your environment values and test login once a workspace exists.

Check it works
- Your app shows the signed-in person, and the workspace switcher shows their workspace.
- Users in the console lists that person, with the method they used.
- Get started shows both steps of Connect your app done after Recheck.
Things to watch out for
- The client secret is shown once. Copy it before you close the dialog. Regenerate makes a new one and stops the old one at once.
- A redirect URL must match exactly: scheme, host, port and path. A
localhostaddress matches any port, sohttp://localhost:3000also covers your app on port 3001. - Without a sender, nobody gets a code. Sign-in links, codes and password resets are not delivered until step 6 is done.
- A method shows on the sign-in page only once it is ticked on the client (step 10). Adding it on the Methods tab is not enough.
- Data region cannot be changed after the organization is made.
If something goes wrong
| What you see | What it means |
|---|---|
| "Invalid redirect URL" on the hosted sign-in page | The address your app sent is not in the client's Redirect URLs. Add it exactly (step 10) |
| The provider throws about the organization ID | NEXT_PUBLIC_BUILDBASE_ORG_ID is not the 24-character id. Copy it again from Settings > General |
| Your app renders without sign-in | NEXT_PUBLIC_BUILDBASE_CLIENT_ID is empty: until it is set, the generated provider renders your app without BuildBase |
| "Unpaid organization limit reached" when making an organization | You already have the unpaid organizations your account allows. Choose a plan for one of them first |
| A sign-in code never arrives | No sender is connected, or it is not the System default. See step 6 |
Next steps
- Set up sign-in, step by step - every way to sign in, and the order to add them.
- Quickstart - the code behind
buildbase init, file by file. - Going to production - what to check before real people sign in.
- Development and staging environments - a separate copy of everything to build against.